Life Size Projects
Hagholyhelga Hedgewitch
Materials Used
Polystyrene Hat Stand Head
Fencing wire
Polypipe - I used 4 pre-cut 1mtrx32mm lengths for this project
5 x 90 degree Elbows
1 x 45 Degree Elbows
2 x Tee Joiner
1 Joiner (this is to join pipes together for the spine to give it more height)
1 x Cross (+) Jonier (these are not a pluming thing I get mine from Klevercages)
Plumbers Glue
Glue Gun
Paint - for head, hands & eyeballs (ping pong balls)
Ping Pong Balls
Masking Tap
Pool Noodle
Craft Foam Sheet
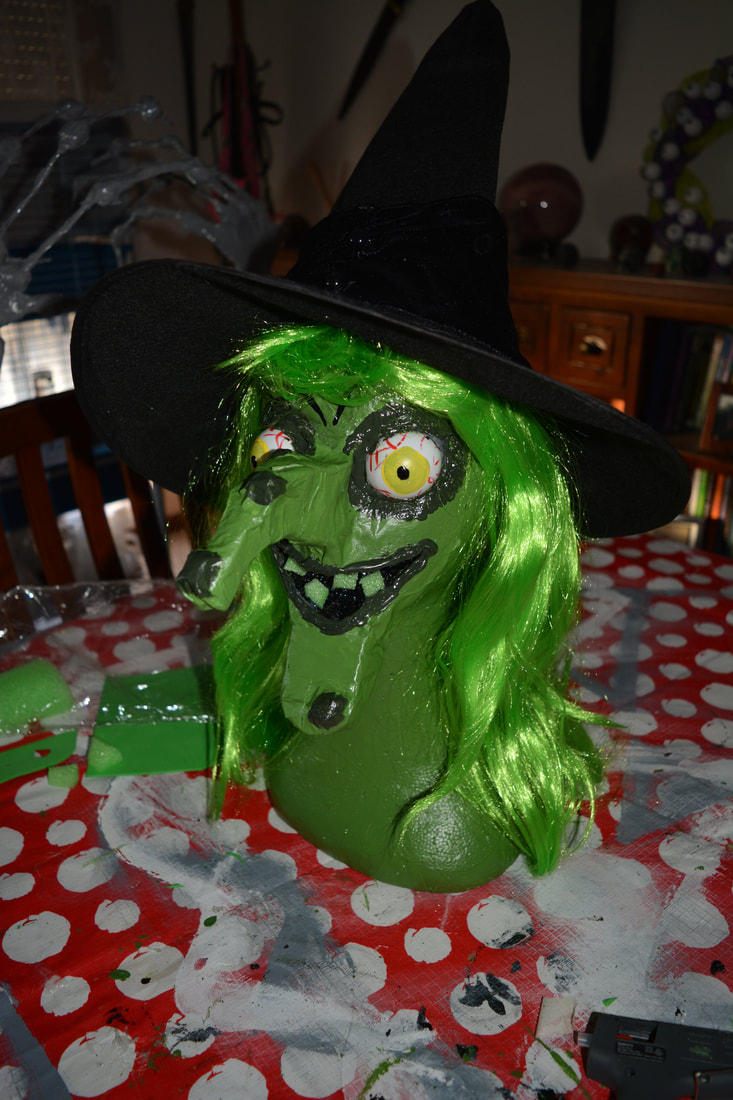
Wig
Witches Hat or Cloak
Long Lengths of Black Material
Pieces of Other Material - to drape over her shoulders and arms
Materials Used
Polystyrene Hat Stand Head
Fencing wire
Polypipe - I used 4 pre-cut 1mtrx32mm lengths for this project
5 x 90 degree Elbows
1 x 45 Degree Elbows
2 x Tee Joiner
1 Joiner (this is to join pipes together for the spine to give it more height)
1 x Cross (+) Jonier (these are not a pluming thing I get mine from Klevercages)
Plumbers Glue
Glue Gun
Paint - for head, hands & eyeballs (ping pong balls)
Ping Pong Balls
Masking Tap
Pool Noodle
Craft Foam Sheet
Wig
Witches Hat or Cloak
Long Lengths of Black Material
Pieces of Other Material - to drape over her shoulders and arms
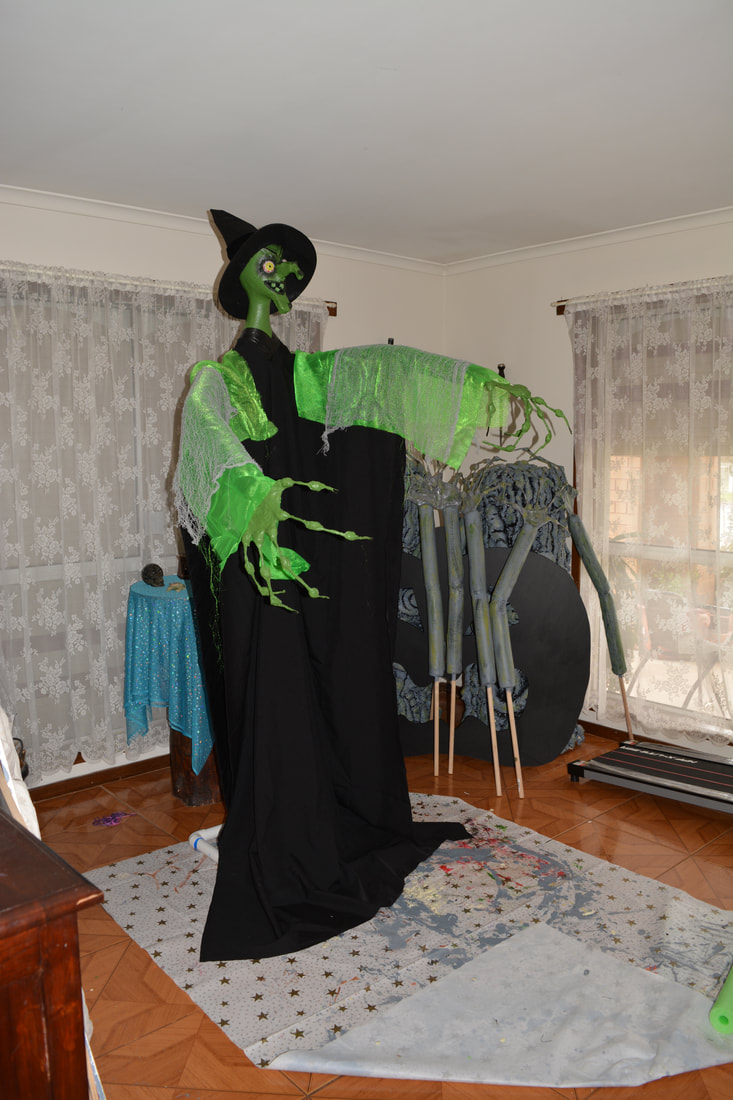
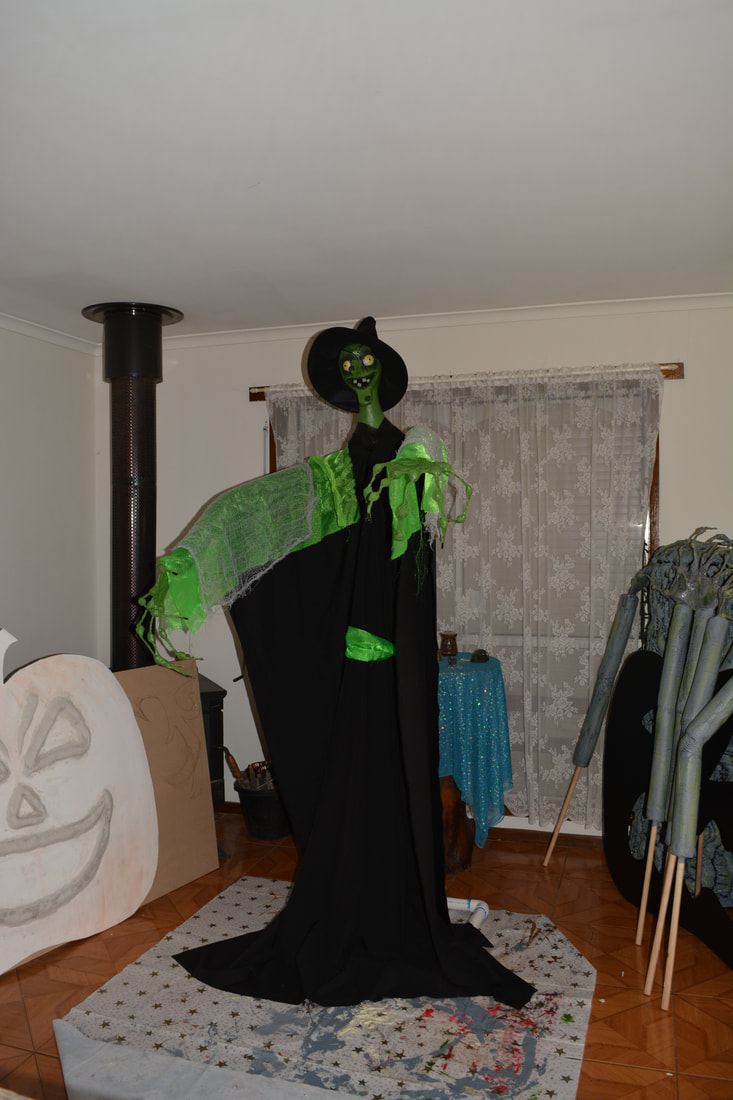
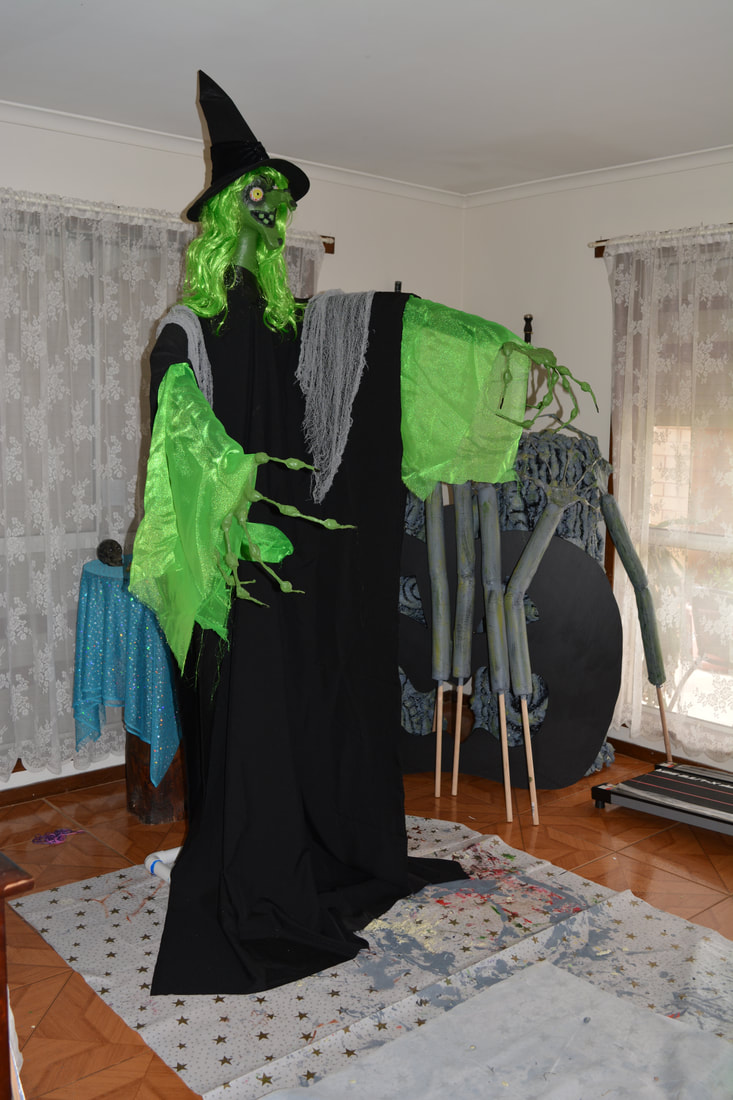
- This project turned out to be about 7 feet tall with her hat.
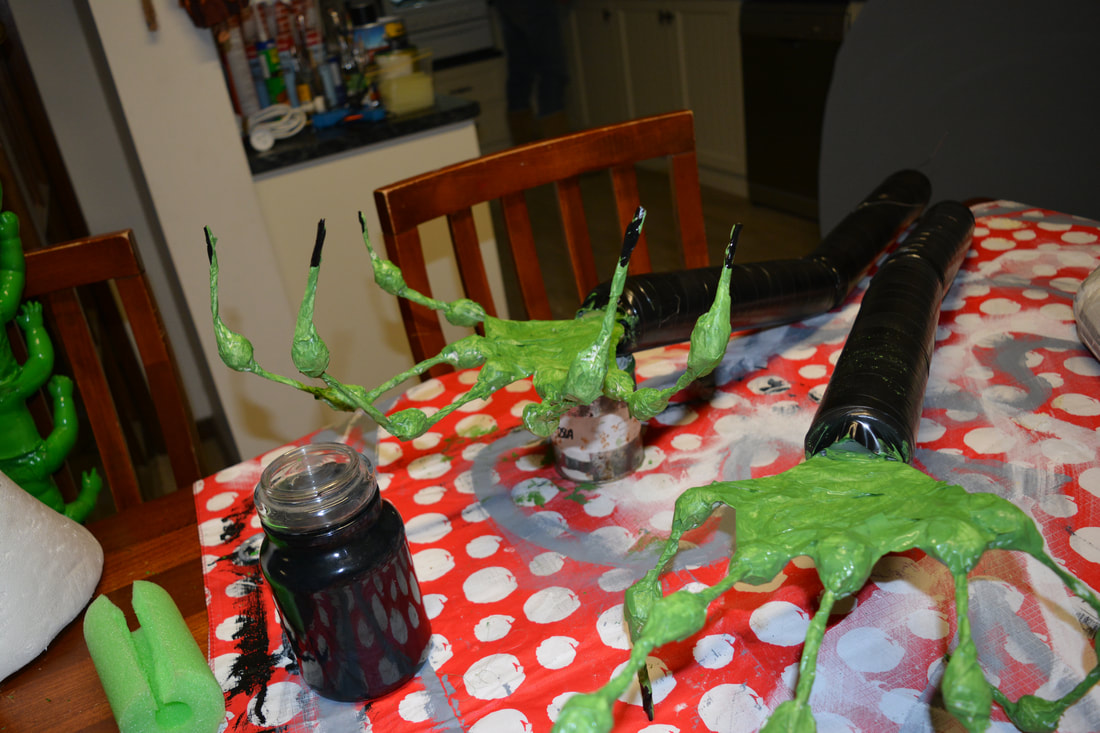
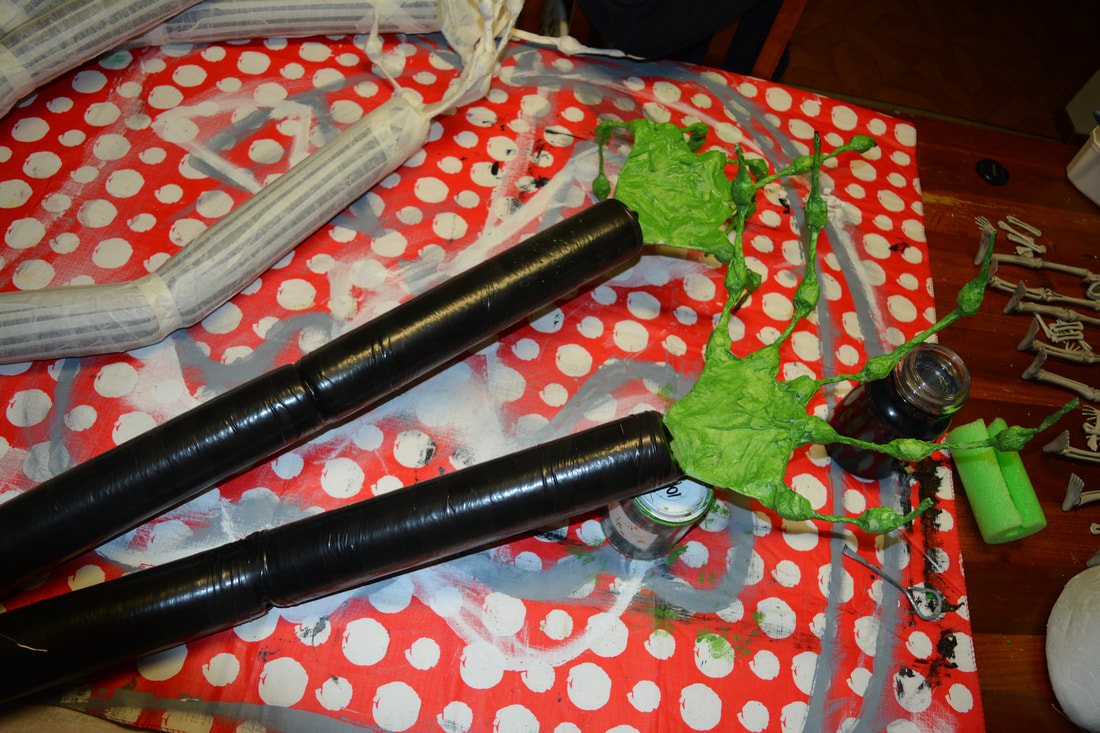
- I started with making a set of monster hands for this project and painting them green with black nails. I also covered the pool noodle arms with the black duct tape but not the masking tape.
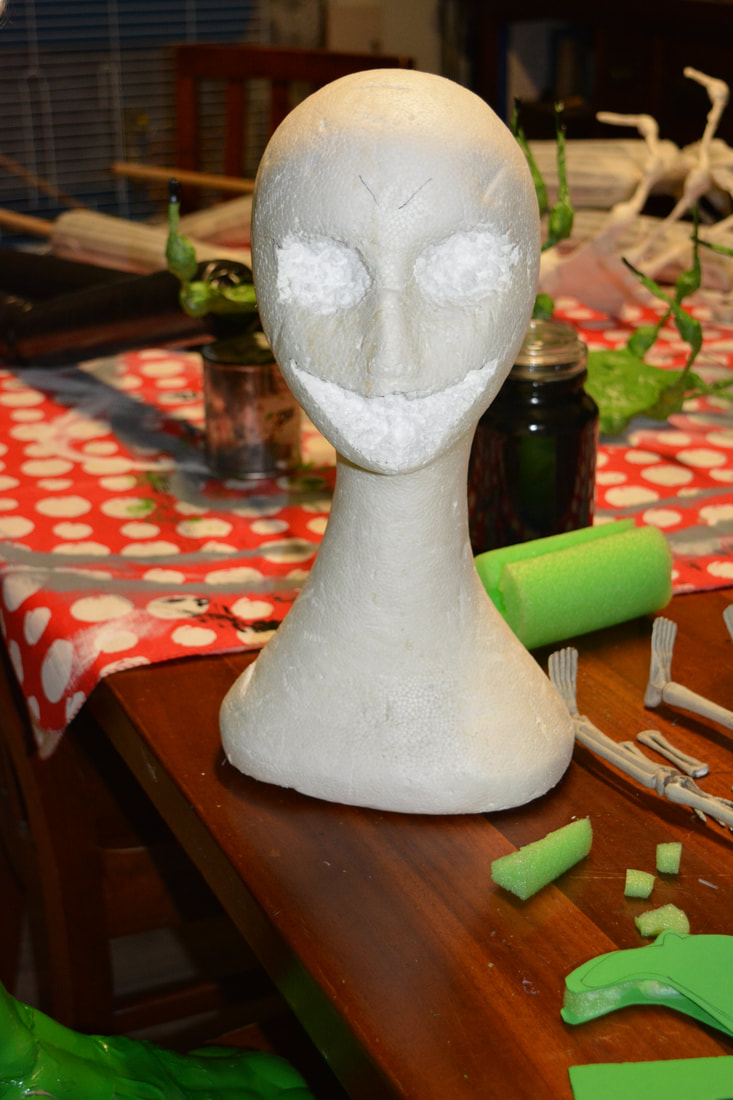
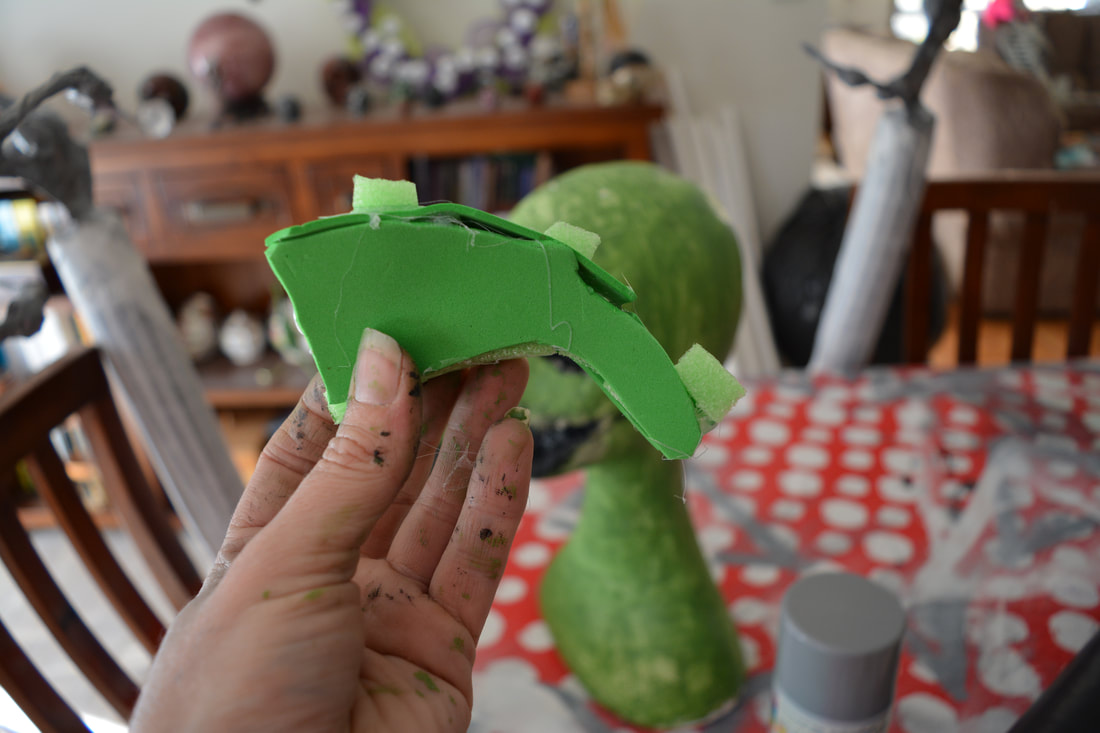
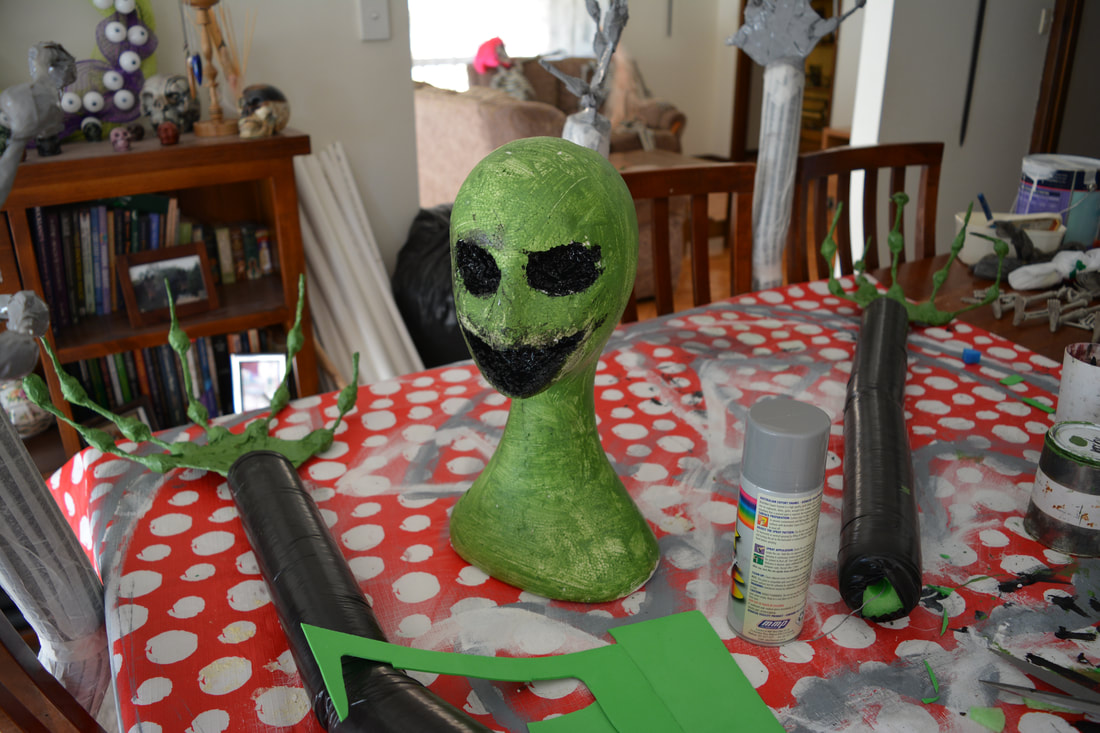
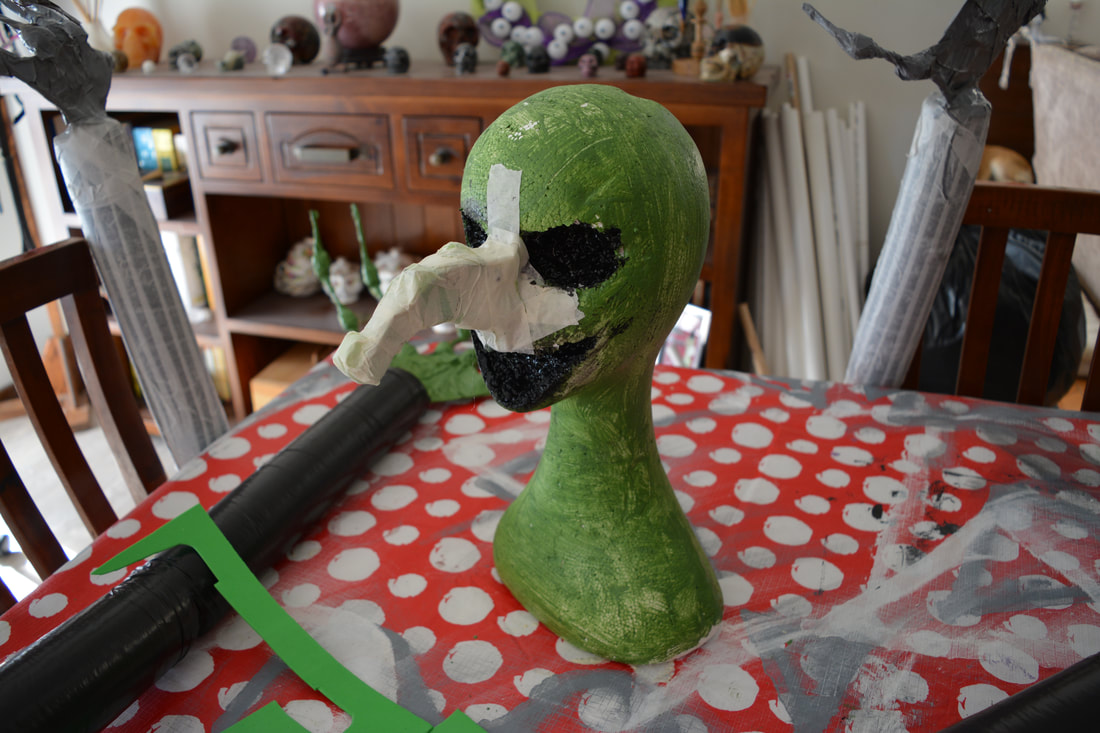
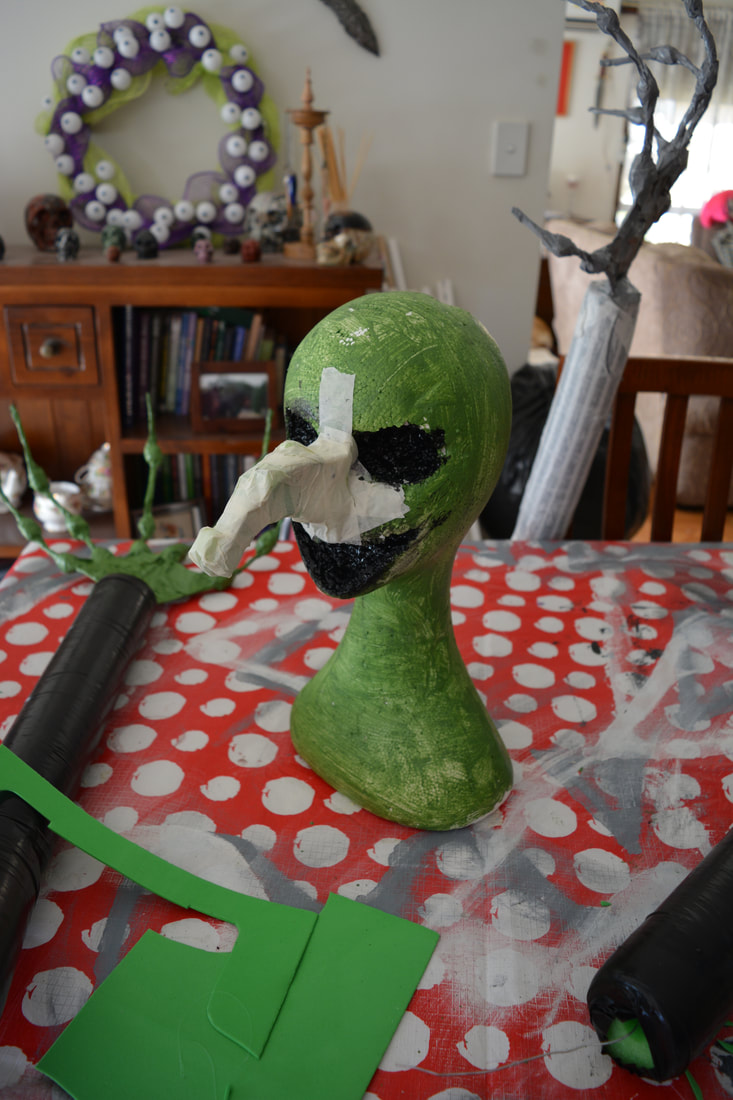
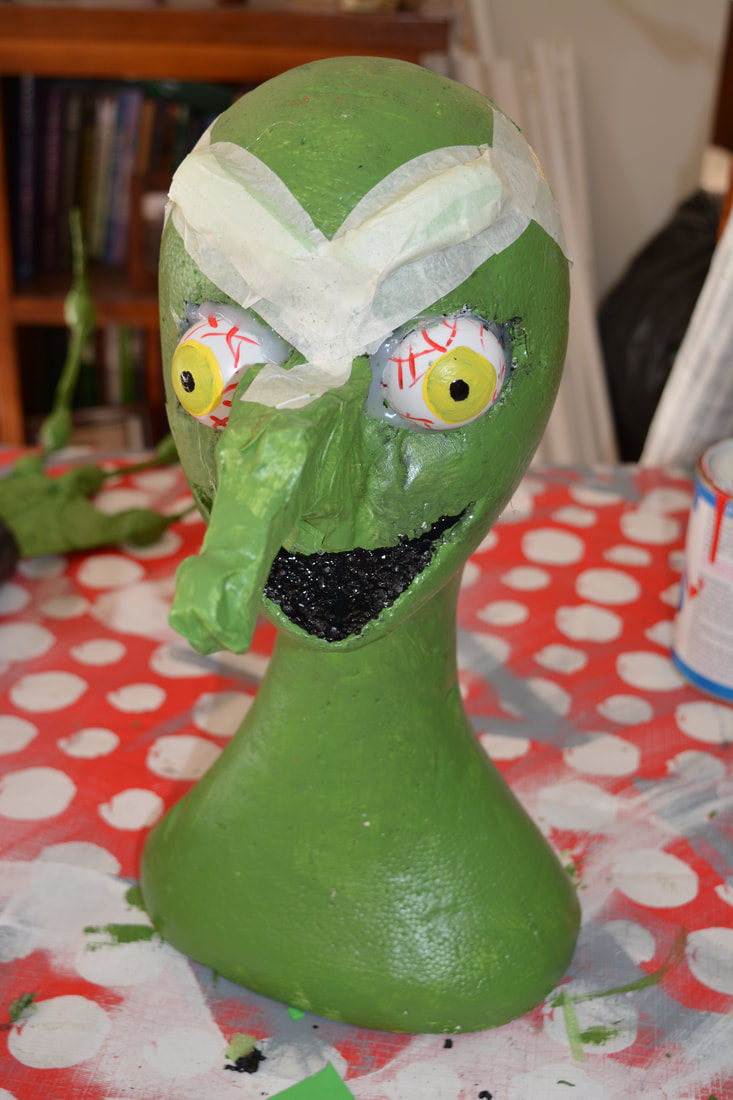
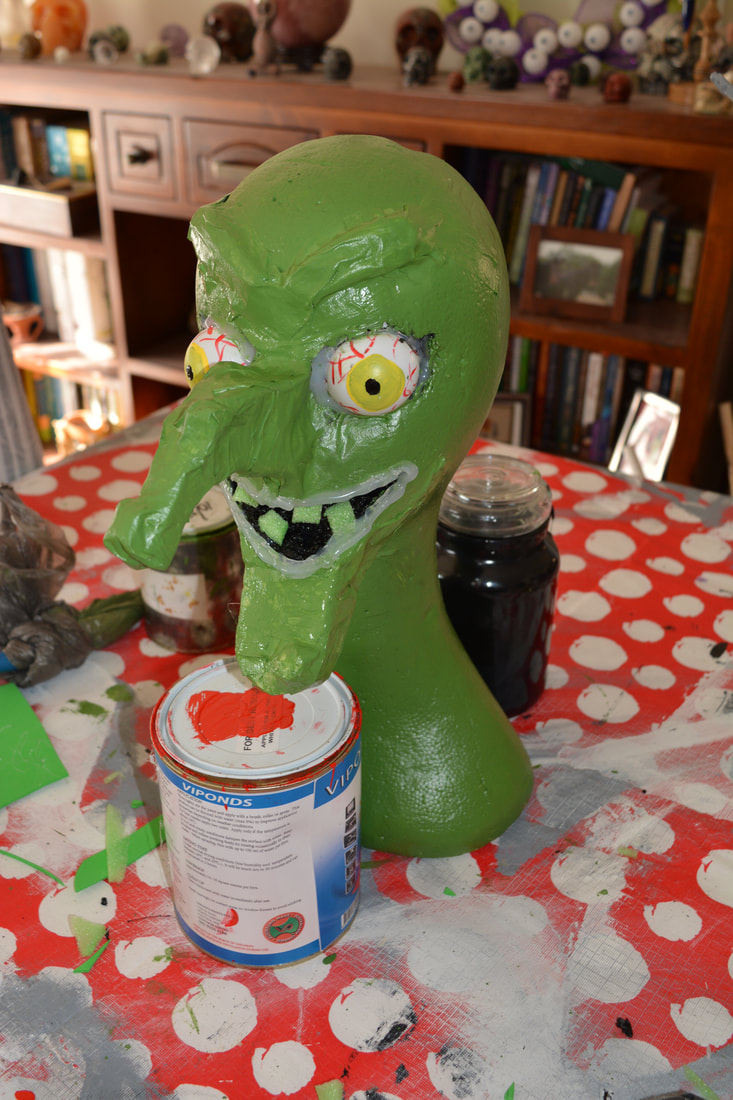
- I then moved onto the polystyrene hat head and cut a wide smile into it and then hollowed out the eyes to fit the ping pong ball eyes.
- I painted the head as I went however when I make another one I will wait until the nose, chin and eye brows are one before painting it.
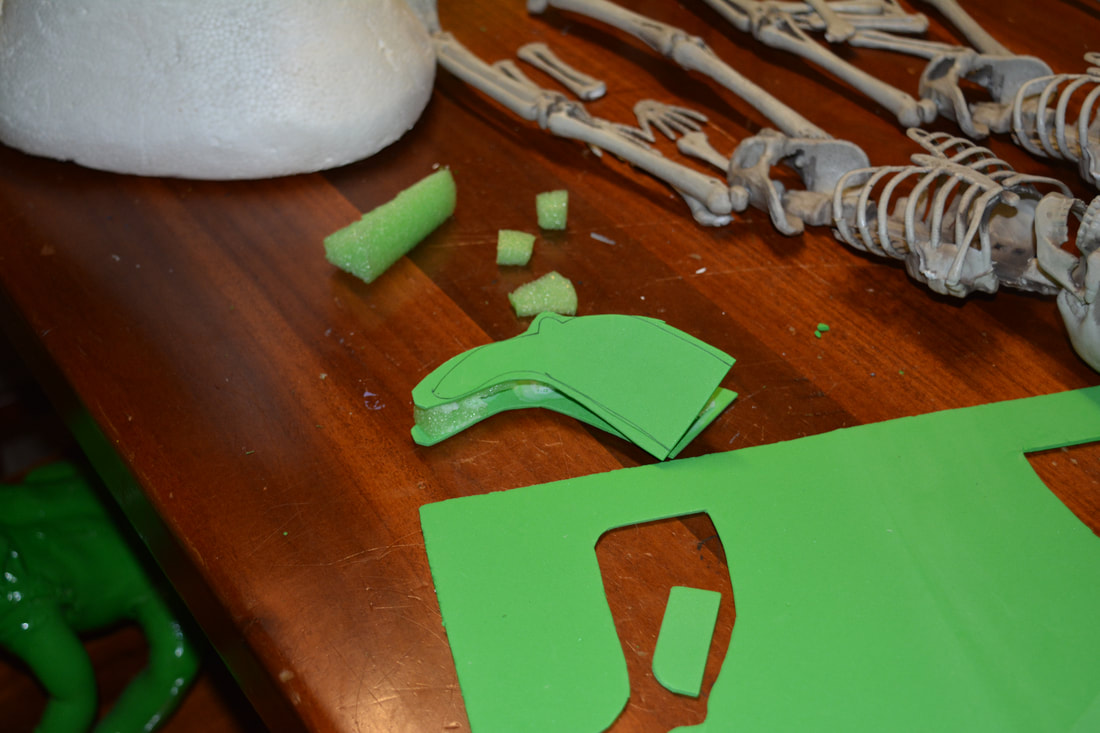
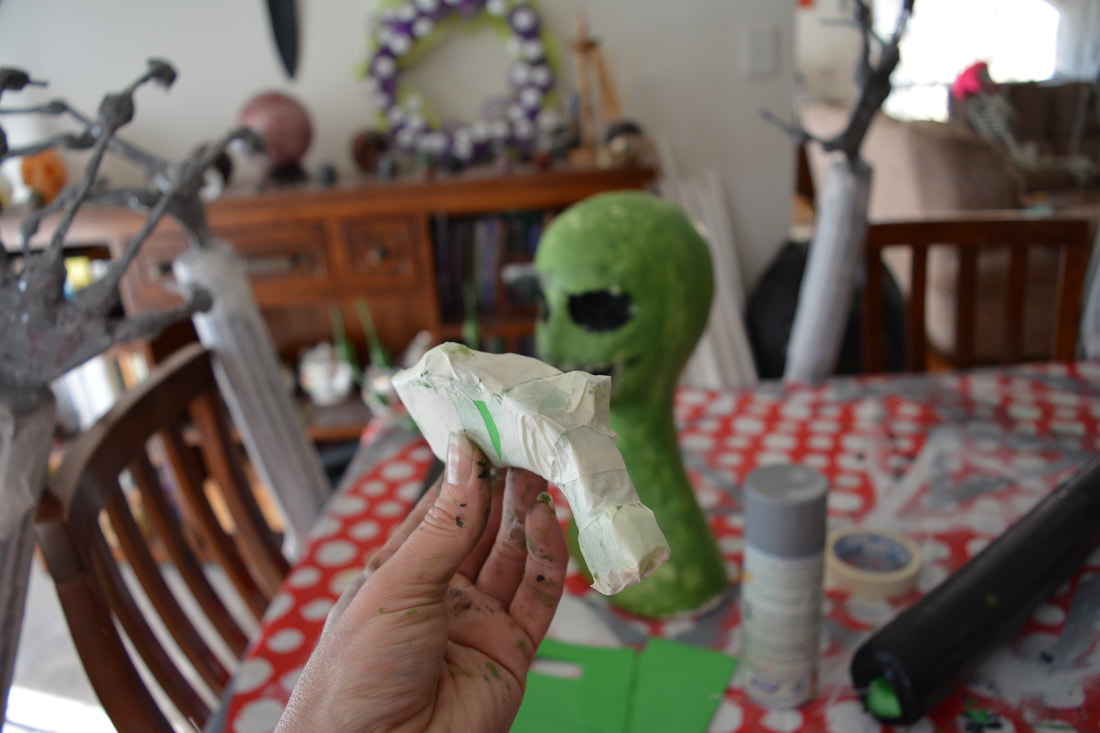
- To make the nose I used craft foam for the outside shape and pool noodle to pad the inside, holding it together with glue gun glue.
- Before wrapping it in masking tape, glue some pieces randomly for warts.
- Once that is done use making tape to attach it to the head
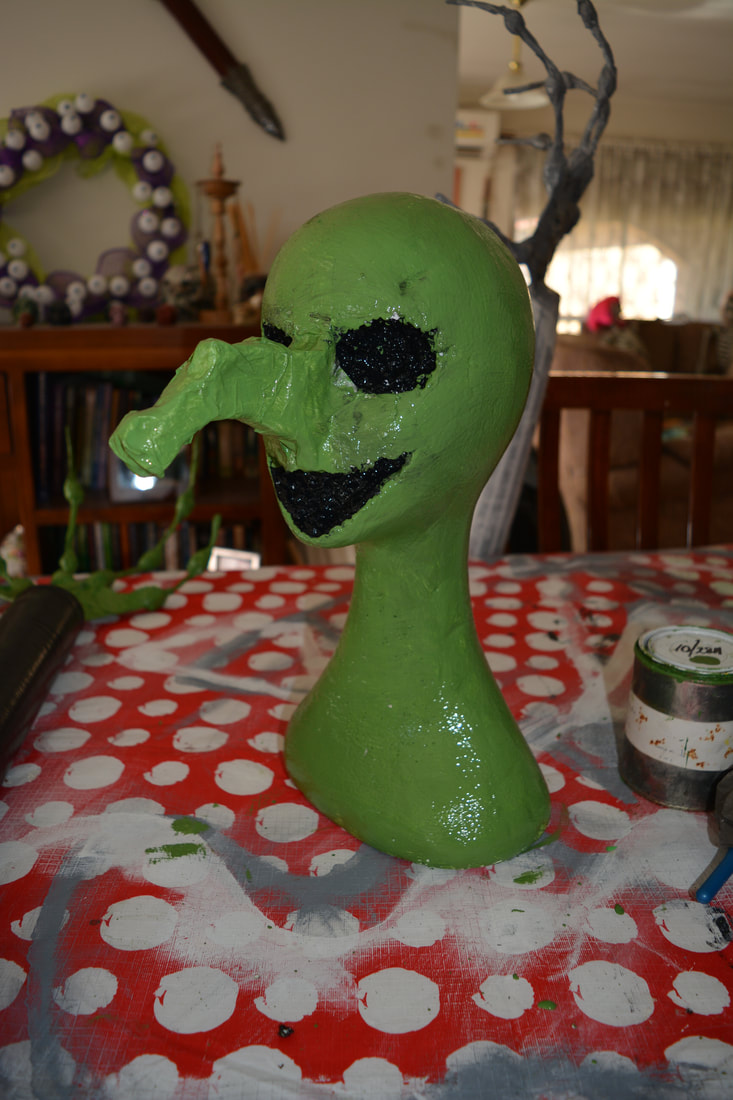
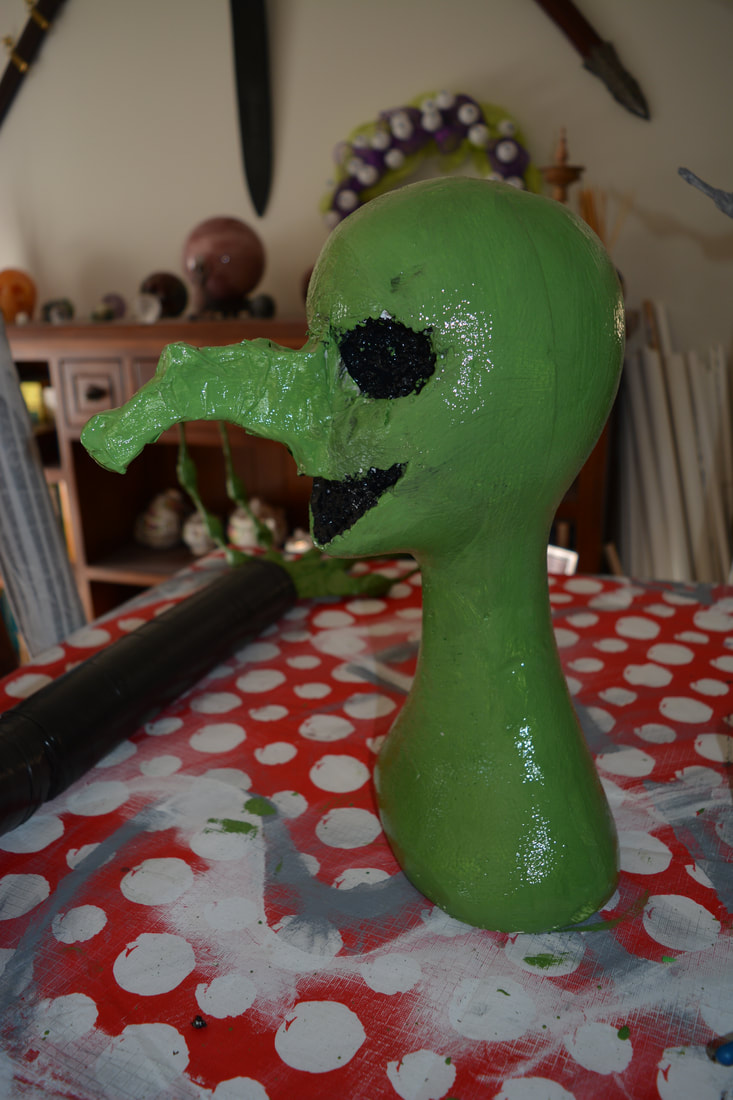
- Take two more pieces of pool noodle and shape them to eyebrows and stick down on face.
- Paint the head in green (I used two coats) and the mouth and eye sockets in black (I only used one coat).
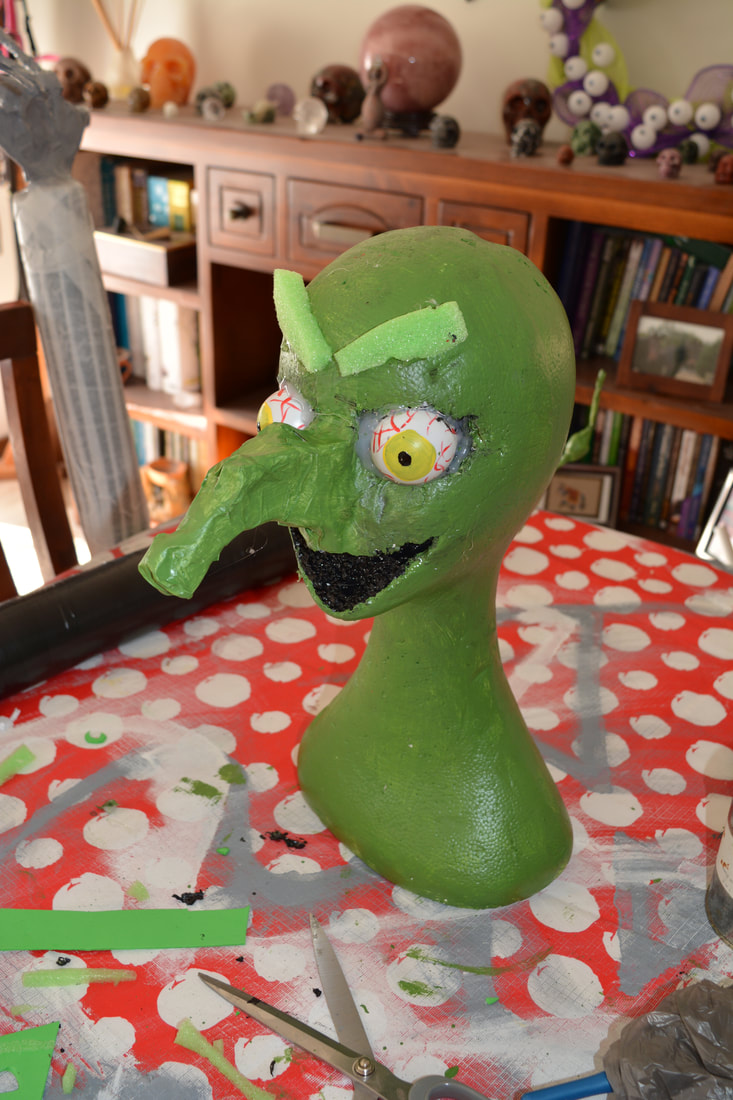
- Paint the ping pong balls as veiny eyes.
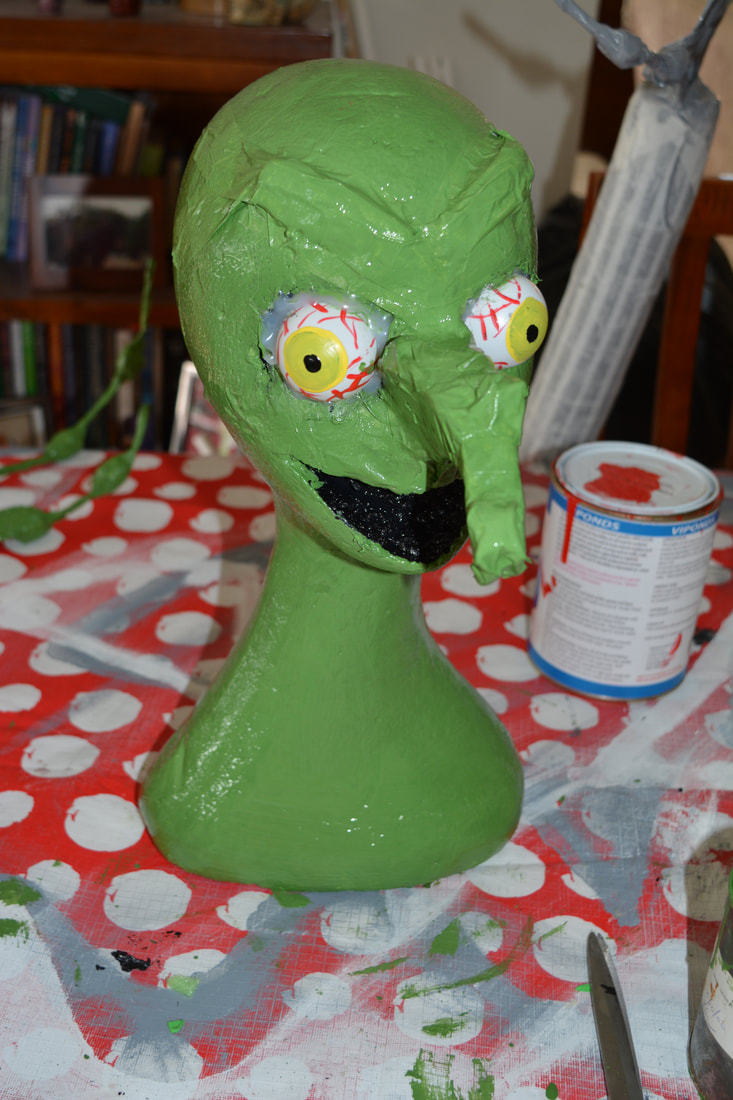
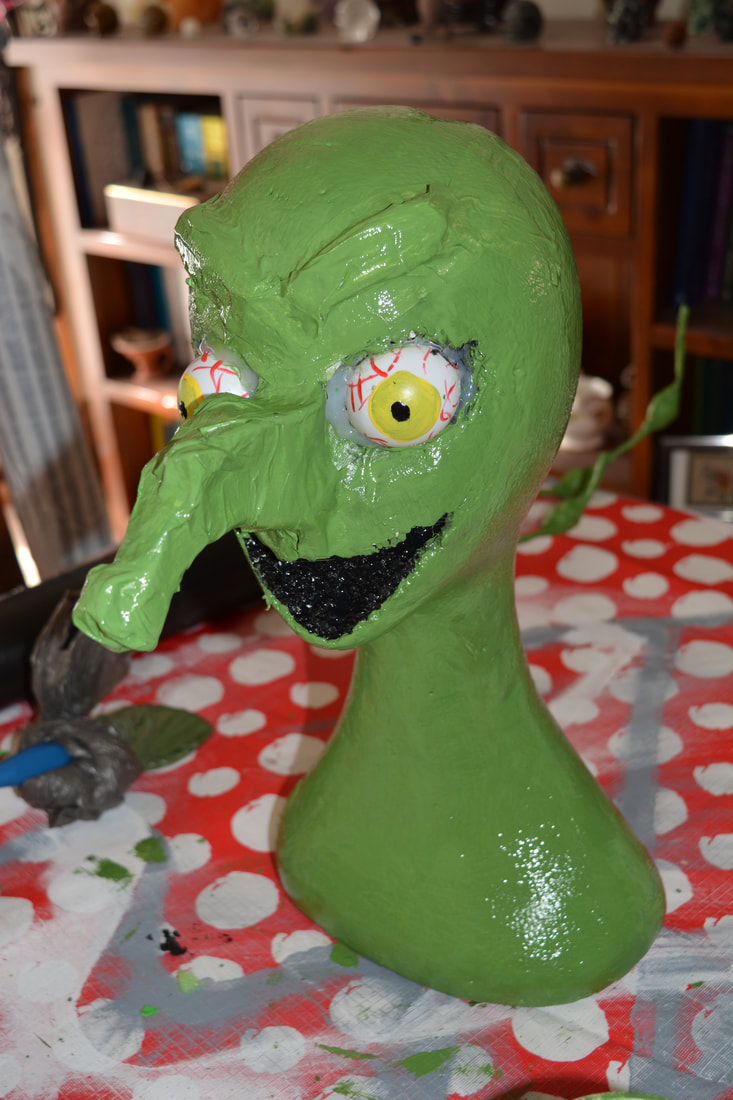
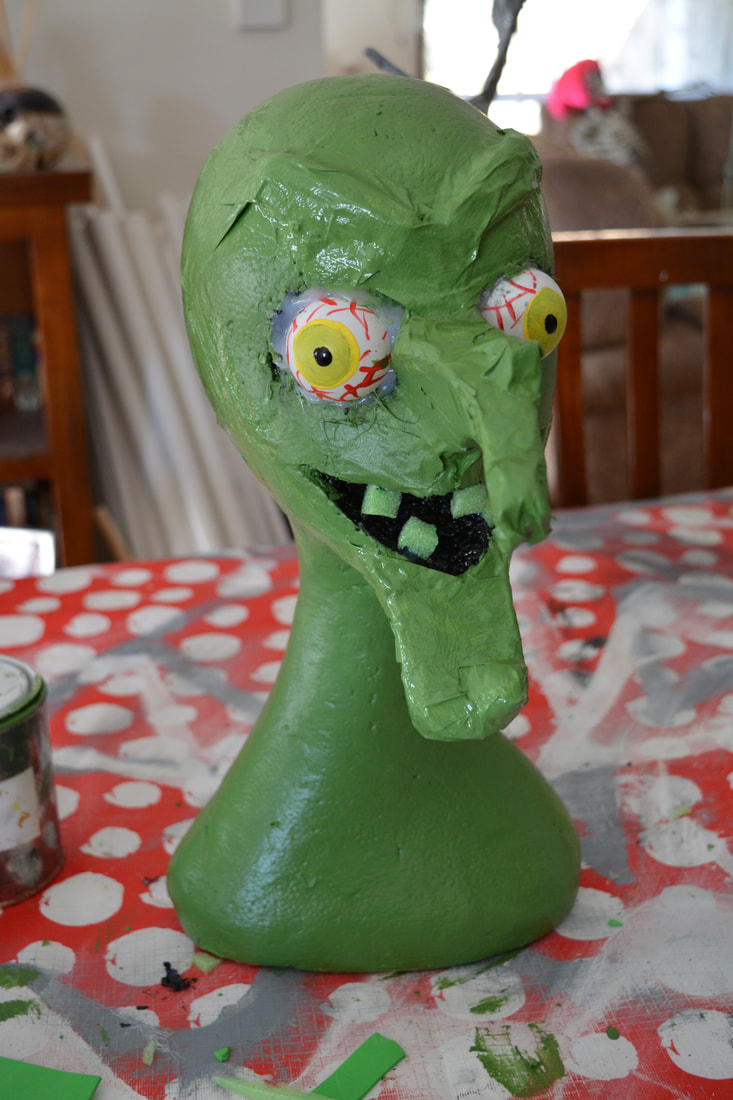
- Hot glue into the eye sockets you created into the sockets (be careful with this you don't want the glue hot enough to melt a hole in the ping pong ball).
- Hot glue a few teeth shaped pieces of pool noodle into the mouth for teeth.
- Use the hot glue to create lips (make sure the glue is not too hot you don't want it to run).
- Once these are set paint in the details around the eyes, over the lips and paint the eyebrows on.
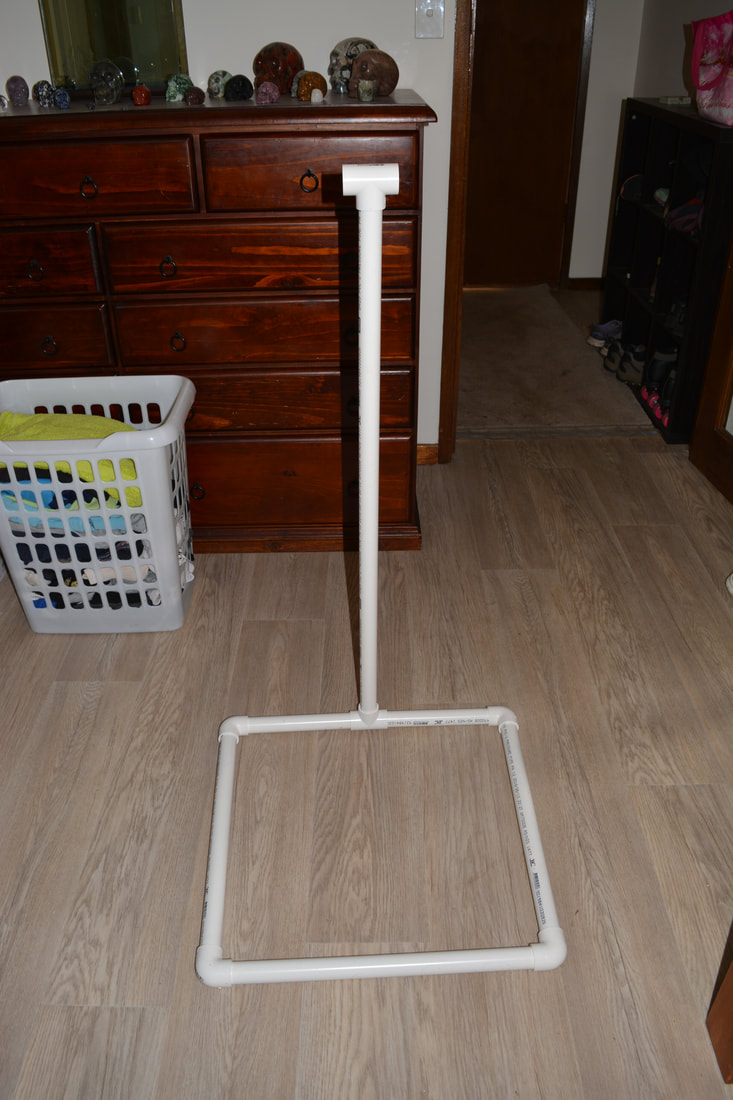
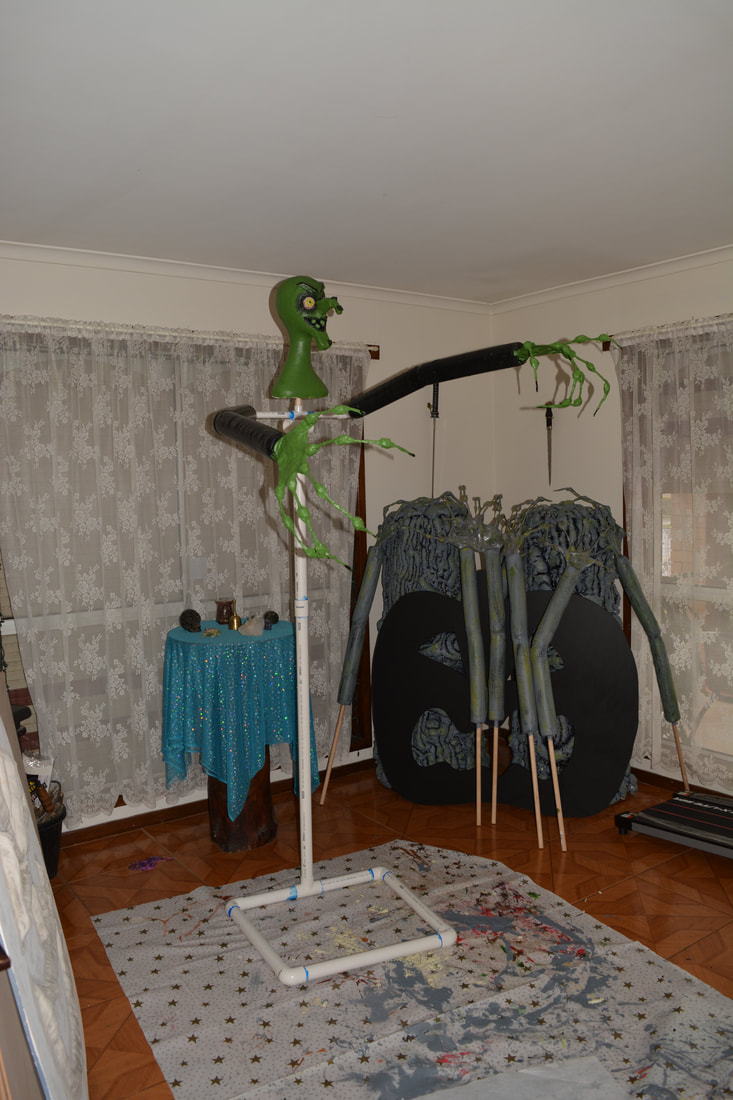
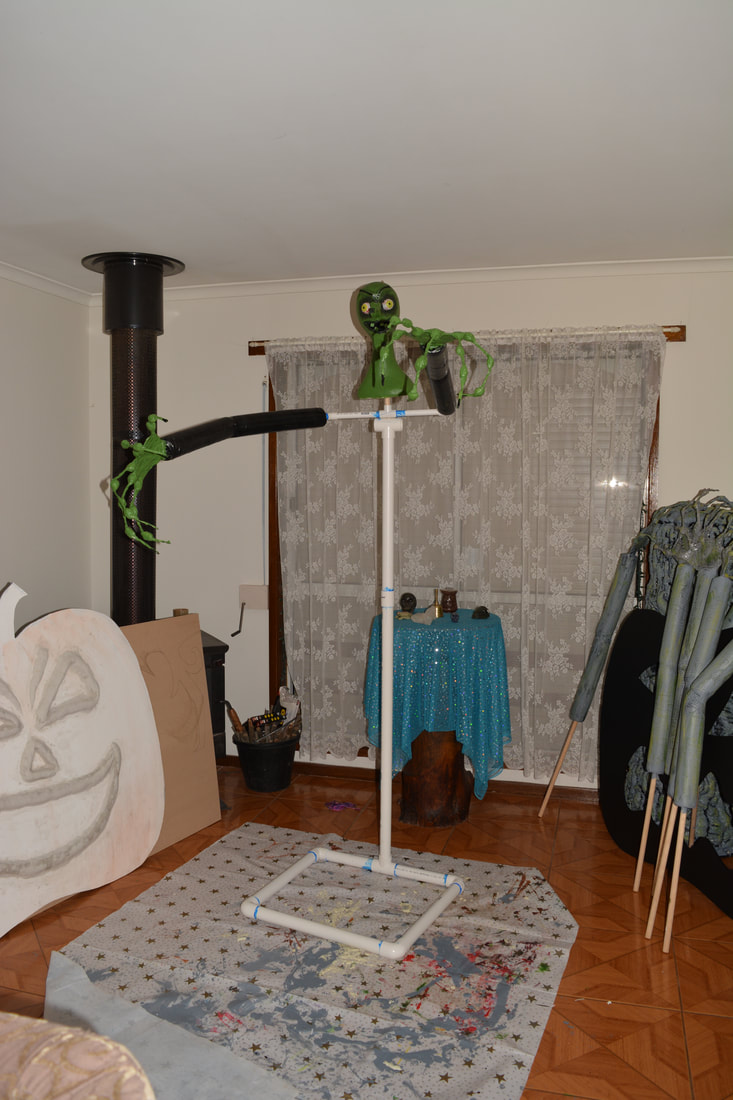
- Now move onto the body frame, I used 4 x 90 degree elbows, 1 x Tee joiner and 2 x 1 meter lengths of pipe for the base.
- Cut the 2 x 1 meter lengths of pipe in half and 1 of those halves in half again.
- Then with the plumbers glue, glue the Tee joiner to the 1/4 pieces let is set.
- Once that's done glue the elbows and other pieces together making sue the middle/top of the Tee joiner faces straight up.
- Glue the pipe joiner to two pieces for the spin but don't glue the spine to the base use a screw to hold that in place so you can easily collapse it down for storage.
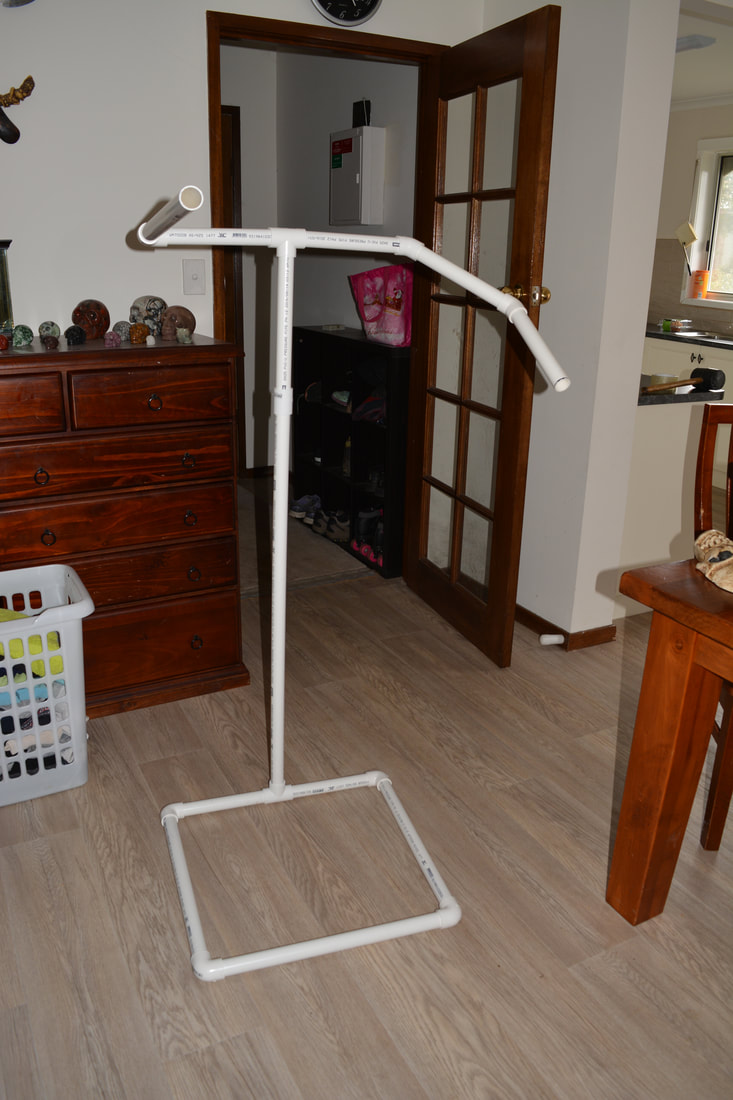
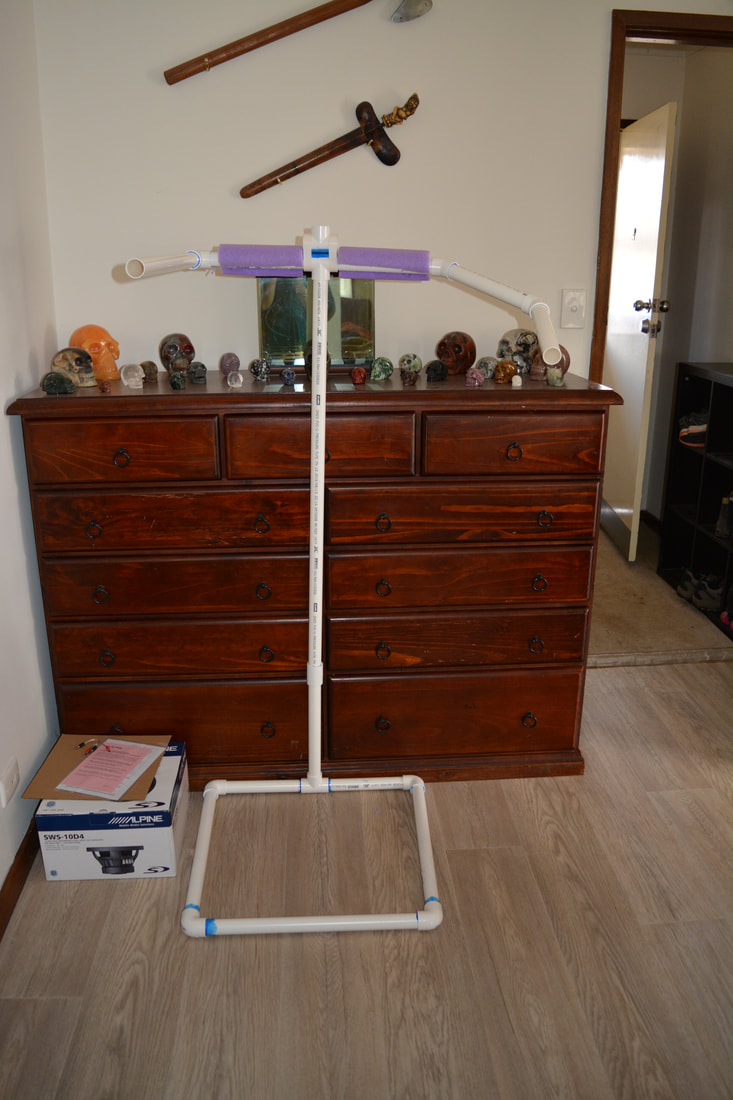
- For the shoulders use the cross (+) joiner and 2 other pieces of the poly pipe in equal lengths about should size (I didn't measure this I just gestimated it).
- Make a hole in the base of the head big enough to hold a piece of the poly pipe.
- Cut a piece long enough to stick out the bottom and push into the top of the cross piece on the shoulders.
- Use liquid nails to glue this in place, if you use the plumbers glue it will eat the polystyrene head.
- Once dry fit it to the shoulders and then fit the shoulders to the spin.
- Use a piece of stiff wire to thread through the shoulders and attach the monster arms. This can be threaded into the pre-made arms and bent into the needed poses.
- It is now ready to drape the material over in the form of a dress and rags.
- Note: My cross section didn't arrive in time so I used 15mm pipe Tee joiner and screwed to the 32mm pipe that attached to the spin. I then liquid nailed a 20mm piece of dowel into the polystyrene head and plumber glued that into the 15mm Tee joiner. Then I cut some of the 15mm poly pipe for the shoulders. Because I use the 15mm poly pipe here I liquid nailed a length into each arm (fit perfectly into the centre noodle hole) and used plumbers glue to attach at 90 degree elbow to one arm and a 45 degree elbow to the other. I didn't glue these to the shoulders instead I set them into the position I wanted and put a screw through them so I can take them apart for storage as I did with the spine base and neck base to the spine.


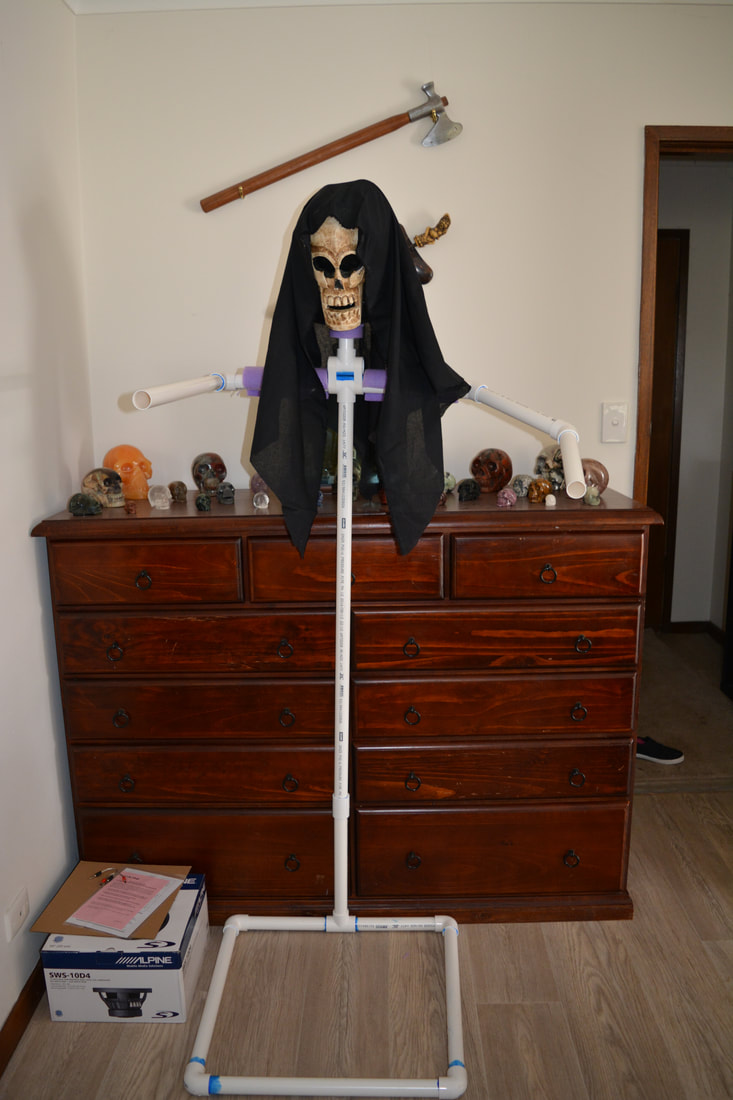
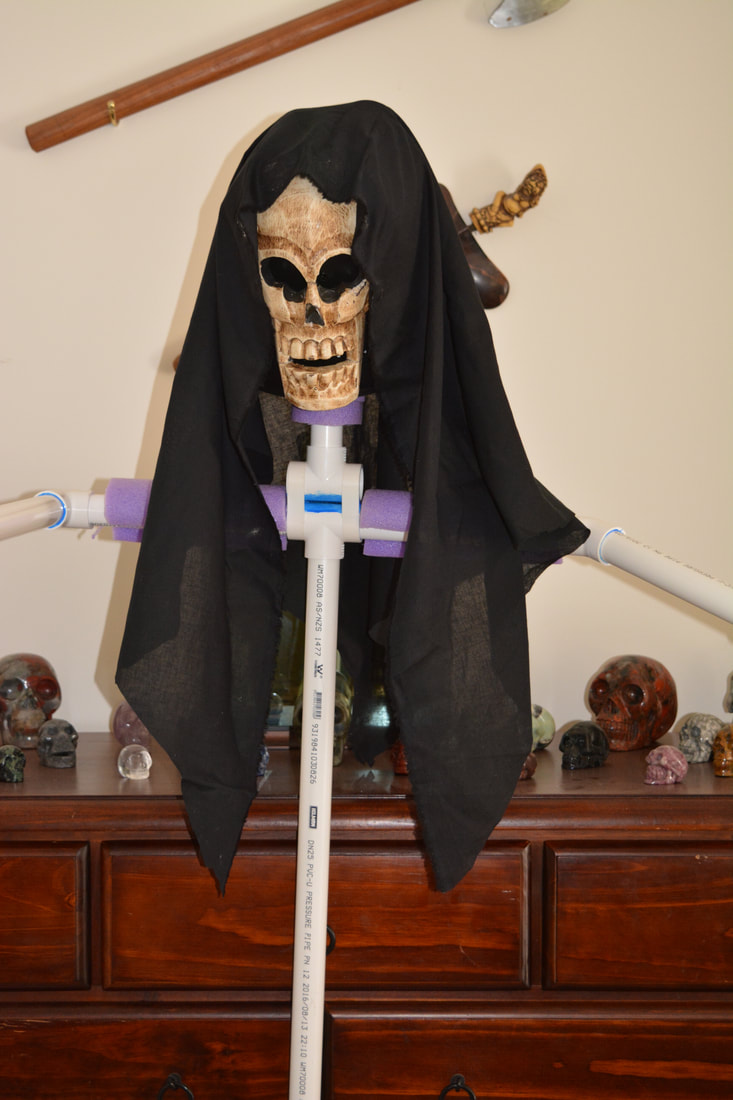
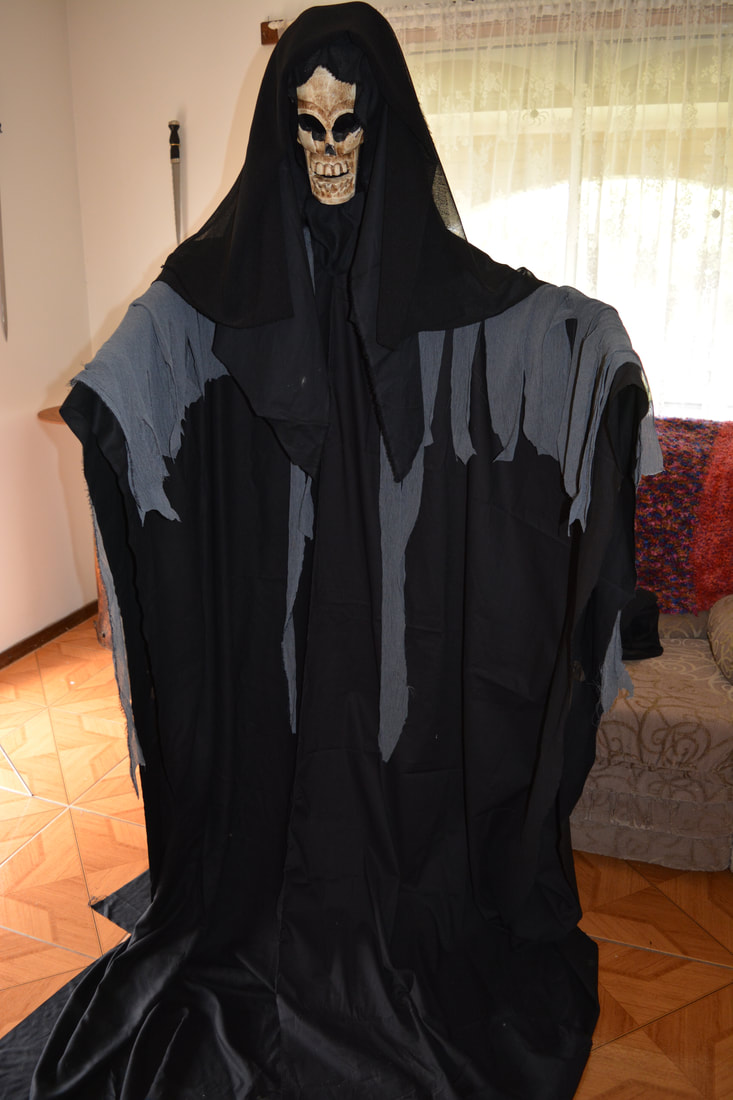
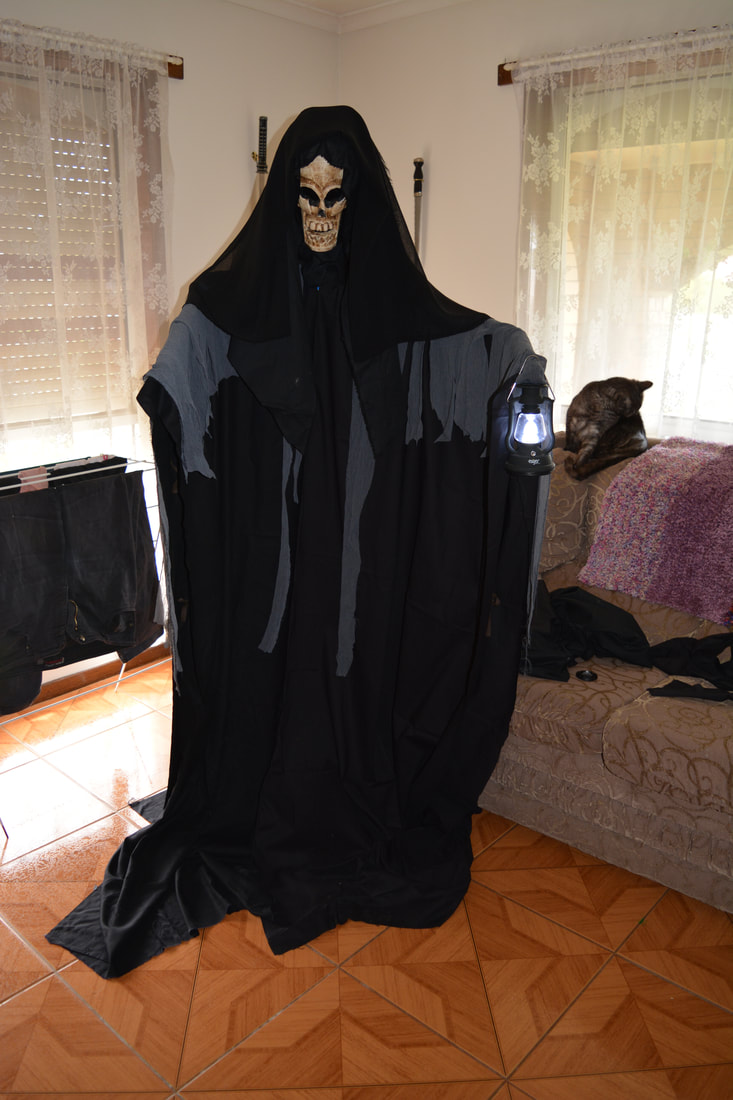
Reaper
Materials Used
Polypipe
90 Degree Elbows
45 Degree Elbows
T Pipe Connectors
Black Material
Grey Material
Skull Mask
20mm x 1 Meter Wood Dowel
Pool Noodle
Plastic Skeleton Hands or Make Monster Hands
Materials Used
Polypipe
90 Degree Elbows
45 Degree Elbows
T Pipe Connectors
Black Material
Grey Material
Skull Mask
20mm x 1 Meter Wood Dowel
Pool Noodle
Plastic Skeleton Hands or Make Monster Hands
- This prop isn't as big as the Hedgewitch but made the same way with poly pipe and connectors used to make the frame, a large piece of material as the robe and smaller piece tattered to enhance
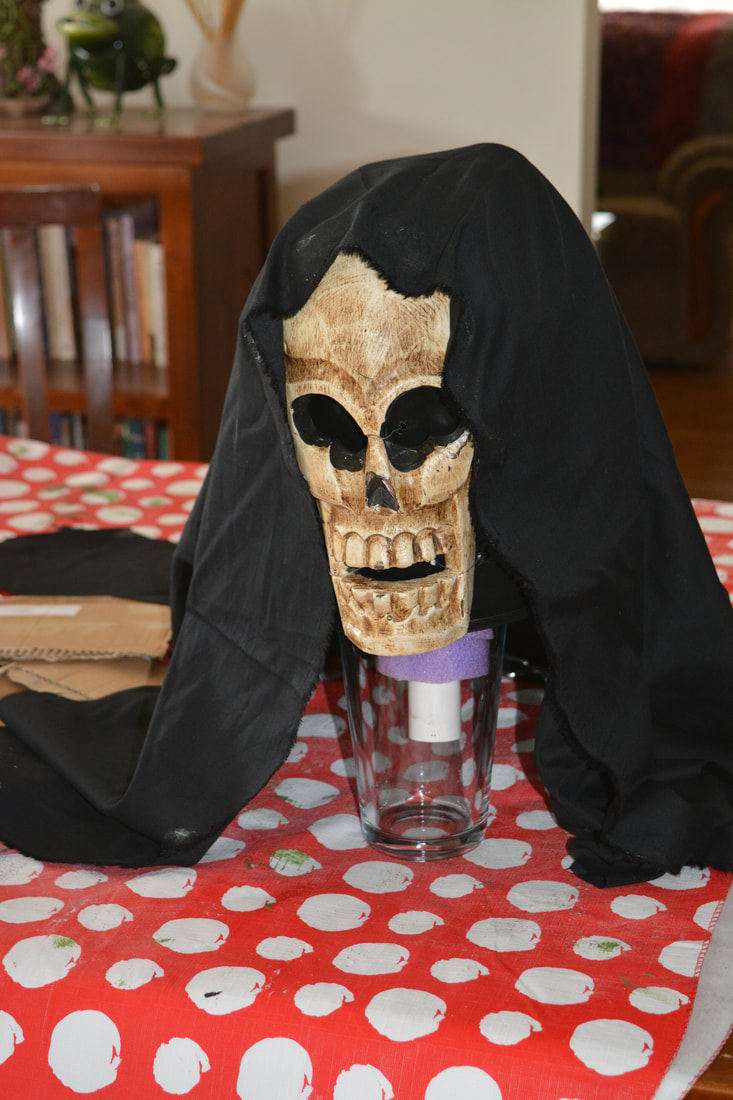
- The head is made with a coconut mask fixed to a 10ltr bucket and covered with a piece of material to hide the bucket
- I used plastic pre made made for this one instead of making hands and hung the plastic bone bits of that came with the hands around the Reapers neck
- To finish him off I attached a wind up LED lantern to his hand