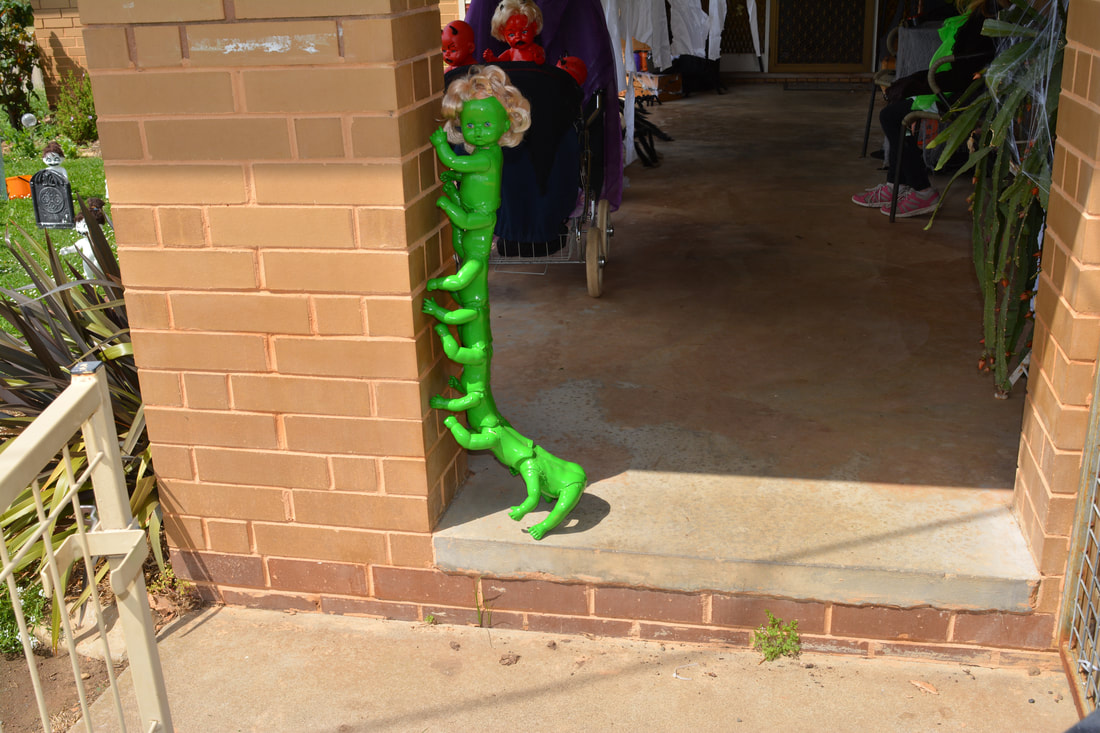
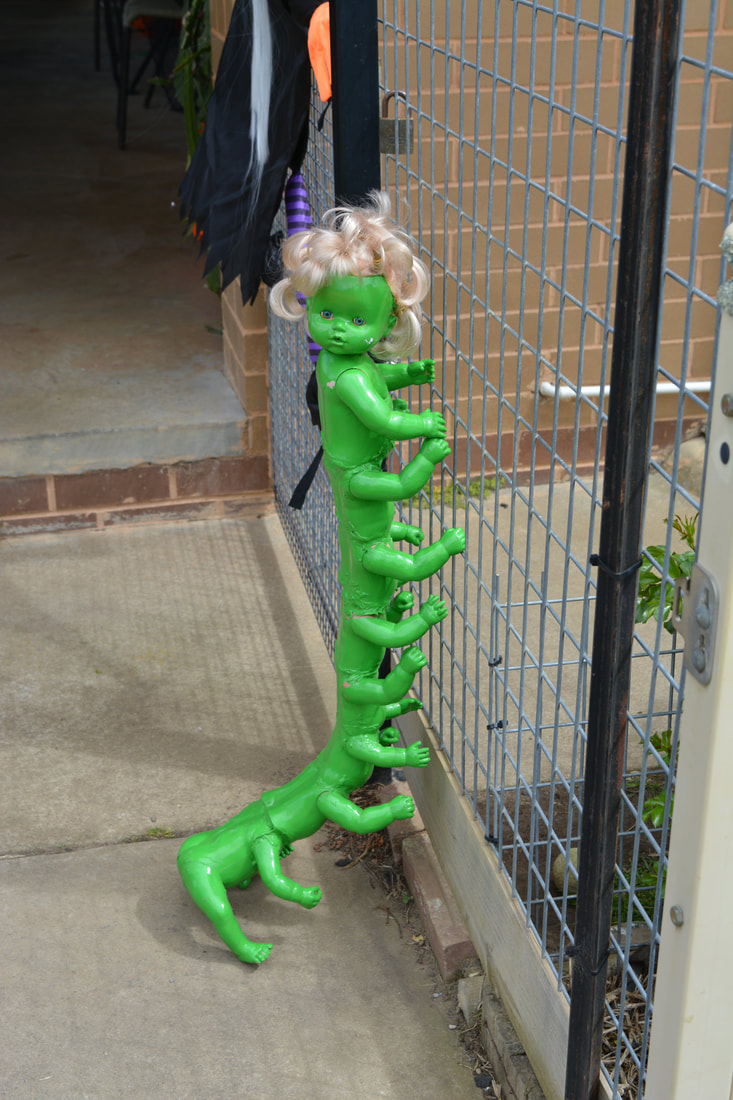
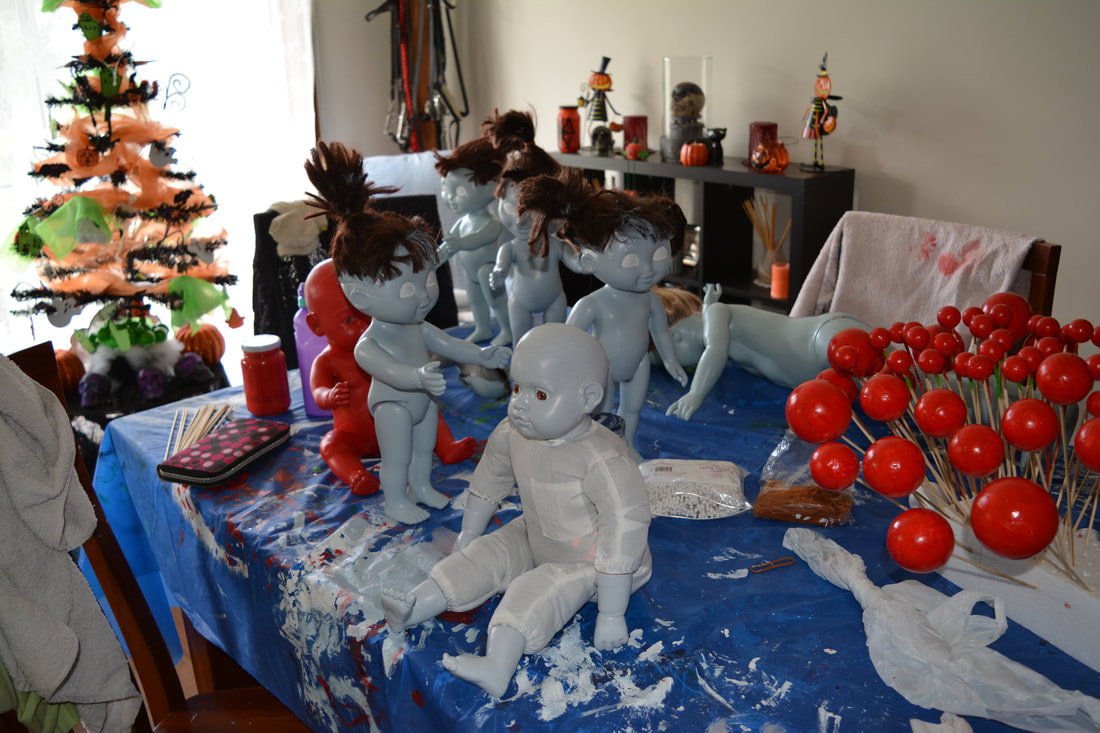
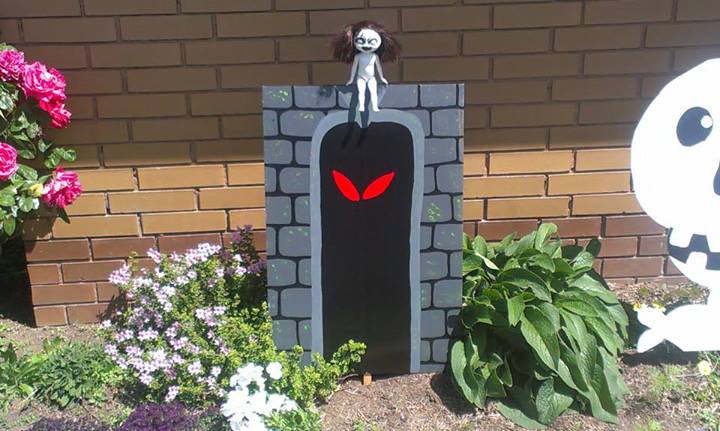
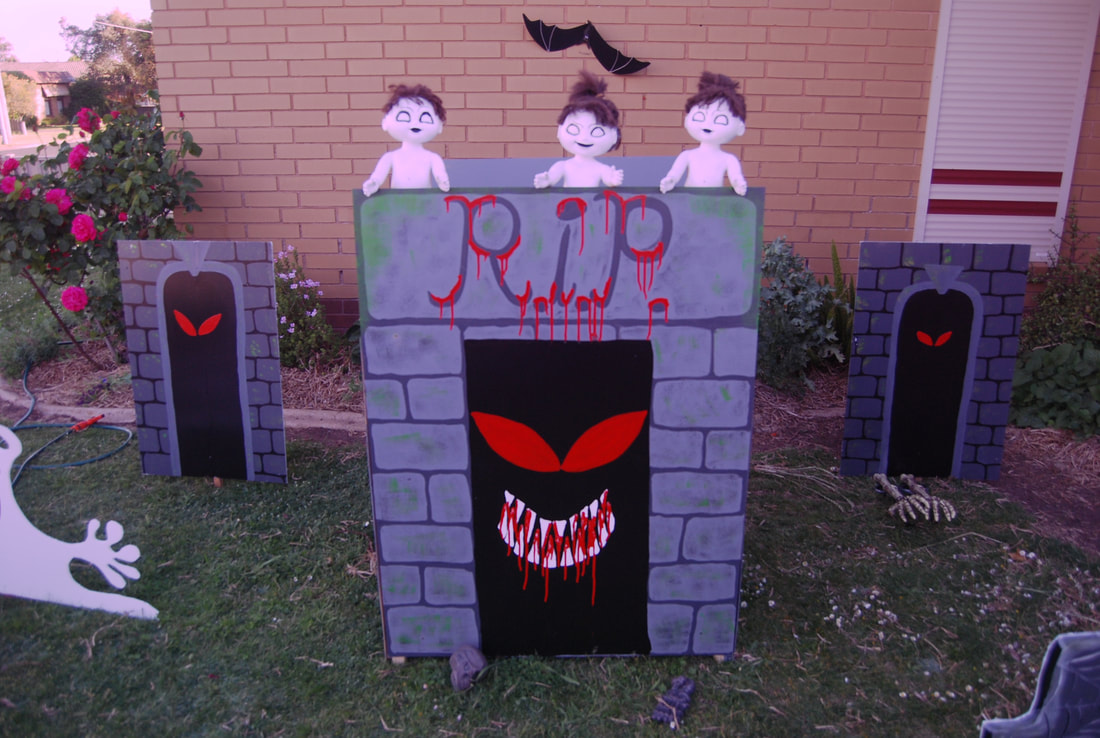
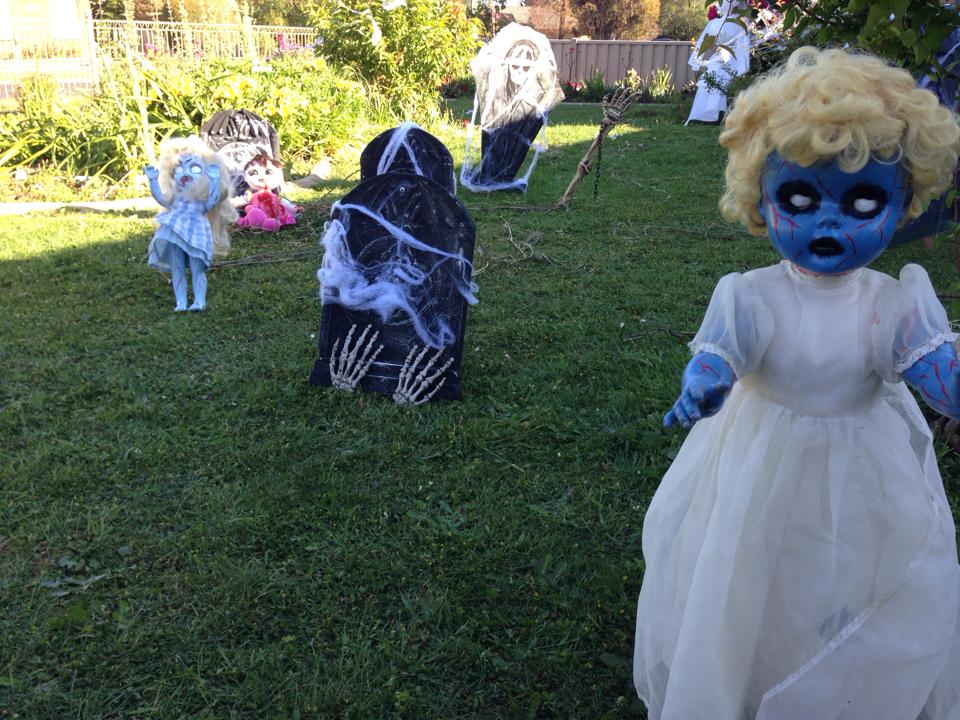
Creepy Dolls
Dollypead
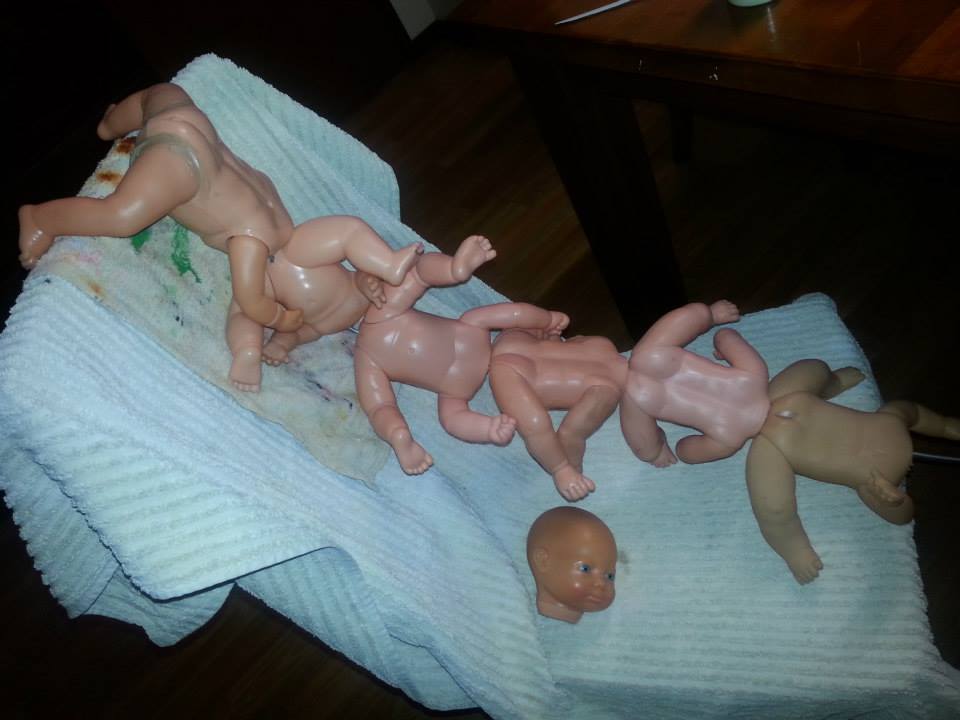
(This is a collection of dolls cut up and glue back together. If you make one of these things you will end up with lots of arms, legs and heads left over that you can use in other projects)
Materials Used
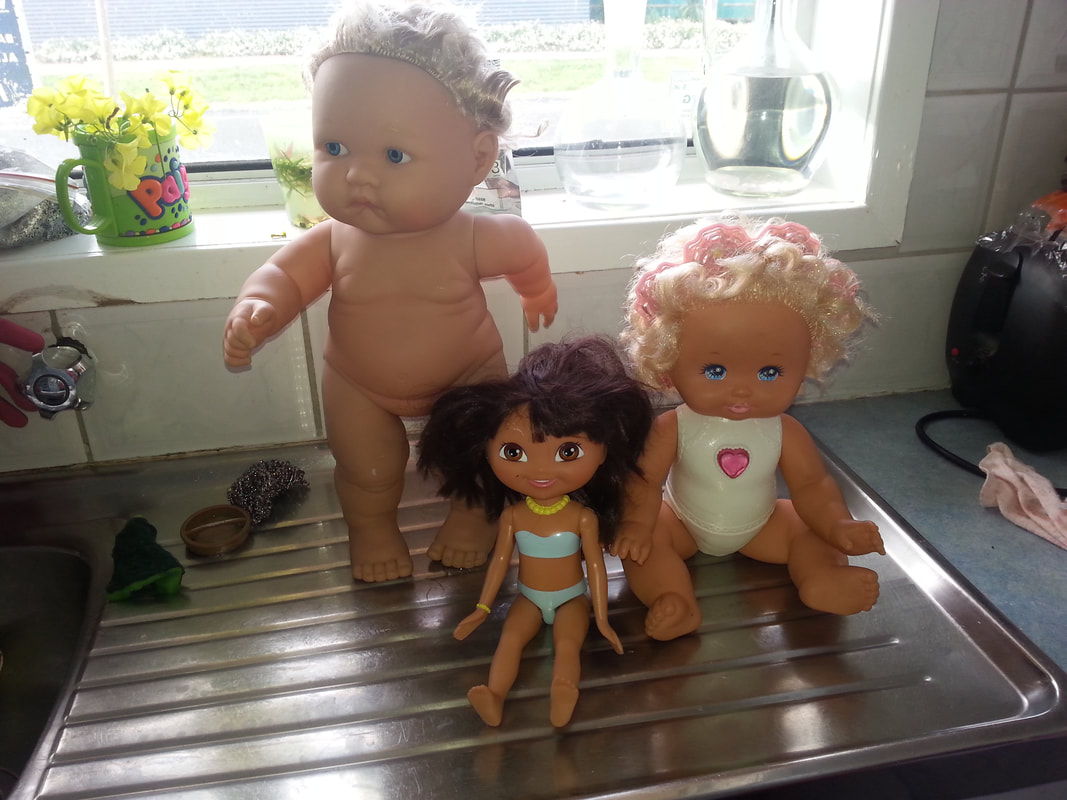
6 plus 25 to 30cm Dolls - for the body
1 25 to 30cm Coll for the Head - I used one with hair
Liquid Nails
Fencing Wire - thick Gage 2.5mm plus thick enough to need plyers to bend it
Paint
Craft/Stanley Knife
Plyers
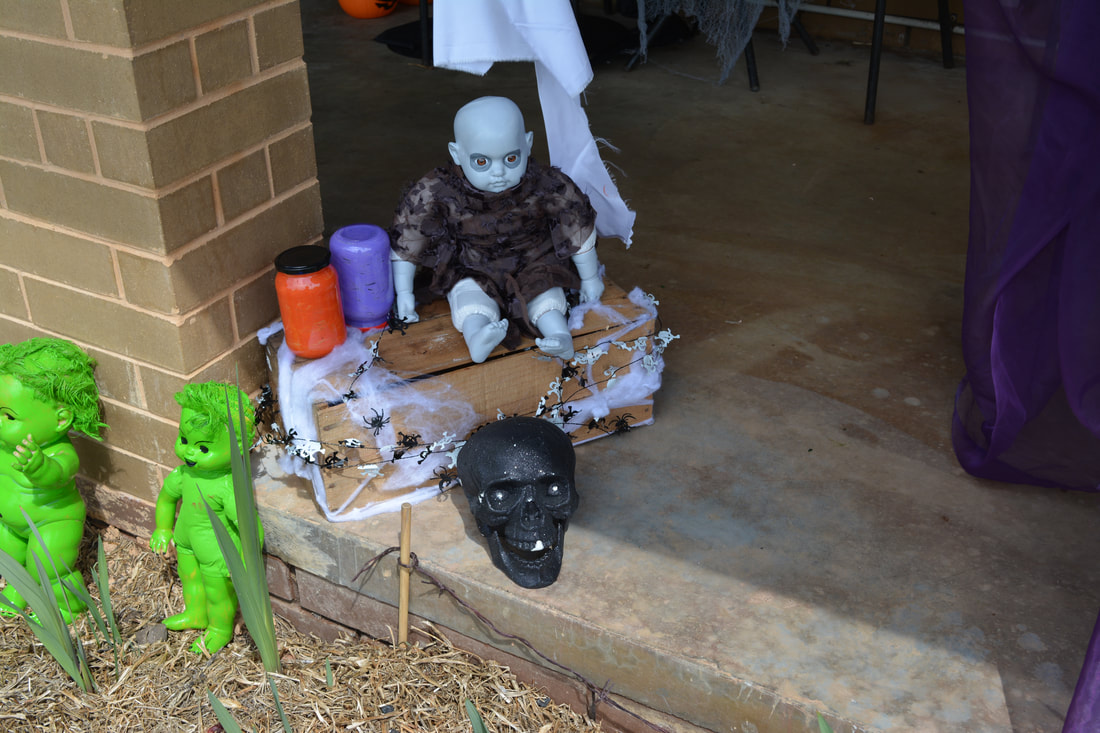
- Set aside the doll you intend to use as the head.
- Take the wire and cut it to leave plenty either end. You need enough to hook it around the base doll and to reach into the head of the topper/head doll.
- You need to remove the heads of the other dolls and drill holes in their butts. If they also have tubes in them remove those.
- Then thread them over the wire to see how you are going to lay them. Once you have done that and are happy with how they will go take them off numbering them from 1 at the base to 7 the topper/head doll.
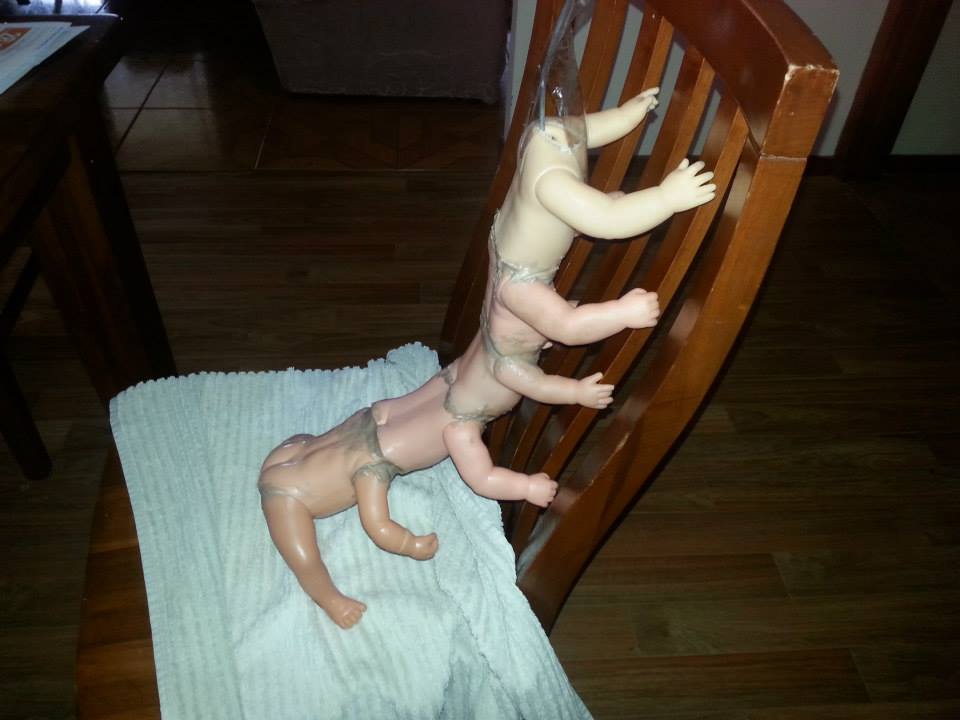
- Leave the base doll on and bend the wire to hook around the doll then use the liquid nails to glue it in place. Leave this to set (takes at least 24hrs for this to set). This is a slow process as liquid nails takes ages to set properly.
- Once the wire is set in place on the base doll bend it into a curved shape so it will look like it is climbing the wall.
- Then cut the other dolls with the craft/stanely knife to site on top of each other but leaving the arms or legs attached (I made this one with arms, only legs are the base doll).
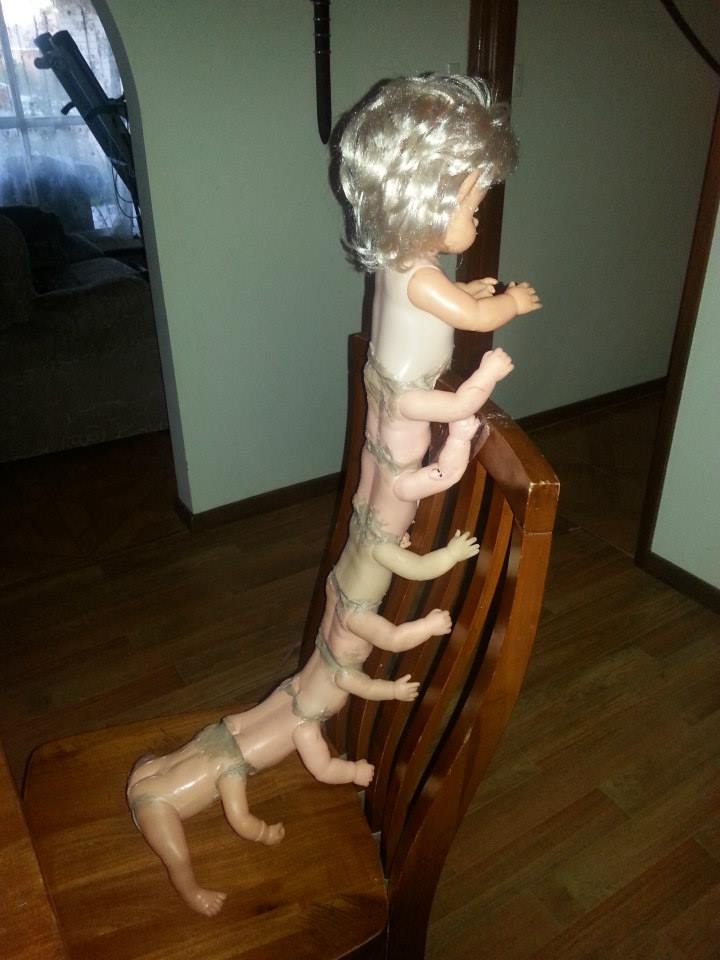
- One by one then glue each doll over the last one allowing plenty of time for each one to set between gluing.
- Glue the topper/head doll on last making sure the wire reaches into the head.
- Finally when it is set you are ready to paint.
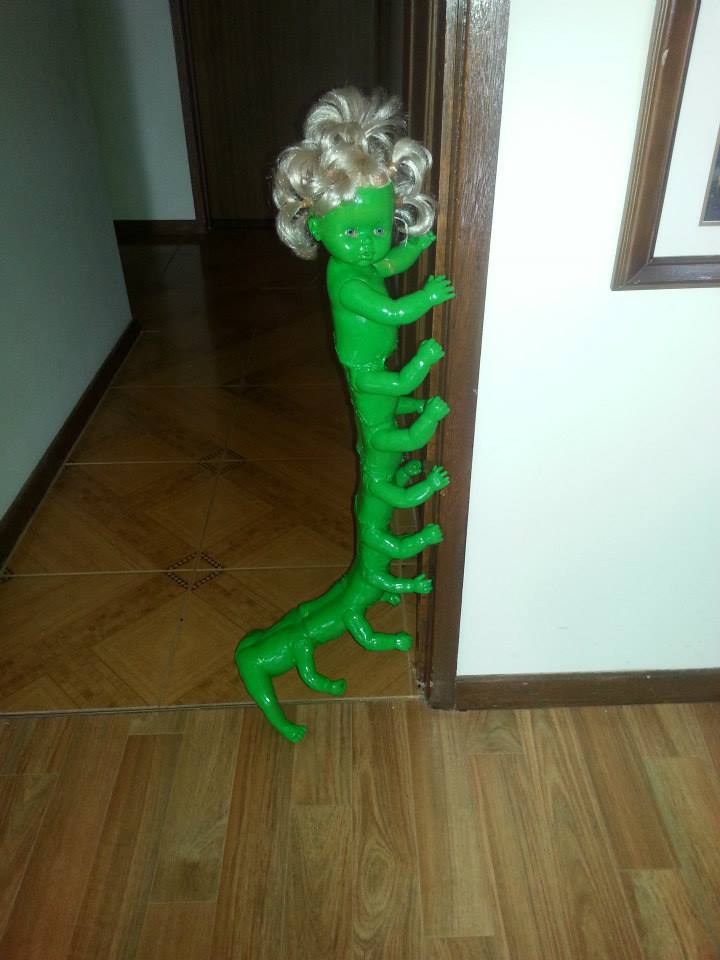
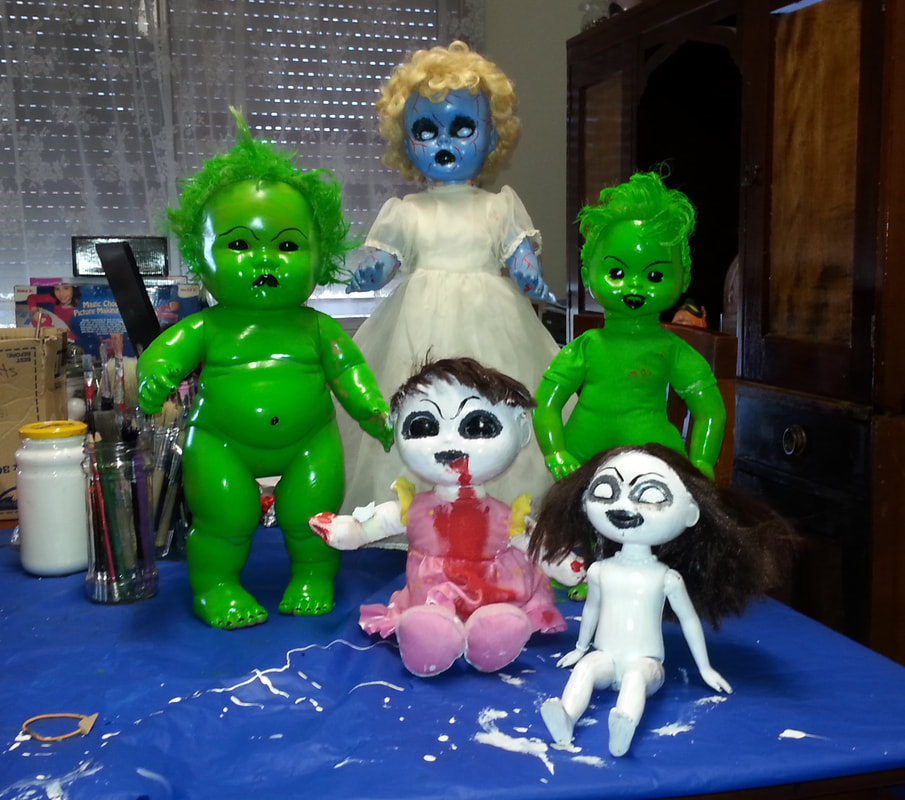
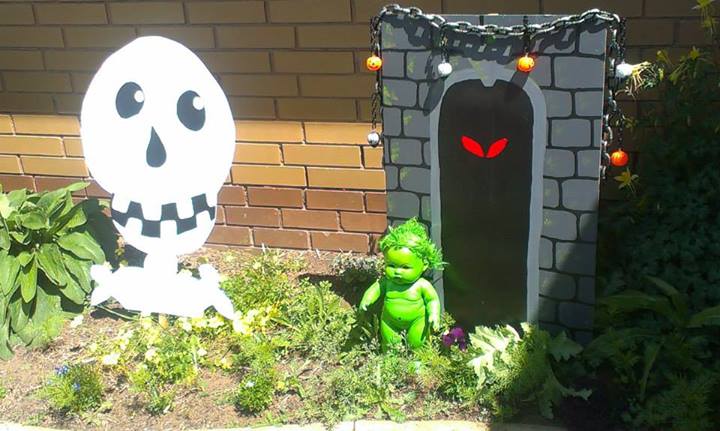
- Choose any colour you like, my kids choose bright green for ours. I also put the hair into little pony tails all over the head. I did not paint between the hair though because I just couldn't not be bothered by this stage.
- We have used her in every display for last the 3 or 4 years. In 2017 I had to repair her because I stood on her, but I reglued her and touched up her paint and she is ready to go again.
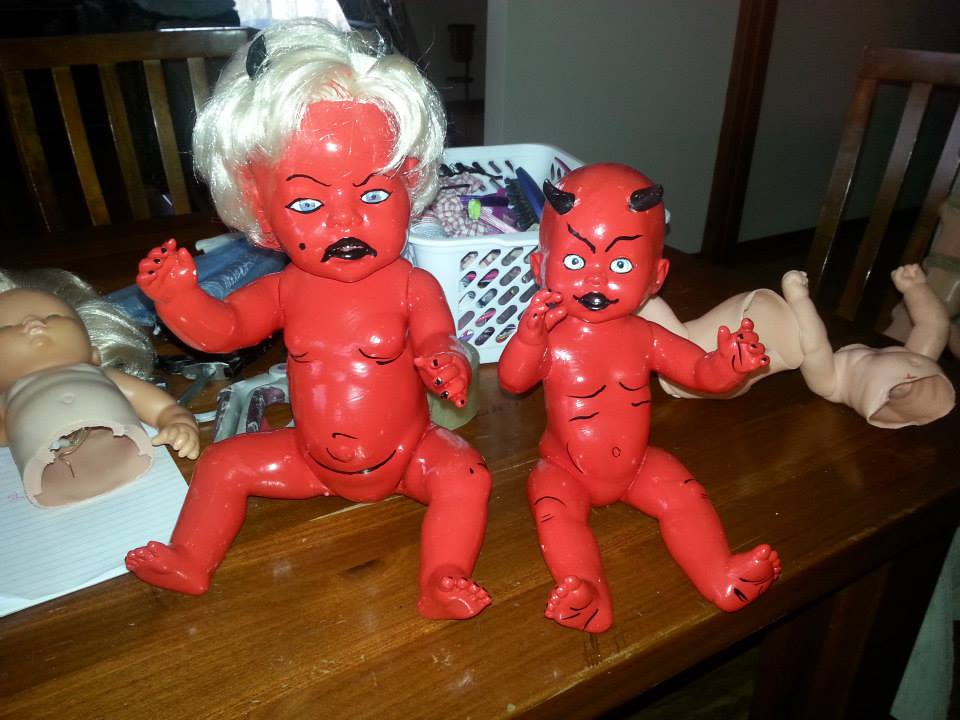
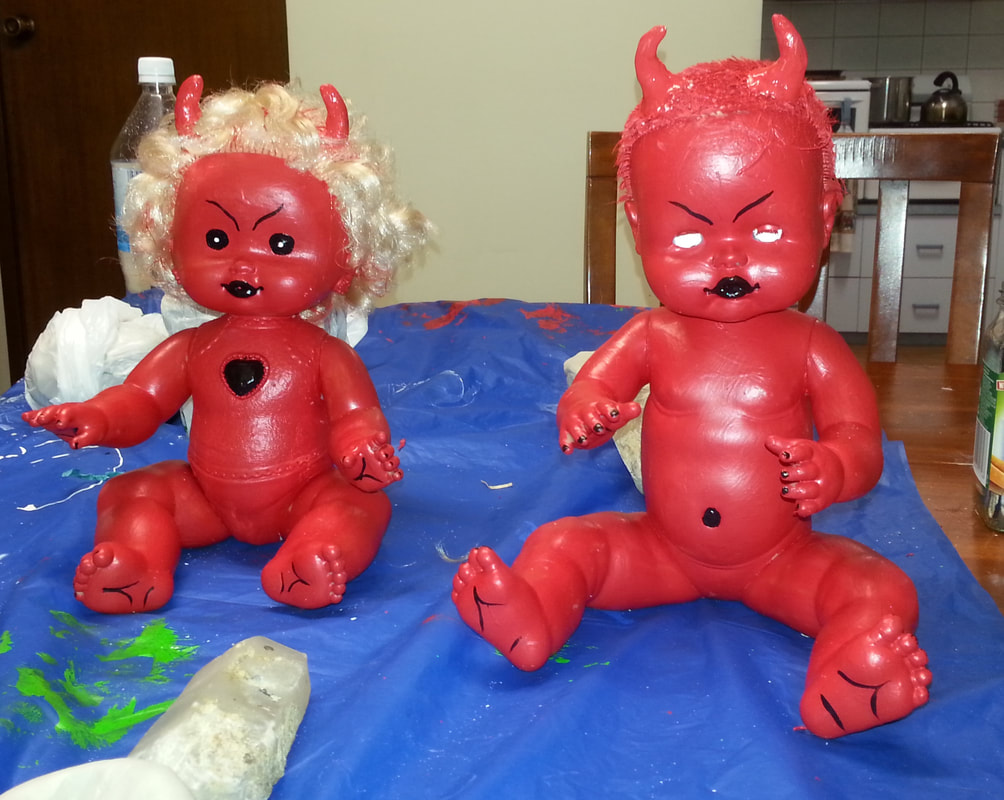
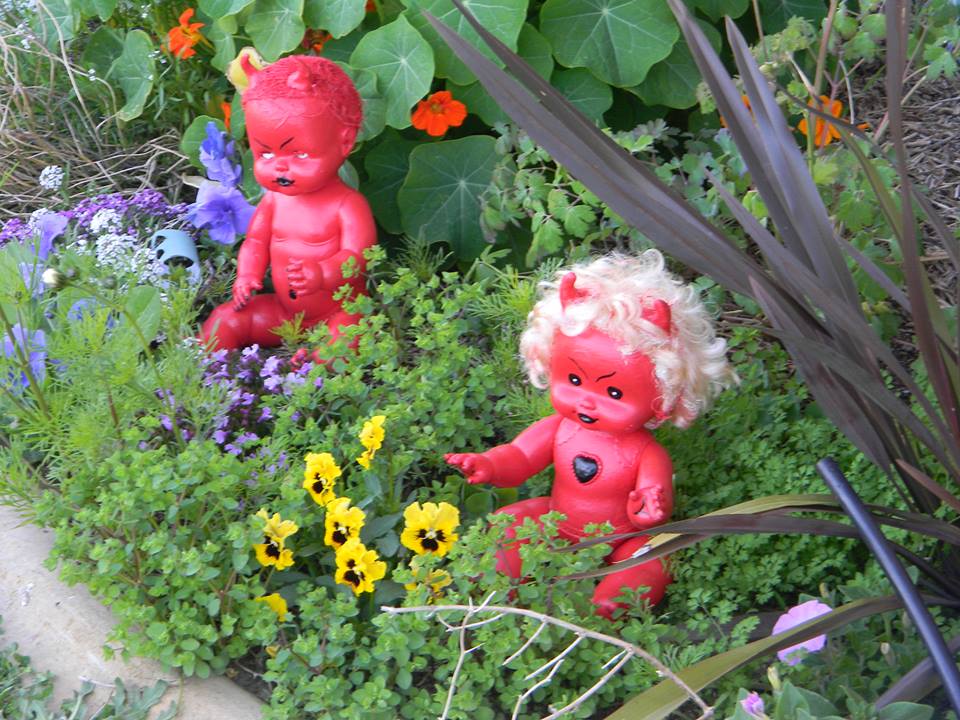
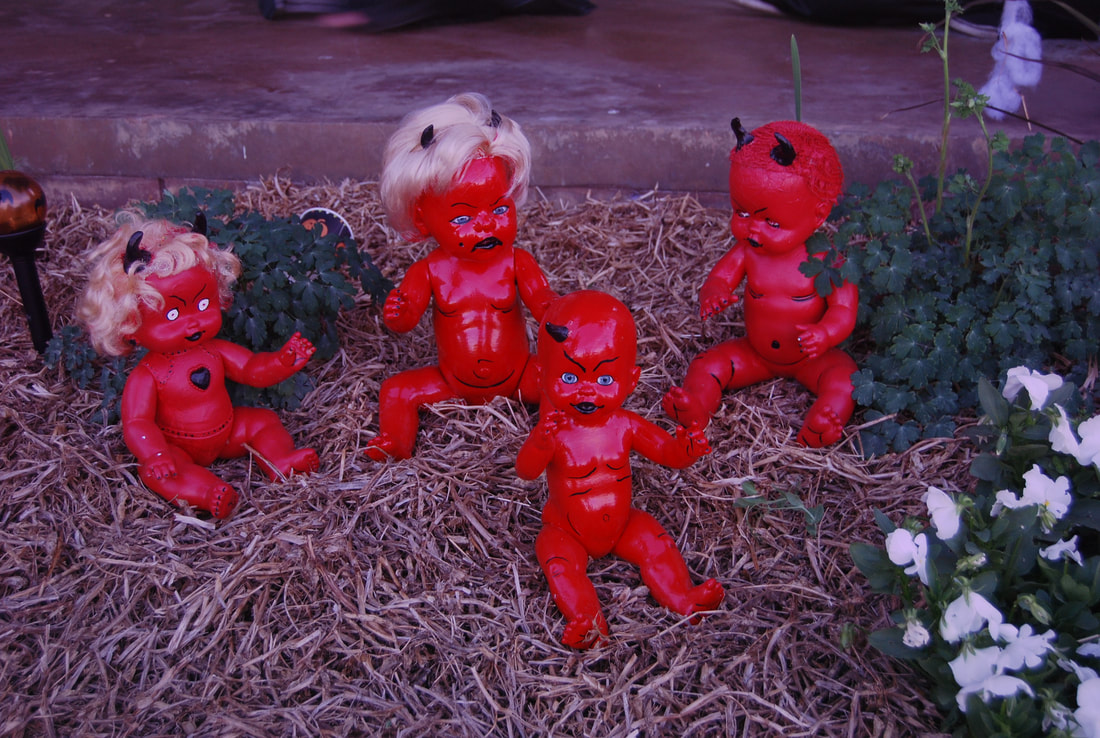
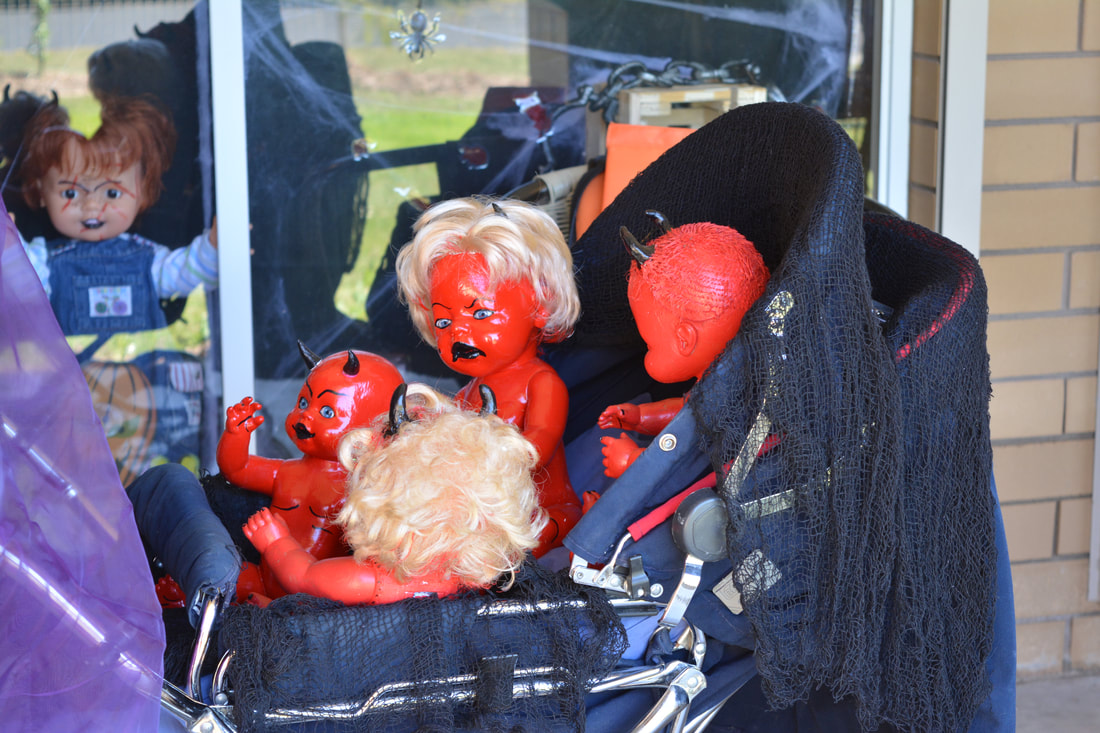
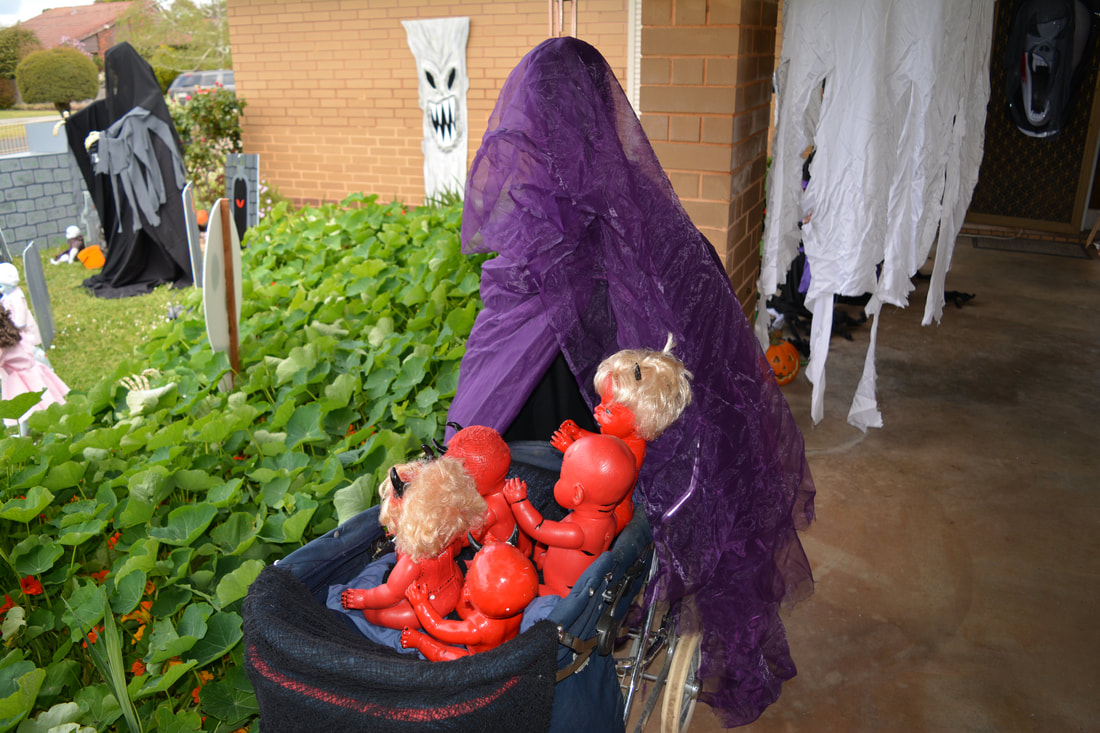
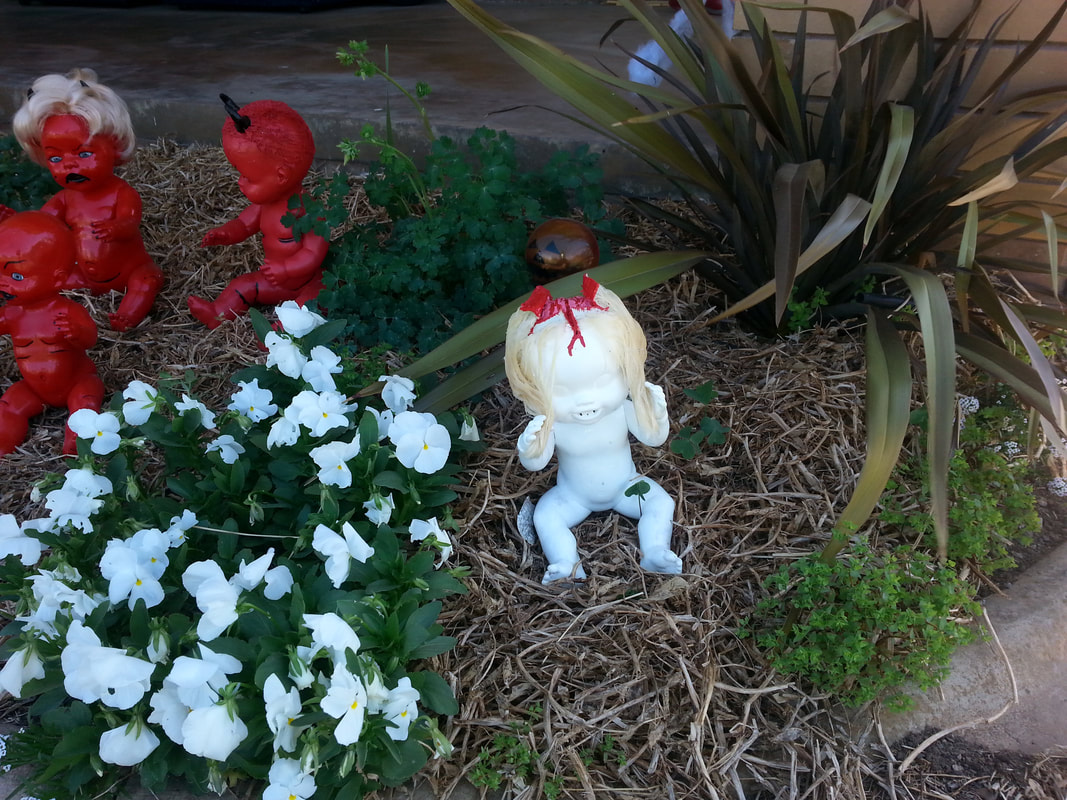
Devilish Demon Dolls
These little guys are so cute! Of course the devil itself doesn't exist in Paganism but as commercial Halloween has nothing to do with the Pagan festival I indulge in the concept of these little devilish demon dolly's.
These little guys are so cute! Of course the devil itself doesn't exist in Paganism but as commercial Halloween has nothing to do with the Pagan festival I indulge in the concept of these little devilish demon dolly's.
Materials Used
Dolls
Paint - black, red, white and a color for eyes if you want
Paint Brushes
Air Drying Clay or Papermache Clay
Glue Gun
Dolls
Paint - black, red, white and a color for eyes if you want
Paint Brushes
Air Drying Clay or Papermache Clay
Glue Gun
- Make sure your dolls are clean and dry
- Some plastics don't take paint well so go for the harder plastics the softer ones can remain sticky for even years after as the paint never sets
- Paint the doll bodies all red
- Use the white and black to detail the faces
- To make horns mould clay into a horn shape and allow them to dry completely (this can take up to a week)
- Paint them either red or black and glue them in place


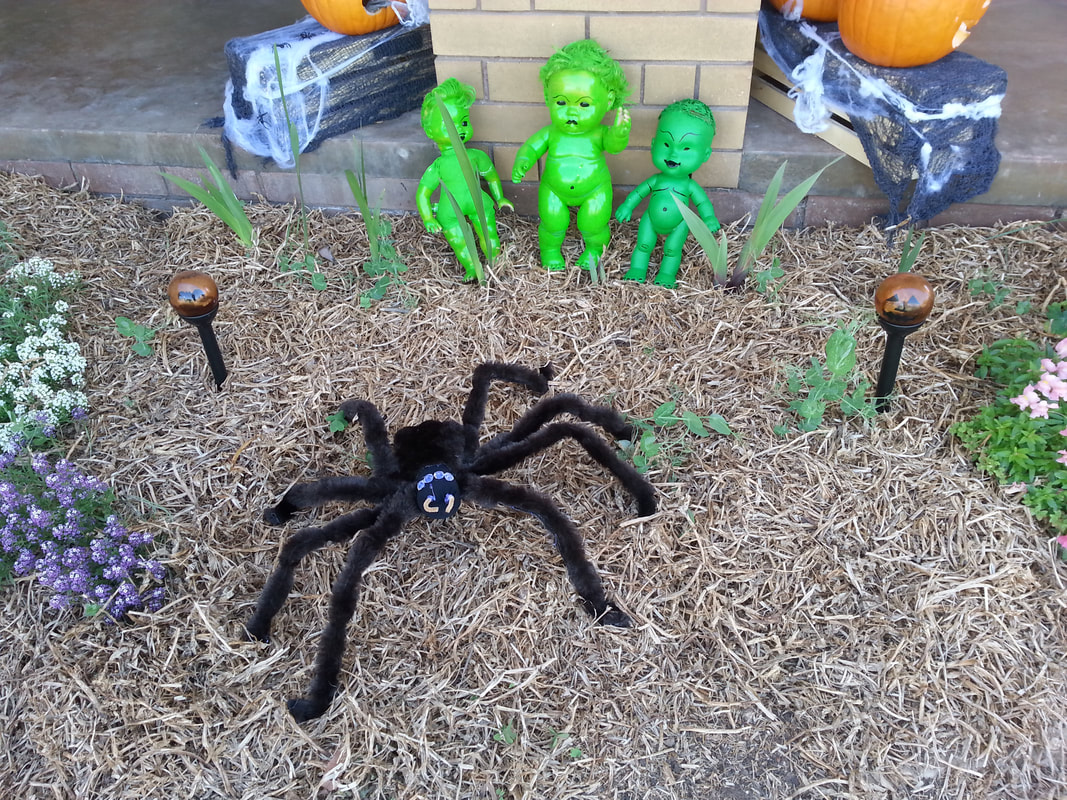
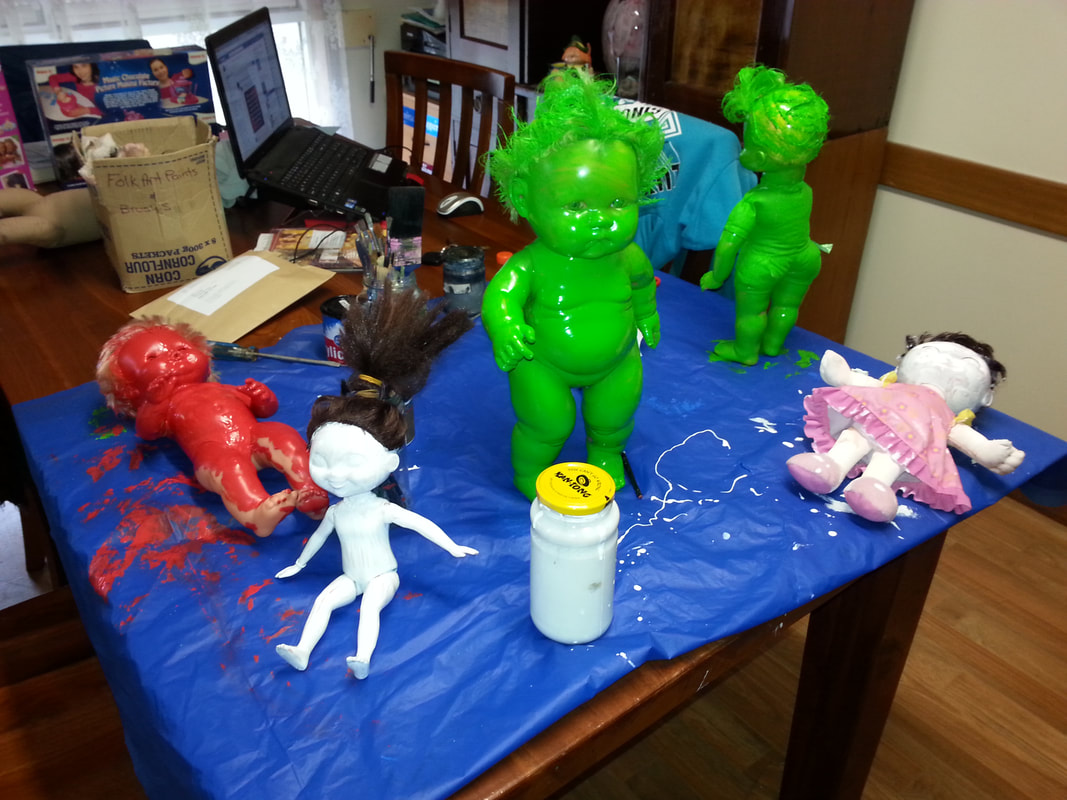
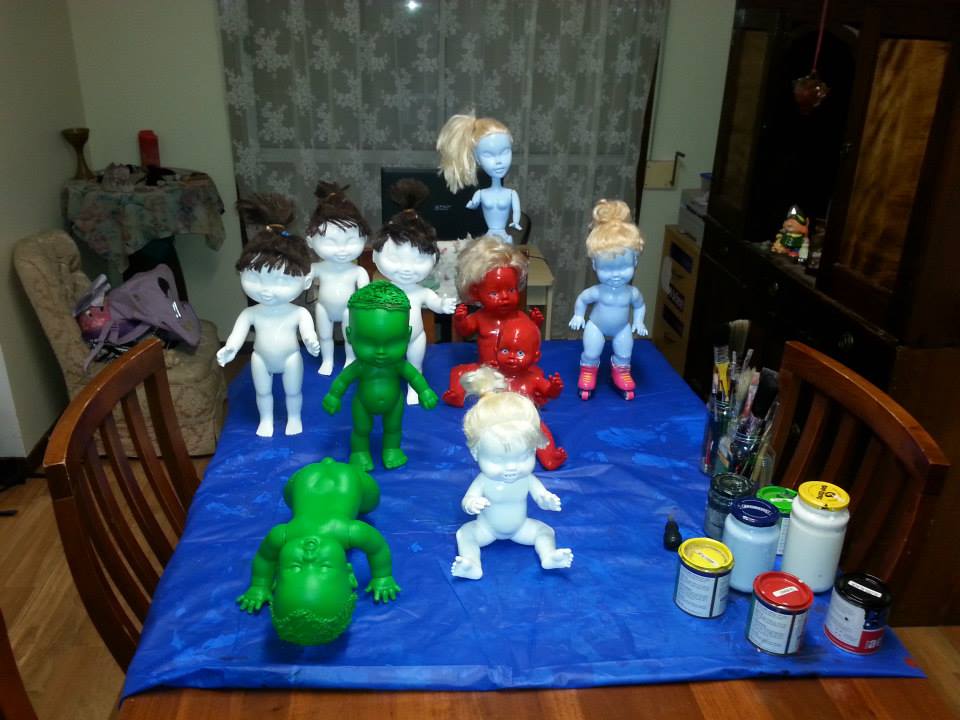
Weird Little Green Dolls
Materials Used
Dolls
Paint - green, black and a colour for eyes if you want
Paint Brushes
Materials Used
Dolls
Paint - green, black and a colour for eyes if you want
Paint Brushes
- Make sure the dolls and clean and dry again be mindful of the type of plastic as some paints don't set on the softer plastics
- Paint the dolls in the green base coat
- Use the black to paint in the face details


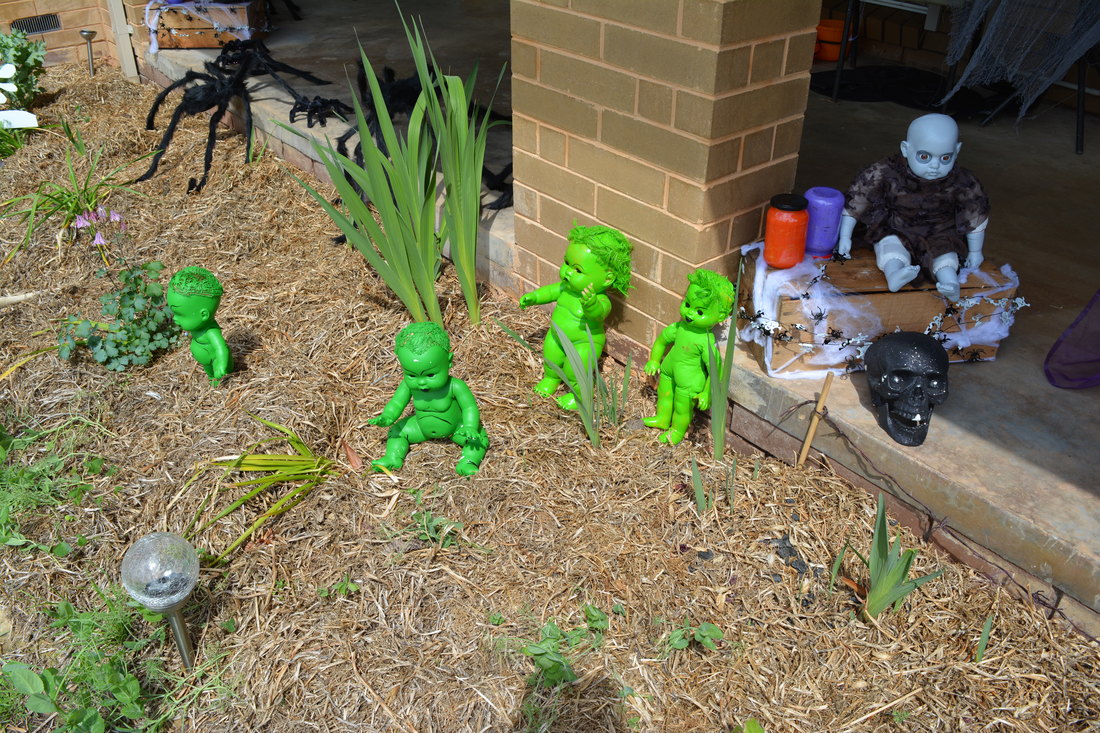
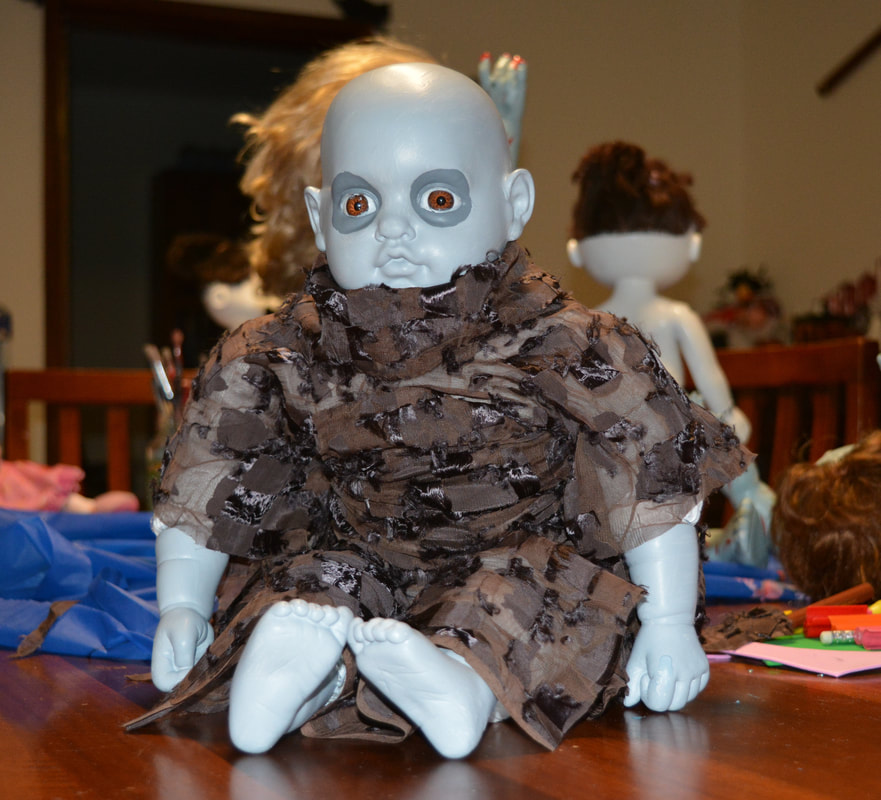
Uncle Festers Offspring
Materials Used
A doll that looks like Uncle Fester
Brown Material
Paint - black, pale blue
Pain Brushes
A doll that looks like Uncle Fester
Brown Material
Paint - black, pale blue
Pain Brushes
- Paint the doll the light blue base colour
- Then paint the grey around the eyes
- Fold the material over so it's long enough to cover the the doll to the feet
- Cut a hole bit enough to get the material over the head
- Cut a strip for the belt and a strip for a neck wrap
- Poke small holes in the material at waist length close to the dolls body and thread the belt
- Tie the belt and wrap the neck with the other strip
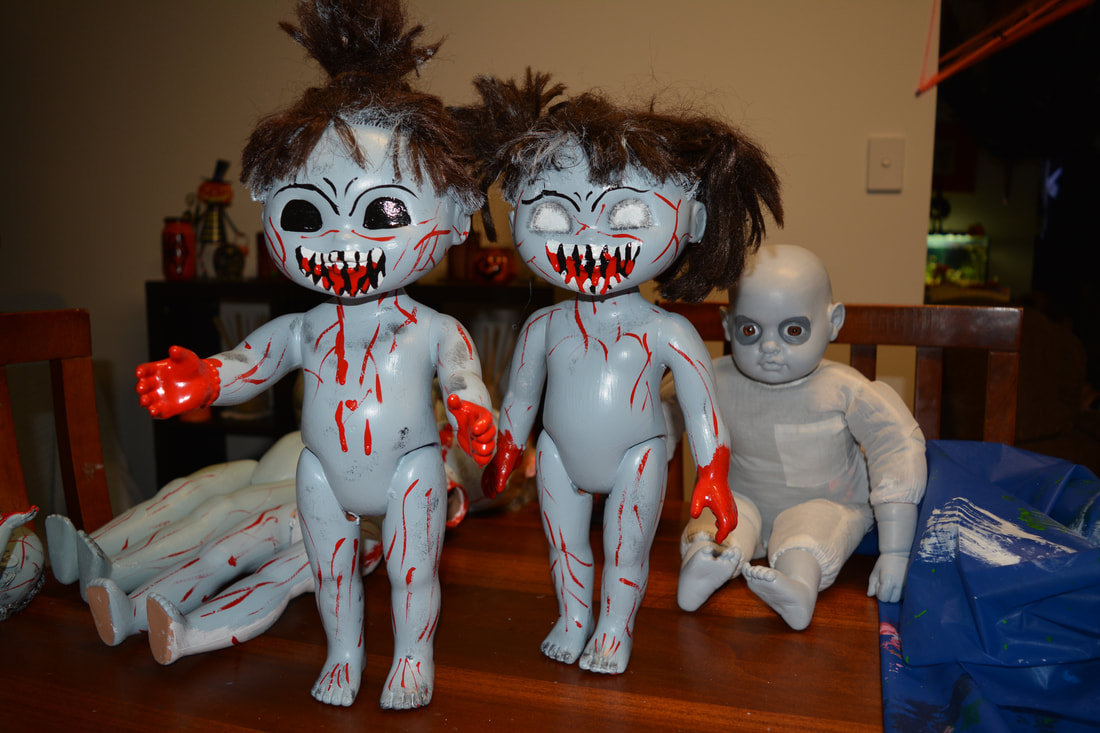
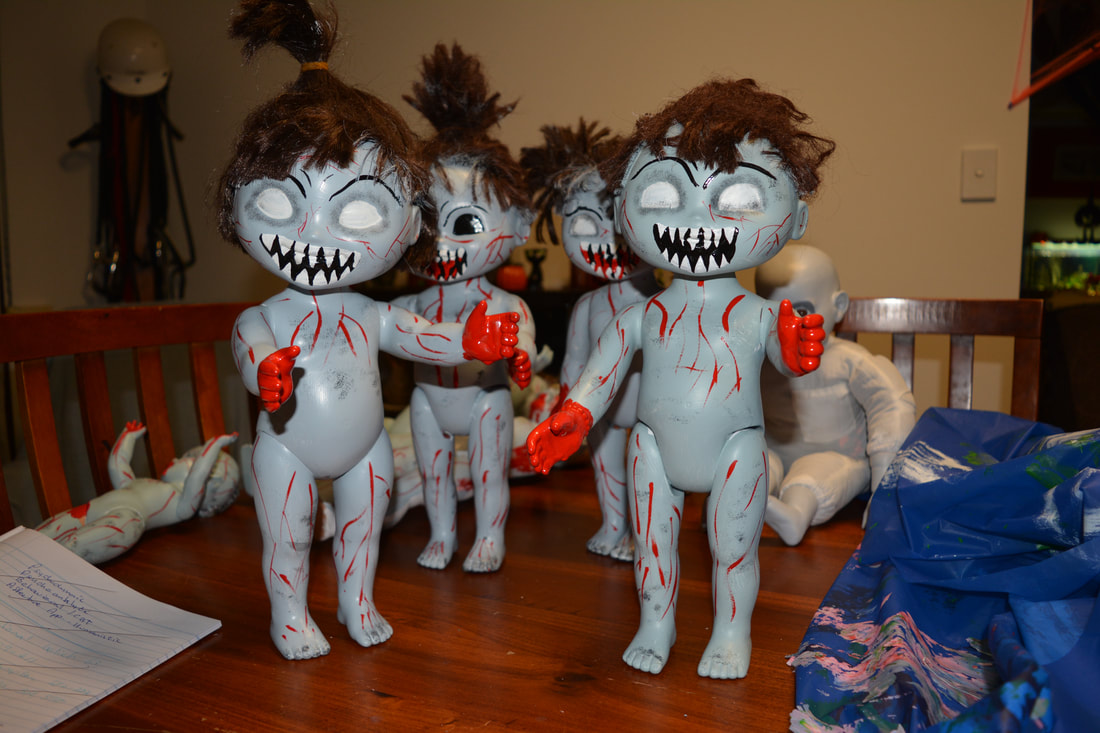
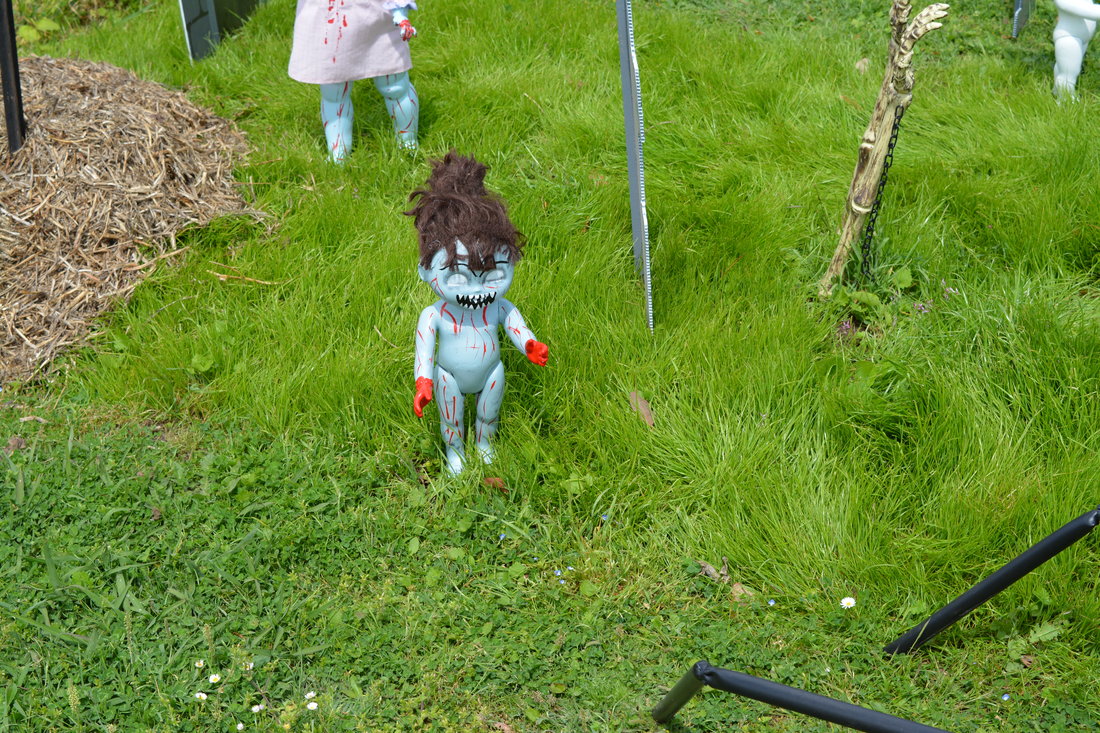
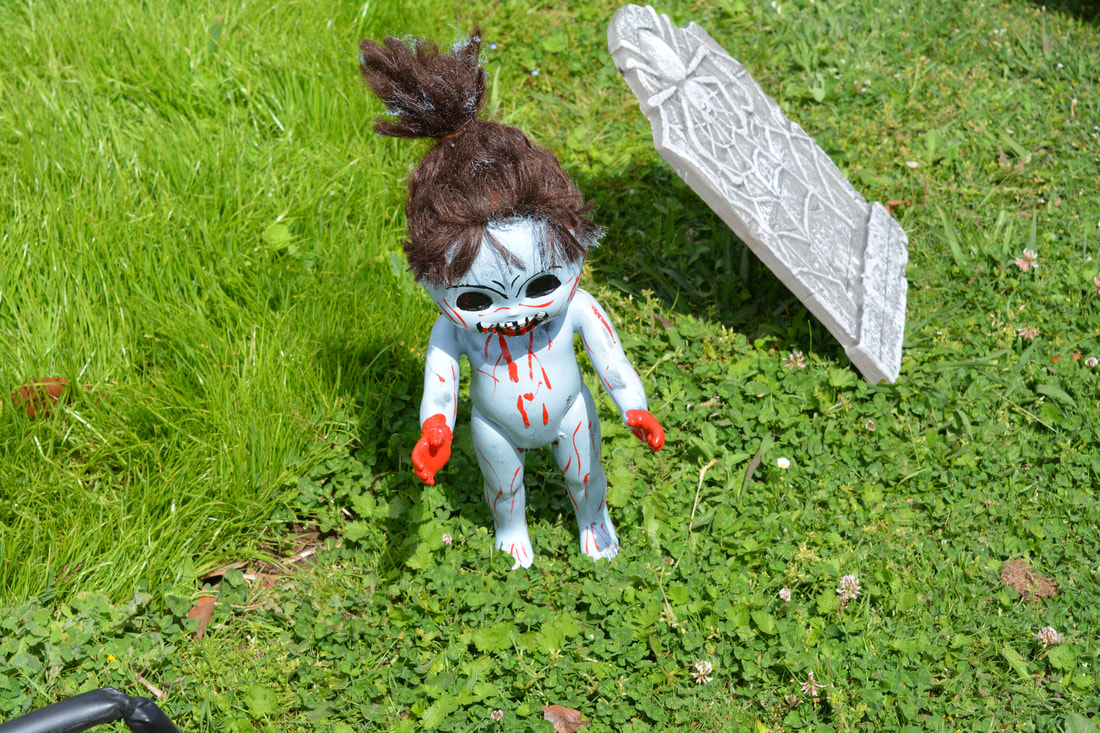
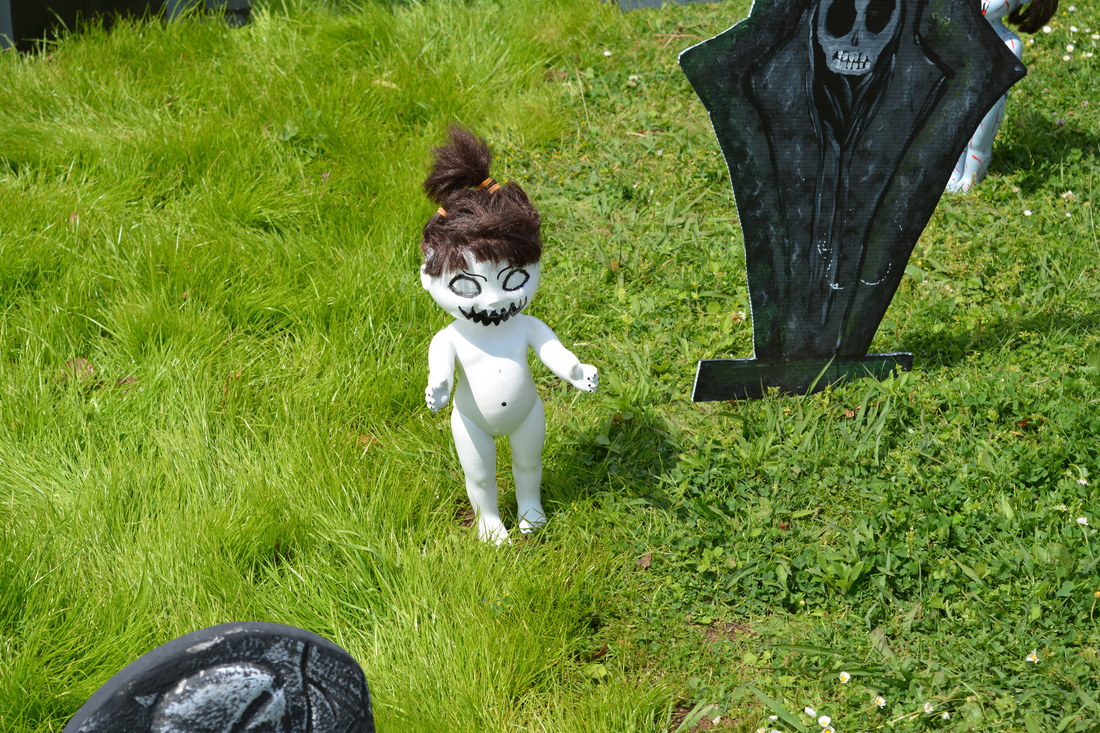
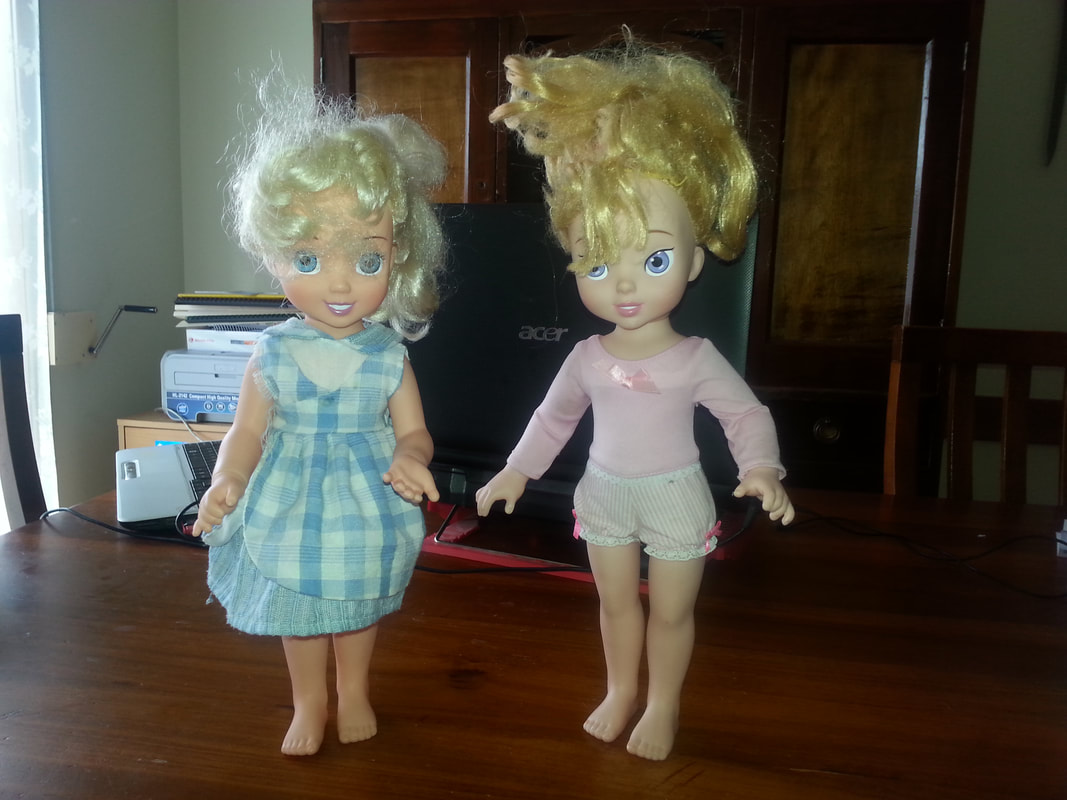
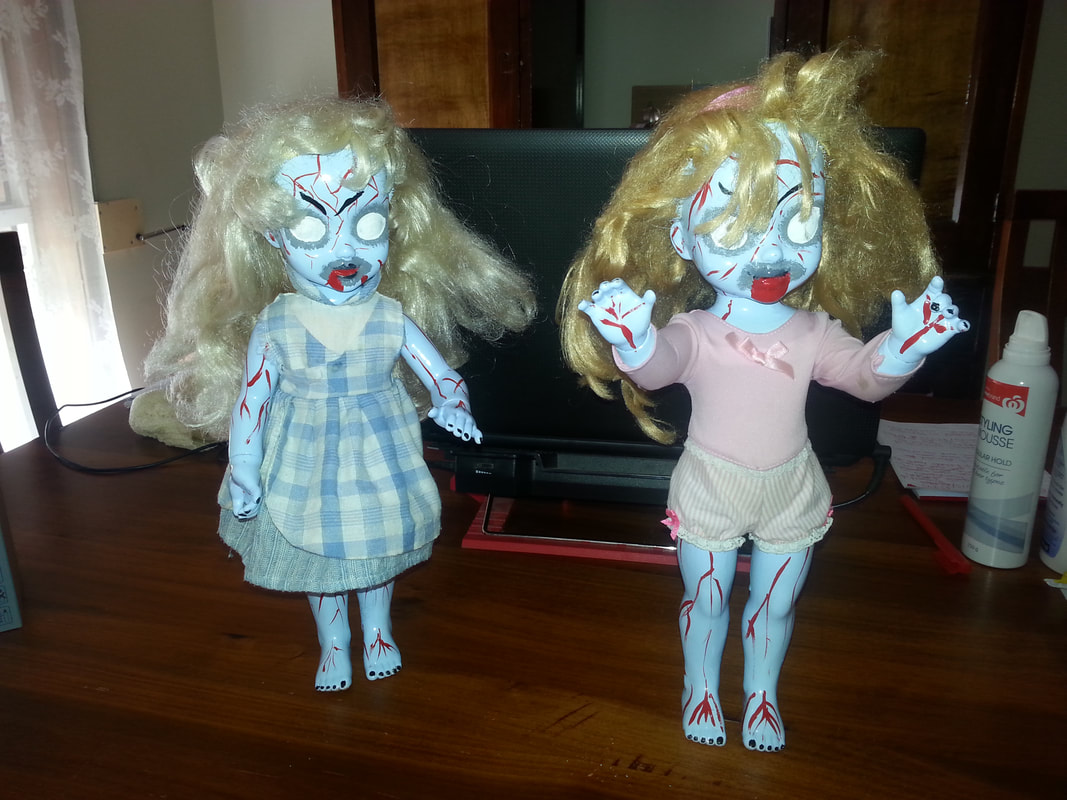
Creepy Dora Dolls
Materials Used
Dora Dolls - here these things are abundant in second hand stores
Paint - white, light blue, black, red
Paint Brushes
Dora Dolls - here these things are abundant in second hand stores
Paint - white, light blue, black, red
Paint Brushes
- Make sure the dolls are clean and dry. Most of these dolls are make of a plastic that holds paint well but still make sure it's the hard plastic
- For the little white creature dolls paint them in a base of white
- For the zombie style dolls paint them in a base of light/greyish blue
- Use the black to detail the faces making the mouths oversized, the first ones I did with only black on the lips but these are very hard to see from a distance. I redid them with oversized mouths and they where much easier to see.
- Use the red for the blood dips and splatter on the zombie style dolls


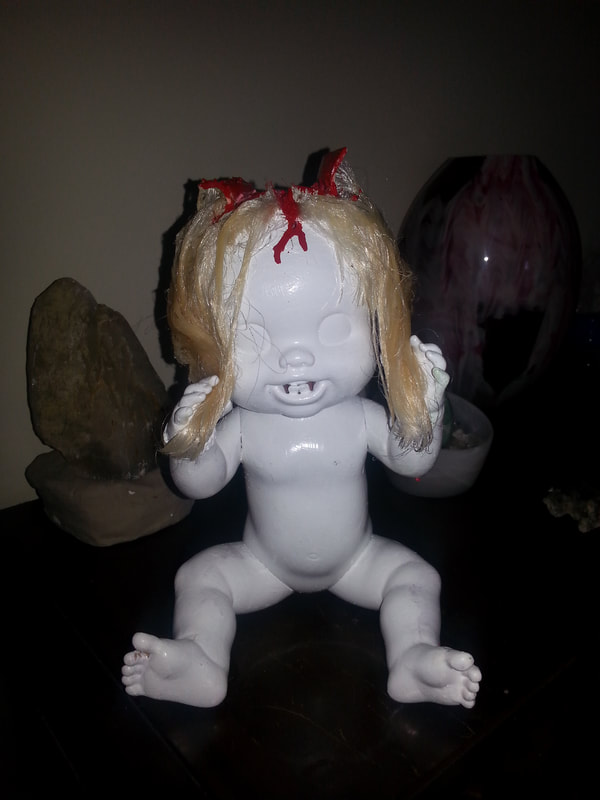
Head Splitting Doll
Materials Used
Doll - choose one with fake hair not moulded plastic
PVA/White Glue
Paint - I used white for the base on the body, pink and red
Paint Brushes
Air Drying Clay or Papermache Clay
Scissors/Craft Knife
skewers
Pliers
Heat Gun
Doll - choose one with fake hair not moulded plastic
PVA/White Glue
Paint - I used white for the base on the body, pink and red
Paint Brushes
Air Drying Clay or Papermache Clay
Scissors/Craft Knife
skewers
Pliers
Heat Gun
- Make sure the doll is clean and dry. The plastic should be hard so the paint will hold.
- Cut the head open from front to back, with slits going from the centre of that cut towards the sides big enough to get a ball of clay in and to glue the hair into place in the hands
- Bend the sides you have created with the cuts with the pliers
- Very carefully hat the underside of the plastic to make it more pliable but watch for the hair melting you don't want that to happen
- This is tricky but eventually you will be able to manipulate the plastic
- Make a ball out of the clay and push into the cavity on the head
- If you need more to fill it in and use the skewer to make squiggly lines to resemble a brain
- Set the doll aside for the clay to dry ensuring that the opening you created by cutting the head open does not close
- It can take up to a a fortnight for it dry if you use the air drying clay
- Ones dry paint the base coat on the dolls body and paint the brain in pink detailing the veins with red
- Now use the PVA/White glue to smother the hair into pigtails toward each hand. Soak the hair well in this glue so it will hold it shape with dry
- Raise the hands to meet the hair and secure them to the hair
- Wait for it all to dry, the idea is to have the doll look like it is tearing it's own scalp off
- With the weight of the clay in the head the doll might be top heavy, I made mine with air drying clay and it is very top heavy

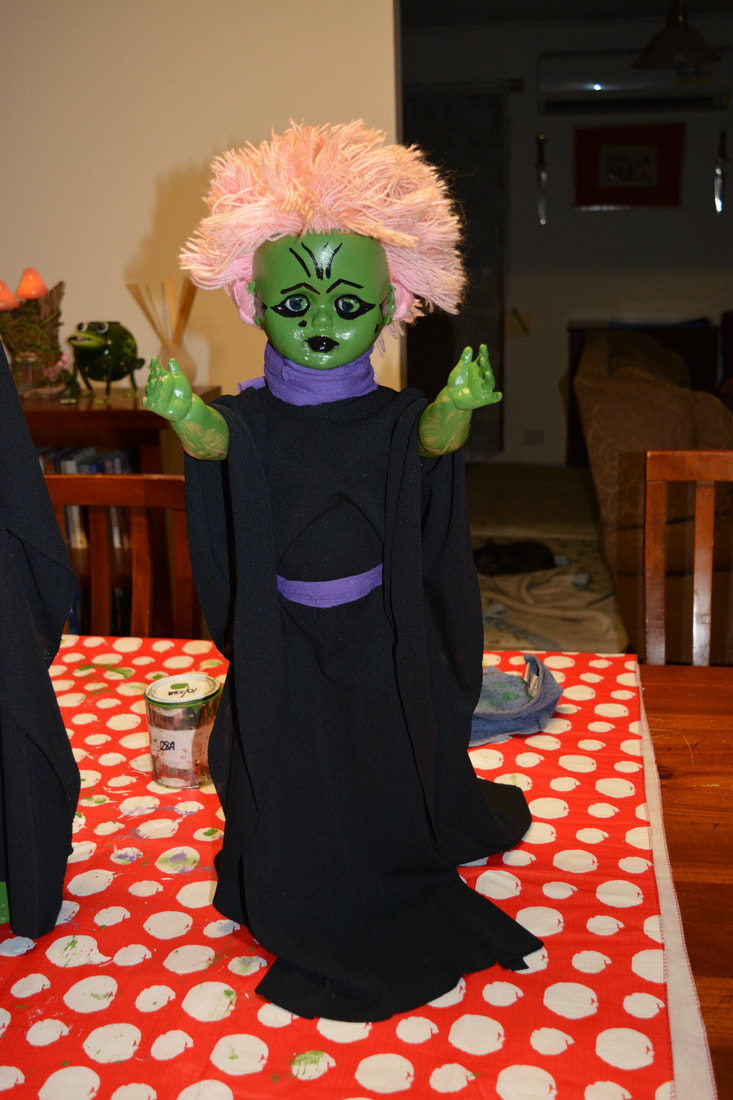
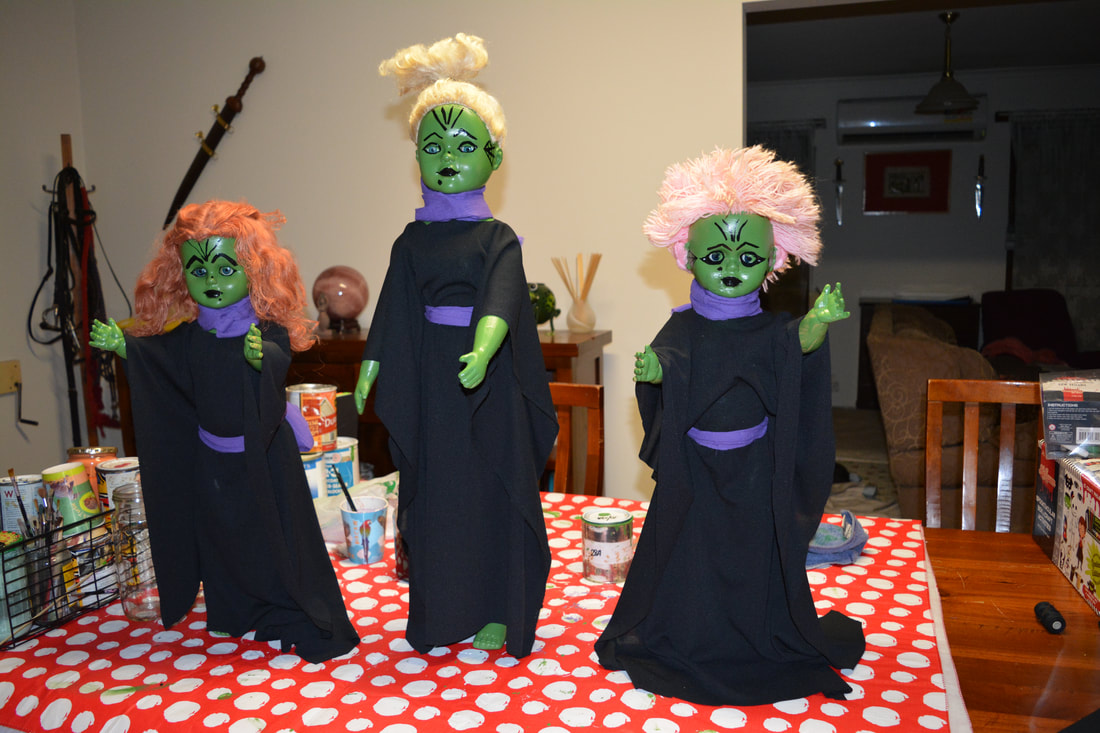
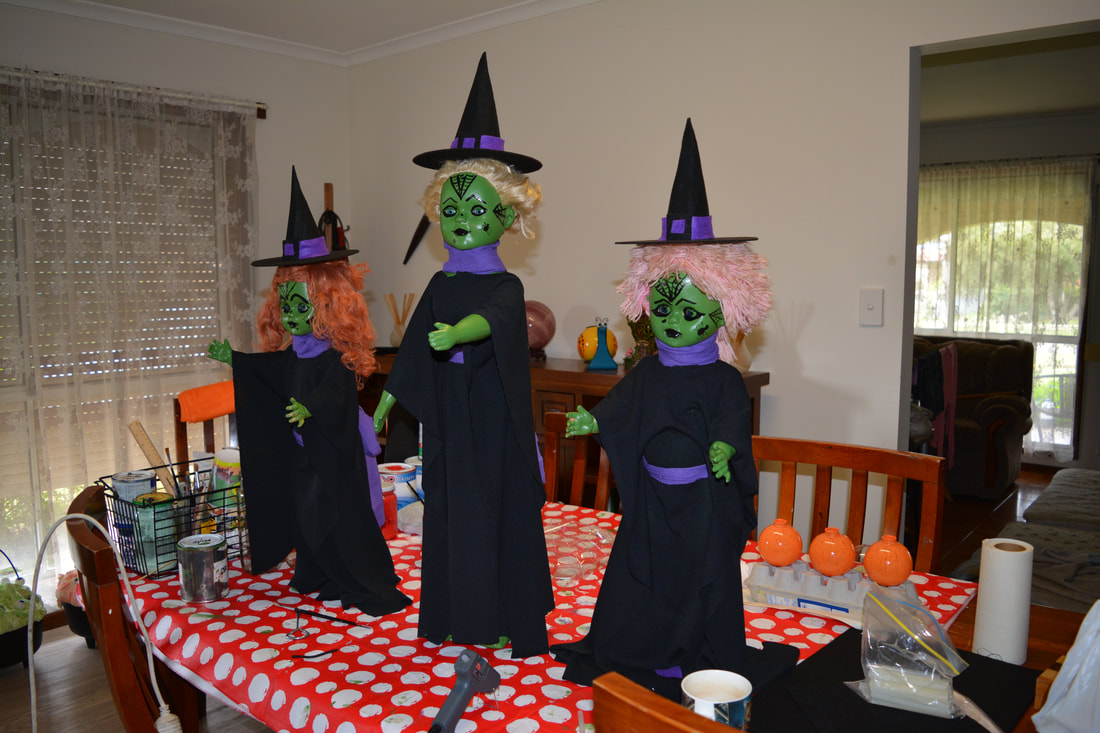
Three Witches
Materials Used
Tall Dolls - Walker dolls work best for these they are between 65cm and 80cm tall
Paint - green, black
Paint Brushes
Black A3 Stiff Felt Sheets
3 to 5cm Wide Purple or Lime Green Ribbon
Glue Gun
Black Material
Tall Dolls - Walker dolls work best for these they are between 65cm and 80cm tall
Paint - green, black
Paint Brushes
Black A3 Stiff Felt Sheets
3 to 5cm Wide Purple or Lime Green Ribbon
Glue Gun
Black Material
- Make sure the dolls are clean and dry, most of these type of dolls are in the harder plastic but again just check as the paint won't set properly on the softer plastic
- I painted these ladies with green paint around the areas that are exposed or that can been seen to make them into stereotypical type witches
- I then painted details on their faces to make it easier to see them from the footpath
- I made their hats with stiffened felt and a hot glue gun
- I then used the same material as the dresses sashes and neck bands to make the hat bands and more stiffened felt cut into a square with the middle cut out, glued on again with the hot glue gun
- The dresses are simple black pieces of material folded over with a hole cut for the head and in the sides
- I just wrapped the neck bands around them and tired they and did the same with the waist bands


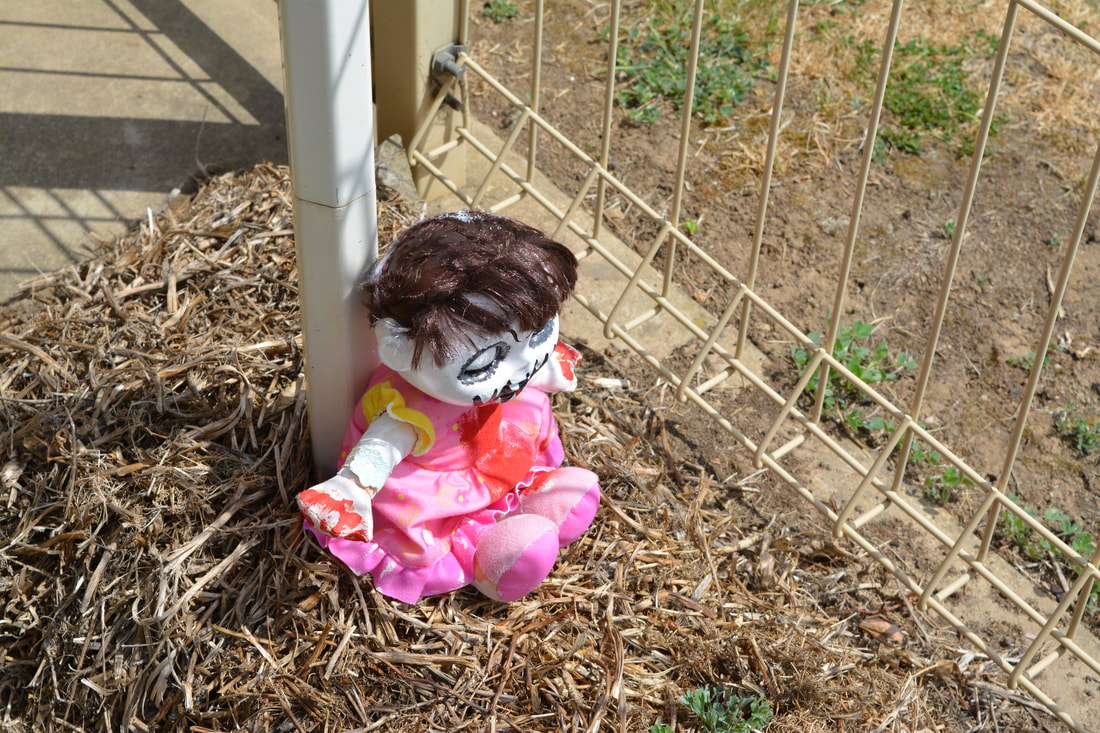
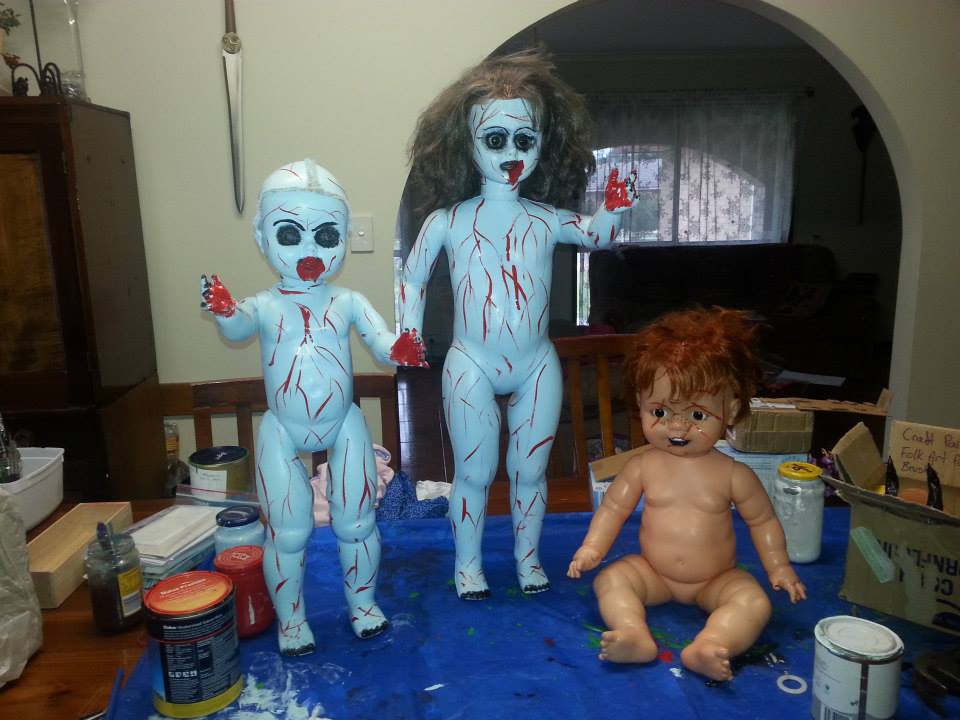
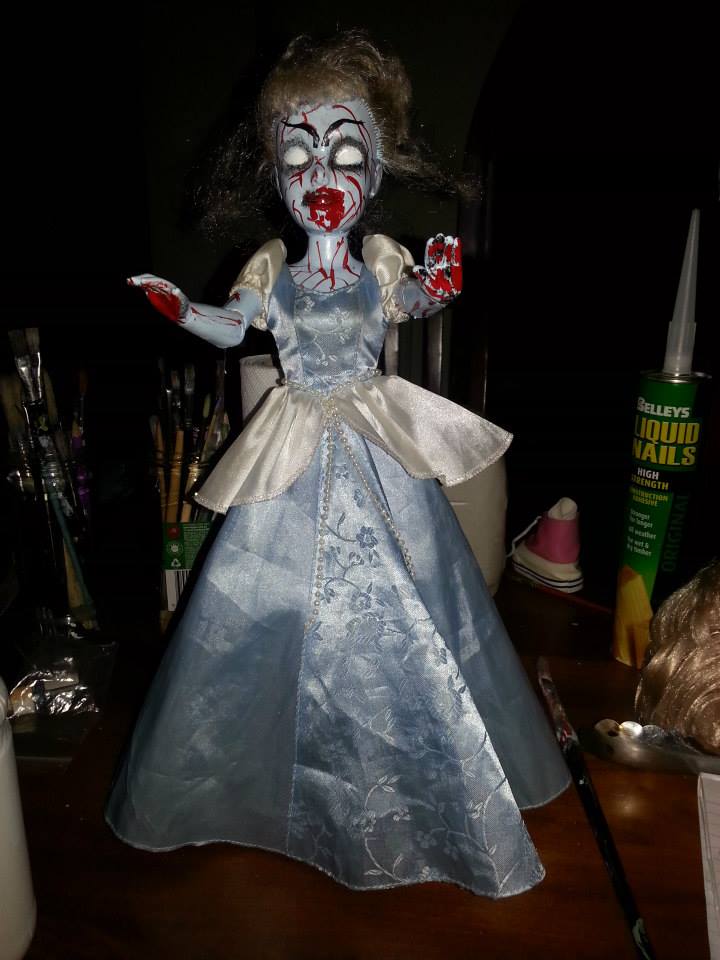
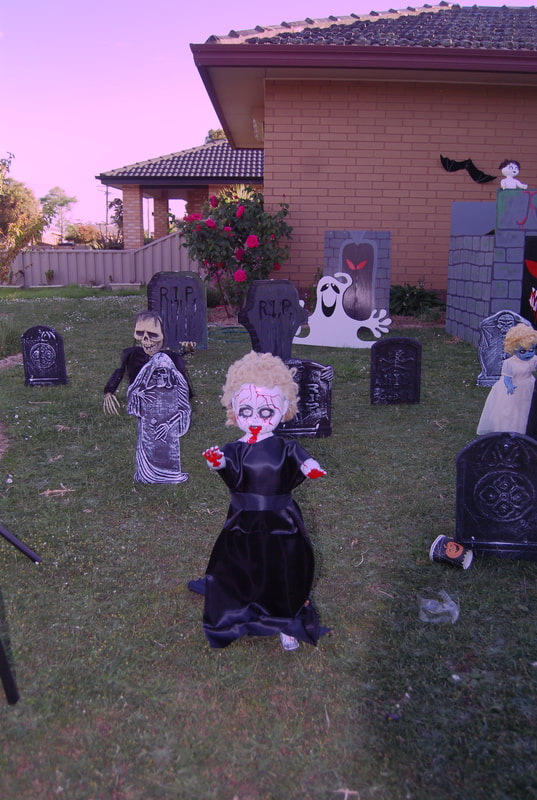
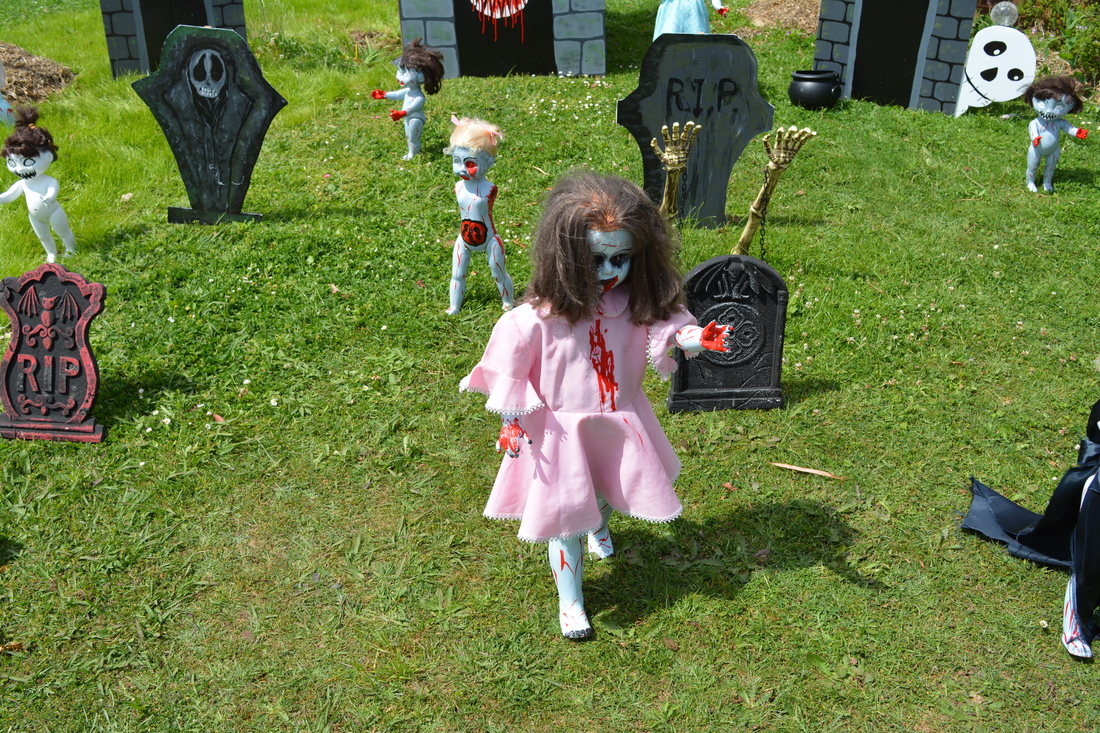
Zombie Dolls
Materials Used
Tall Dolls - Walker dolls are best for this but I have used all sorts over the years
Paint - grey, light blue, green, white, black and red
Paint Brushes
Scrape Material - use this make tattered clothes by draping material and roughly tying it around the dolls waists unless they already have clothes then use red paint to drip and smear blood type stains on them
- Make sure the dolls are clean and dry. Most of the taller dolls will be the harder plastic however check them all so the paint will stick.
- I used various paint colours to create a zombie type look on some of the dolls
- On others I (Dora Dolls) I painted them as Japanese style ghosts, or at least those ghosts where the inspiration for them
- Others I painted as green ghoul dolls, some didn't work as well as expected as the plastic wouldn't take the paint and they stayed sticky even when dry
- There are lots of different options for these, the Chrissy doll in the pictures (one with the short red hair) I painted up as a Chuck doll and put a plastic kids tea set knife in its hand


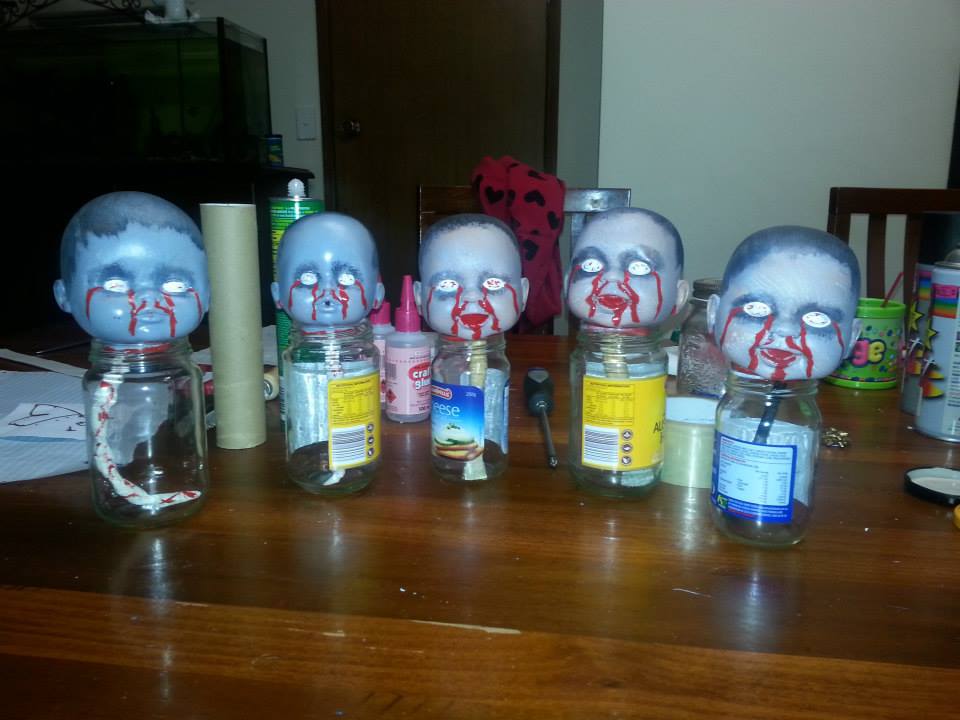
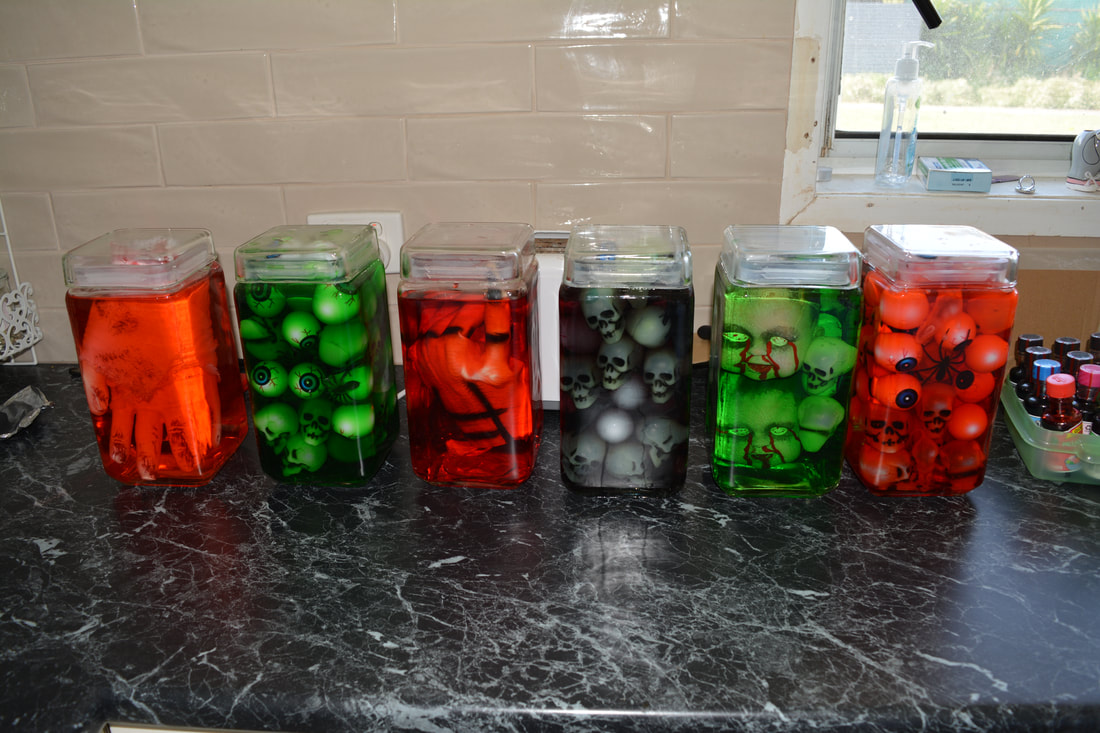
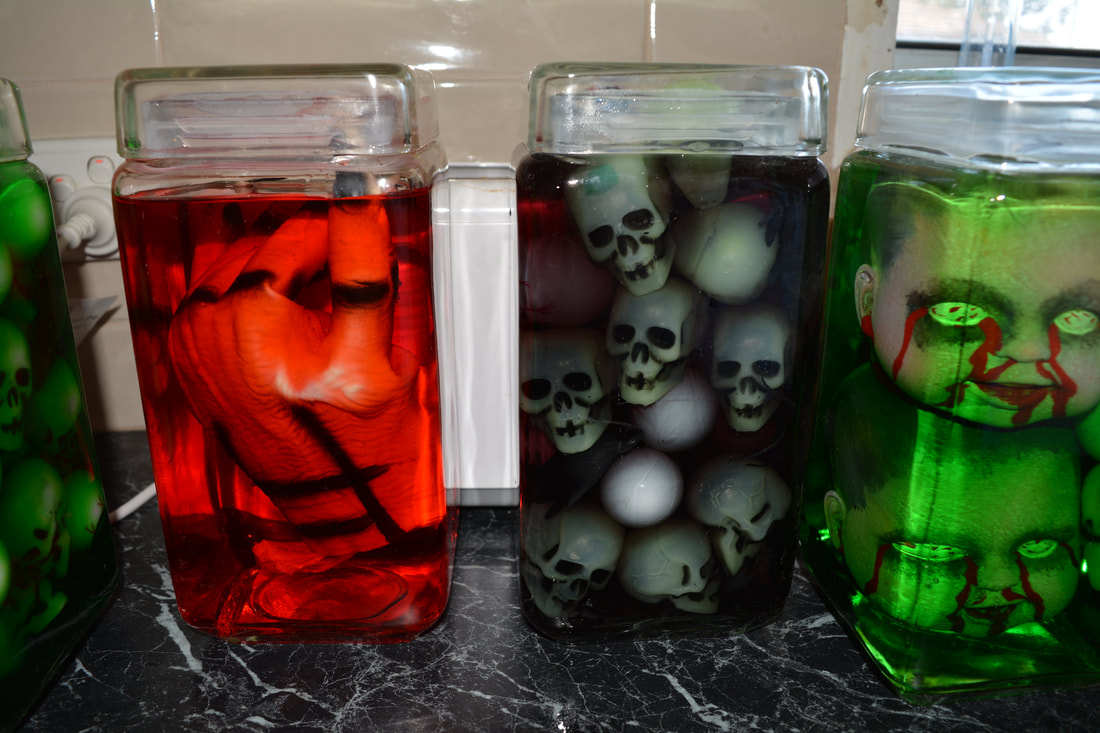
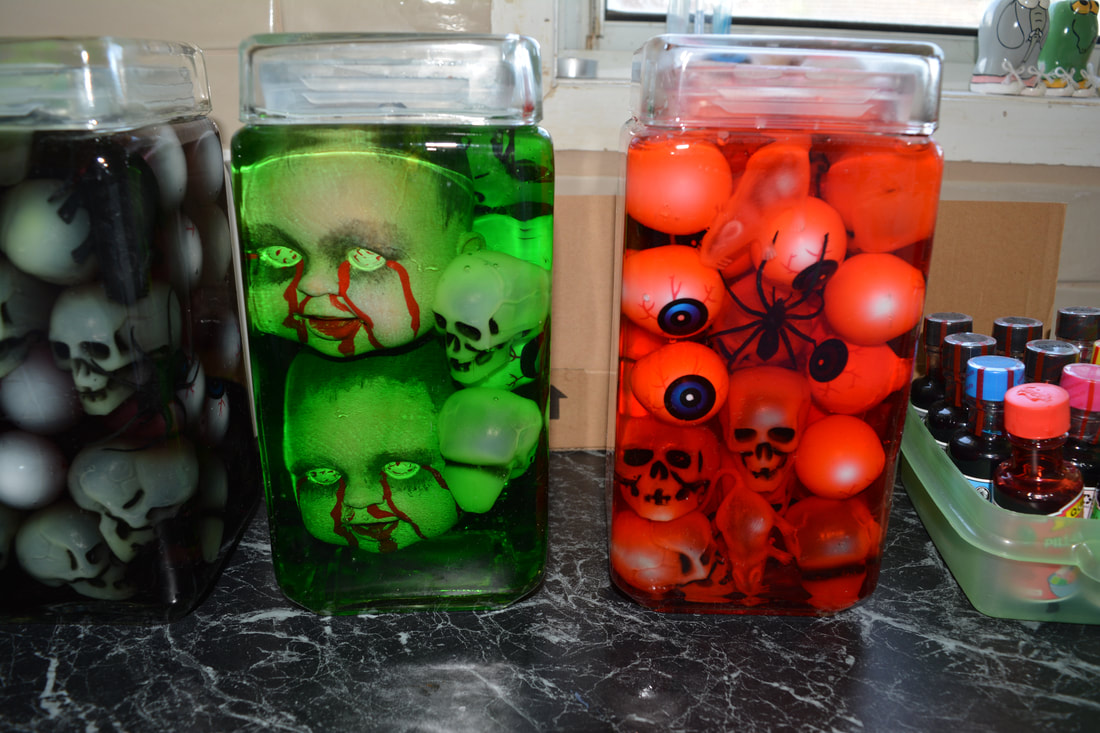
Creepy Dolls Heads
Materials Used
Dolls Heads - I used the heads from making Dollypead's body
Paint - light blue, grey, black, red and white
Paint Brushes
Dolls Heads - I used the heads from making Dollypead's body
Paint - light blue, grey, black, red and white
Paint Brushes
- These are the heads left from making the Dolly Peed that I painted as zombie heads and put in jars and on sticks around the yard