Creepy 3D Eyeballs
Materials Used:
Method:
- Paper strips
- Paper mache paste (recipe in paper mache pumpkins)
- Cotton wool (unwrapped/fibres separated)
- Paint - white, red, brown, yellow, blue (or any other colour you would like)
- Cardboard
- Red wool
- Colour picture of iris (google images)
- High gloss clear sealer
- Basket ball or balloon
- Plastic bag or plastic wrap
- Bucket or mixing bowl (the size is up to what size you want your eyeballs to be)
- PVA/White glue
- Hot Glue
- Photo print out of an iris
- 1 or 2 eyelets (small with screw stem)
- Liquid nails
Method:
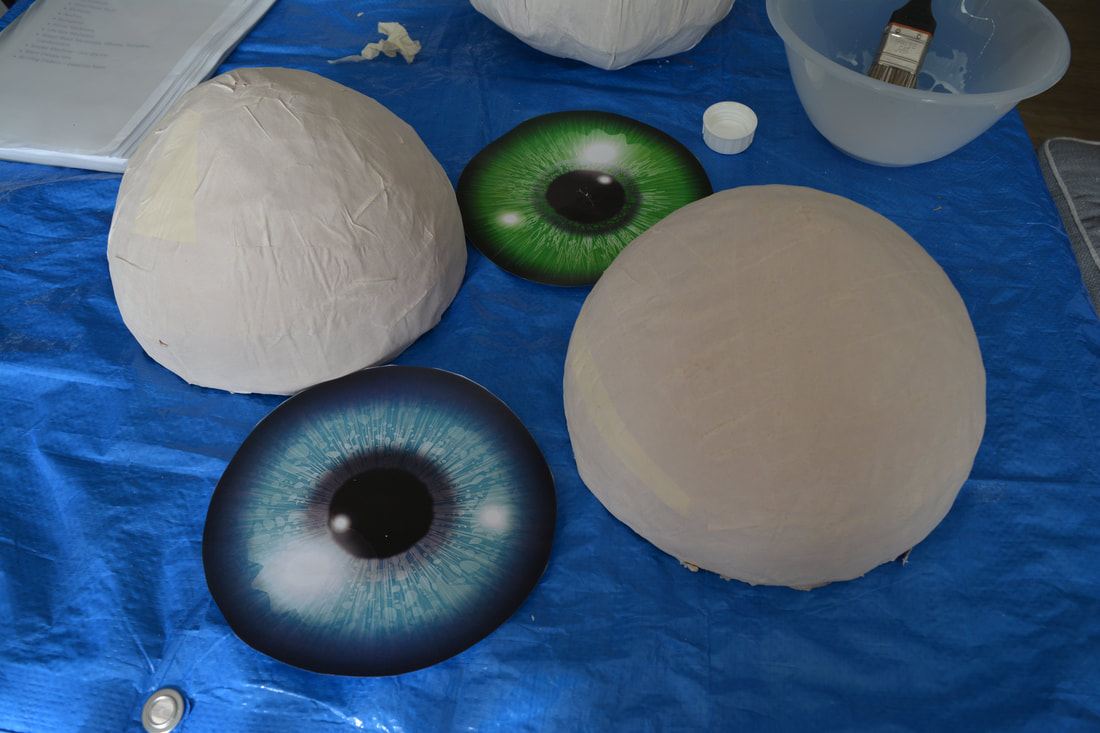
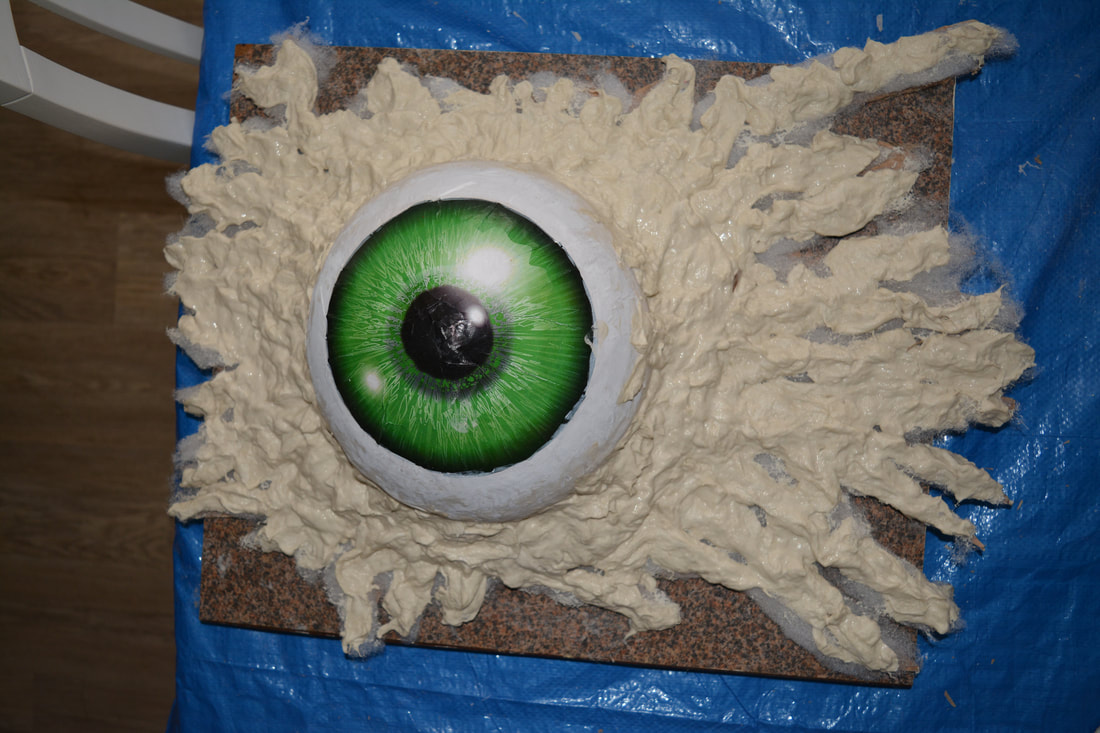
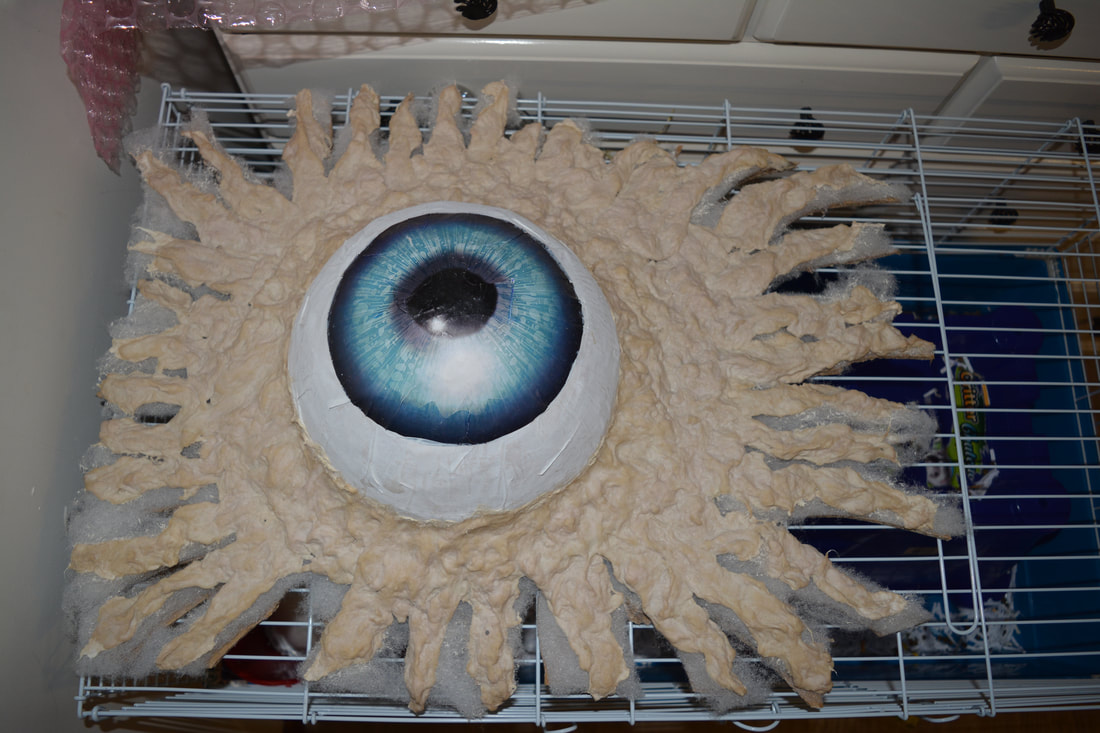
- We first wrapped the outside of the bowl in plastic wrap then began building up layers over it while upside down. We put on 6 layers of paper using the strips and papermache paste.
- While that dried we printed out a colour picture of an iris sized to suit the size of the domes we created.
- We then cut them out and split them from the edge toward the middle so they cross over without looking too out of place but fit over the top of the dome.
- We only cut one slit and later realized we should have cut three at least.
- They still turned out in the end looking wonderfully gruesome but up close they could look better around the iris.
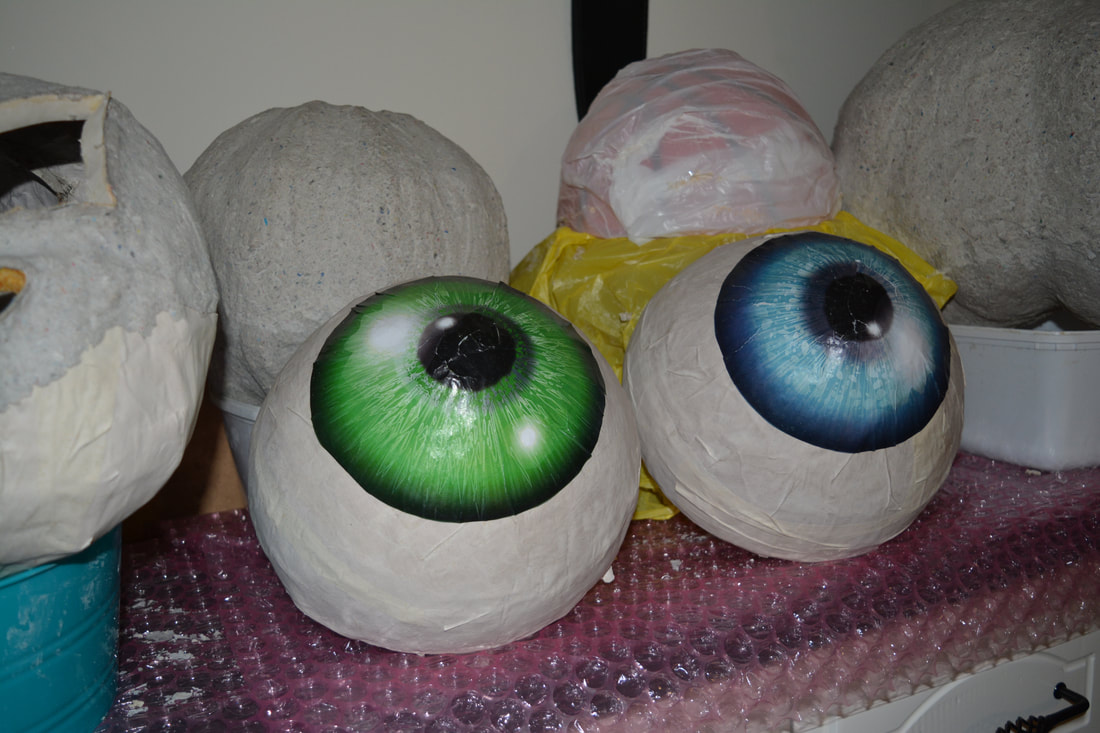
- When the dome was dry we glued the iris on with PVA/White glue.
- The base was made by hot gluing the dome to cardboard.
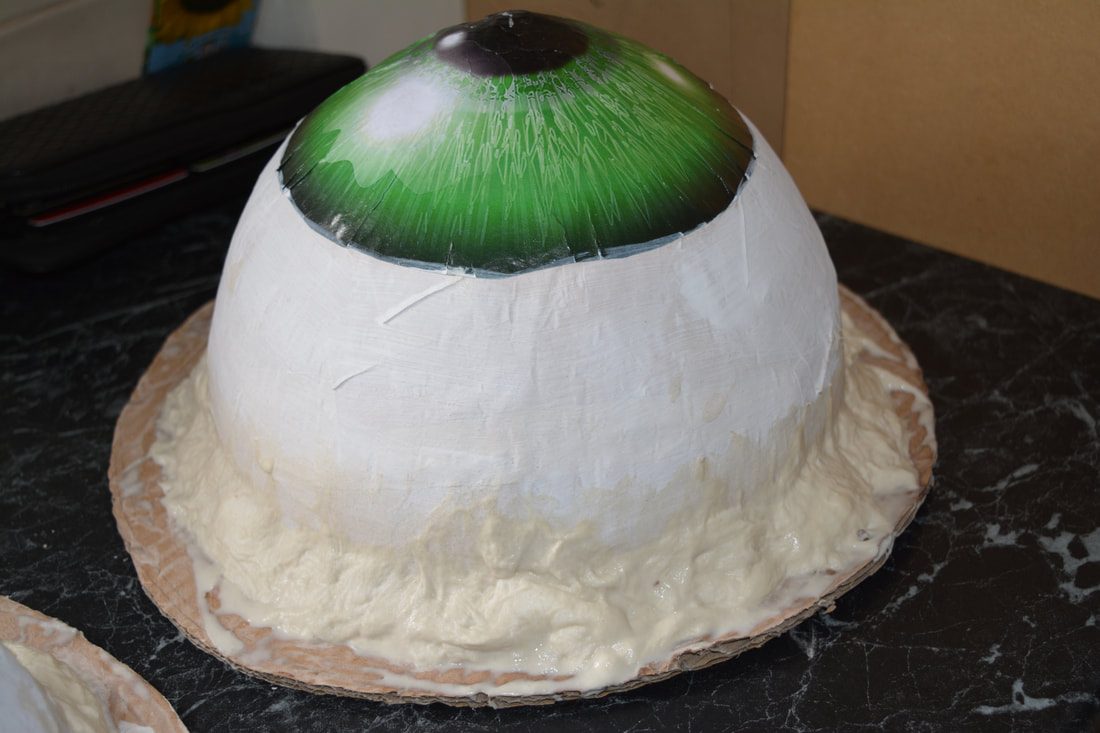
- After we finished them we realized we should have papermached over the cardboard first with at least 3 layers, this would have made it easier to waterproof the entire thing.
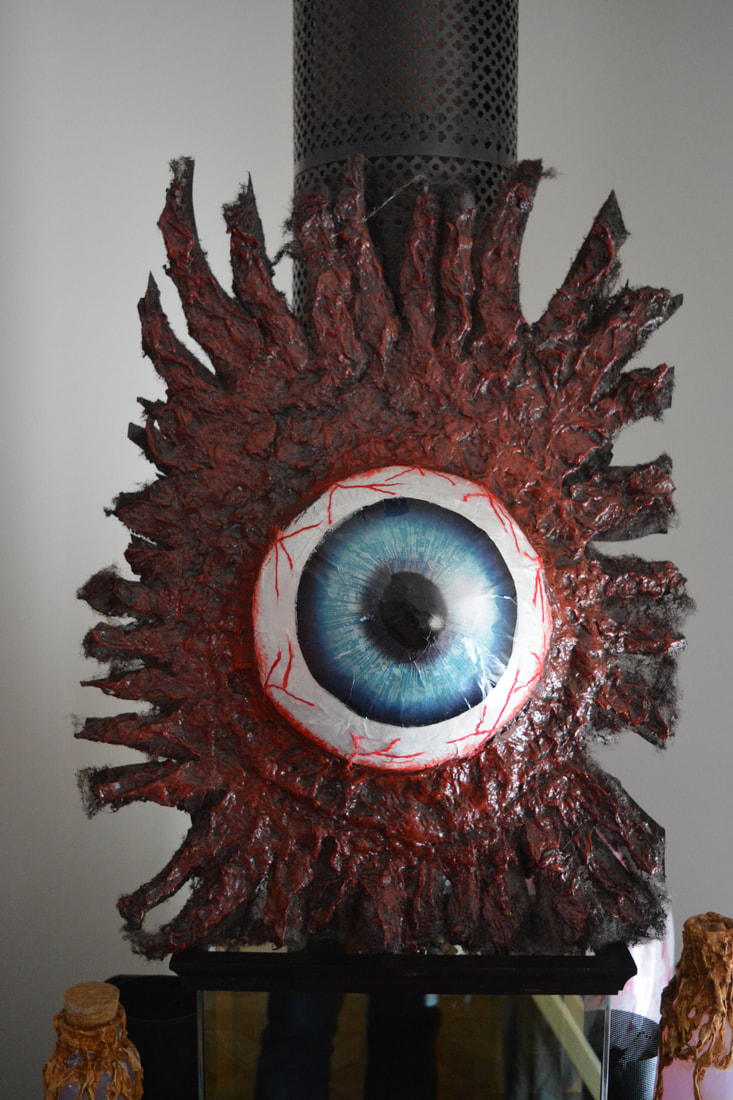
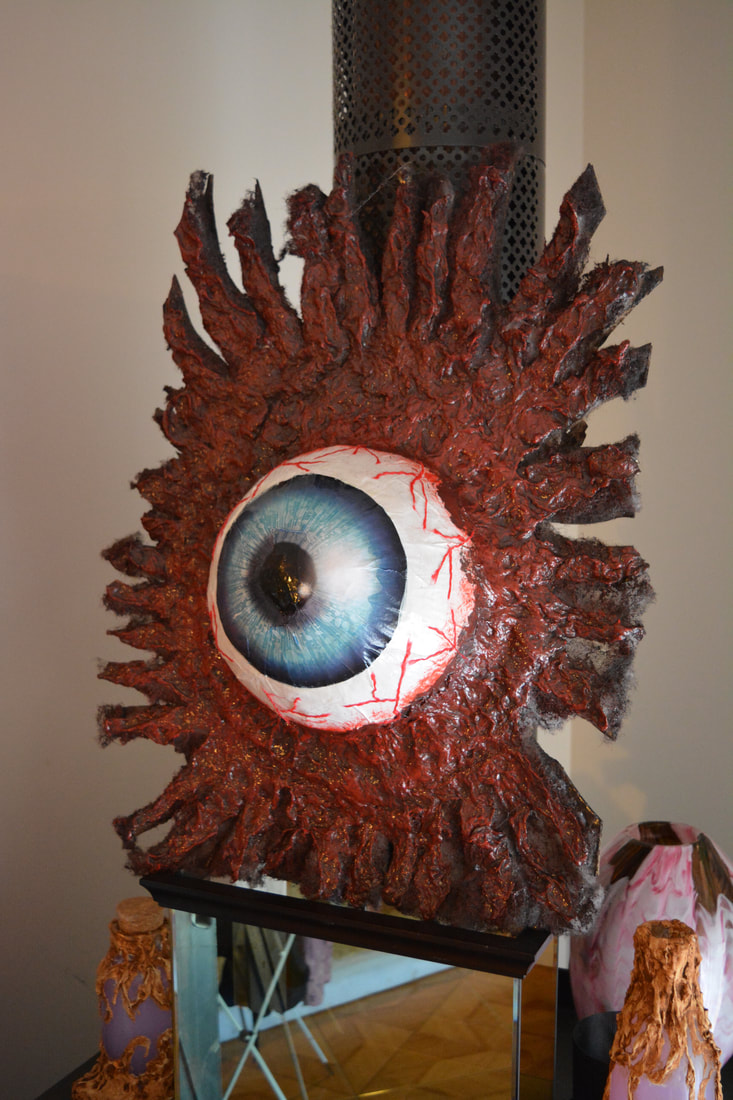
- We also glued them onto round pieces of cardboard initially then realized to get the desired gooey eye flesh effect we needed to put them onto a larger piece cut to look like fleshy strips around the edges.
- Another thing we realized to achieve this was to hot glue polyester blanket wading between the cardboard and the cotton wool papermache paste mix.
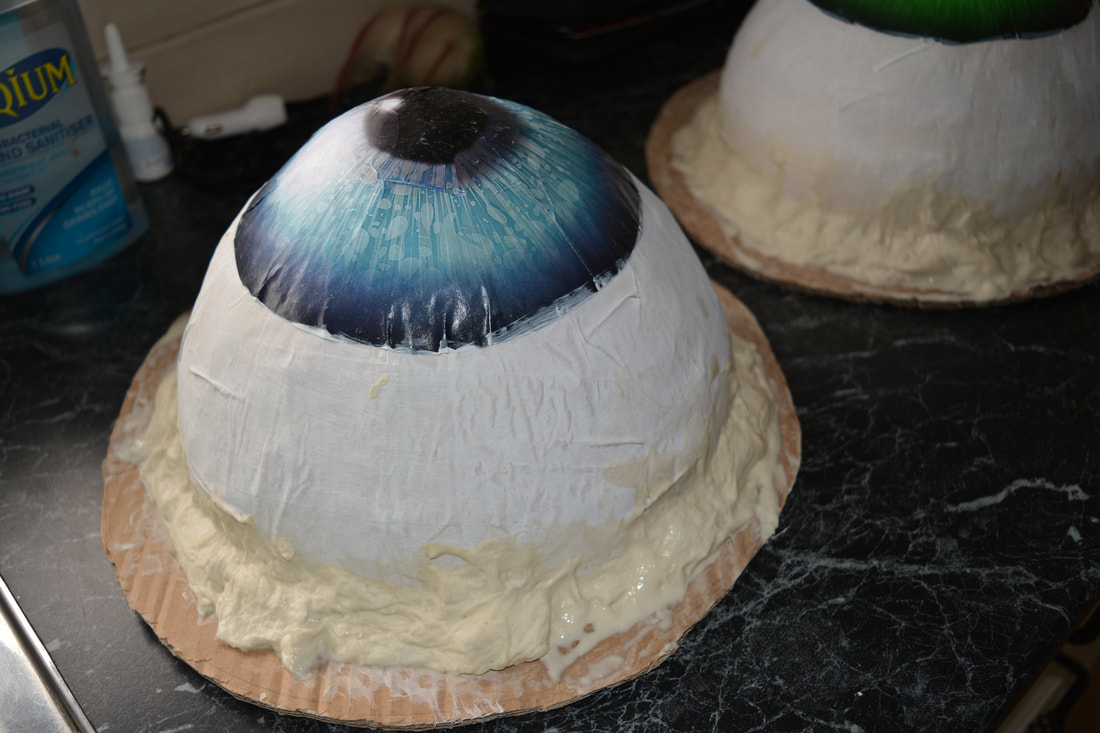
- After all this glued together, we began to slip/slop/slap the pulled apart cotton wool soaked in papermache paste all round the dome and part the way up it.
- They where then left to dry for a couple of weeks.
- The cotton wool mix does take a while to dry out properly.
- We made all these in winter here which also slowed down the drying process.
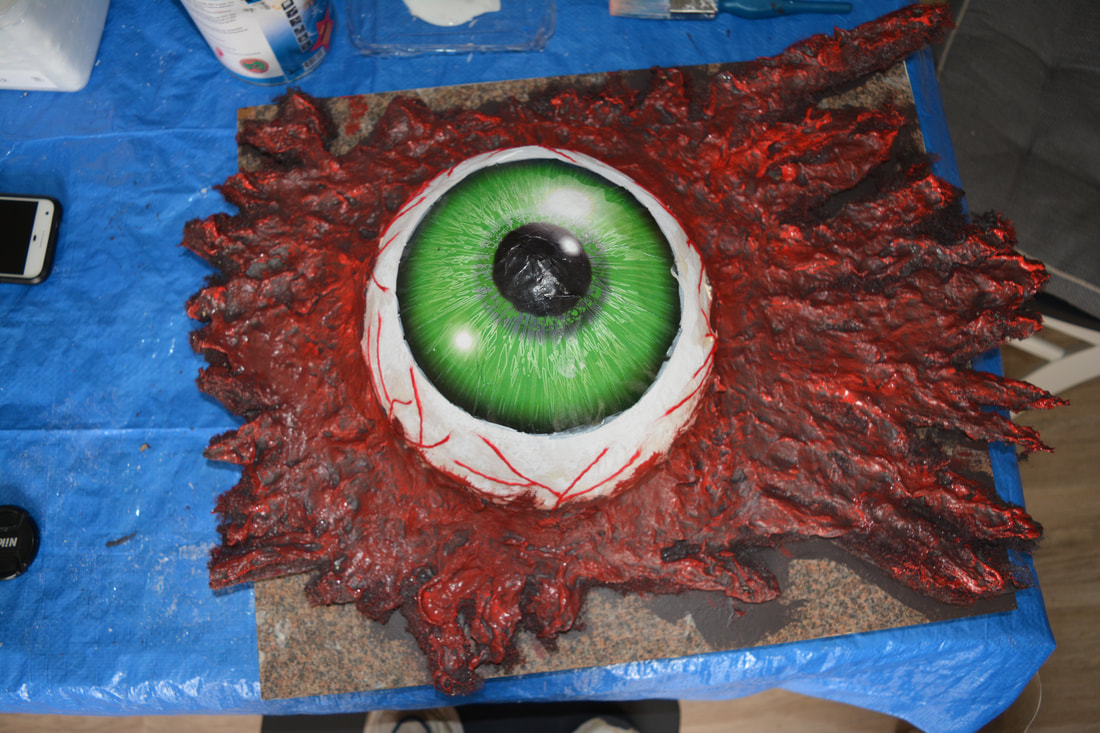
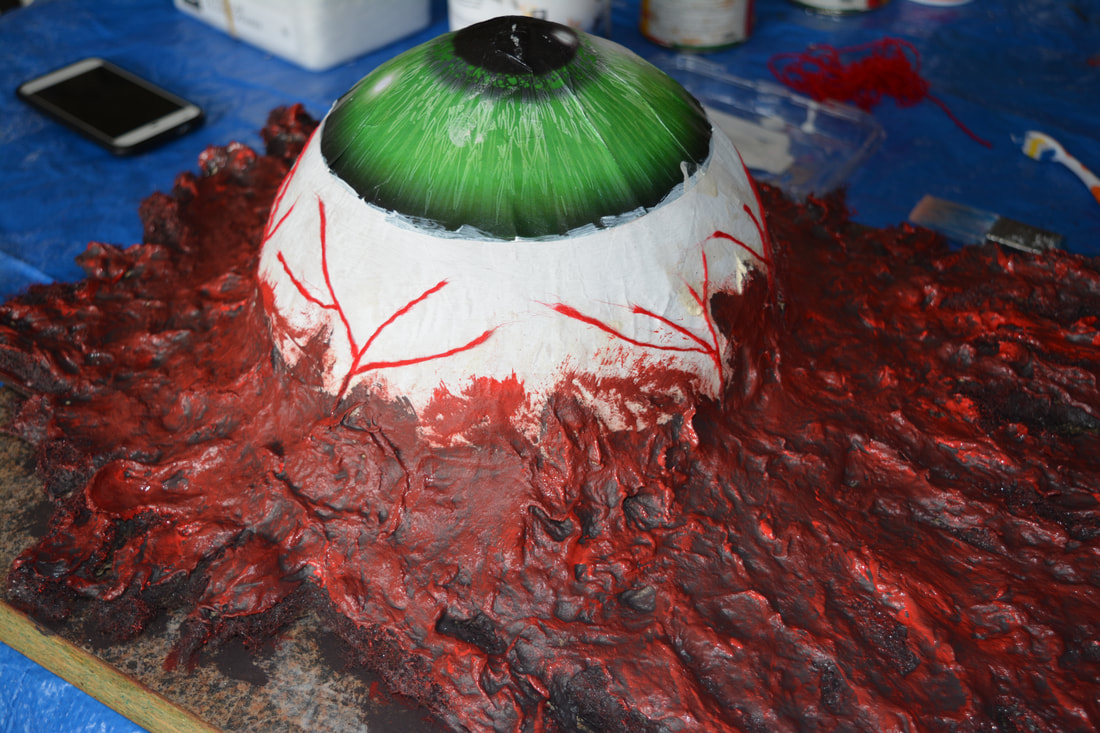
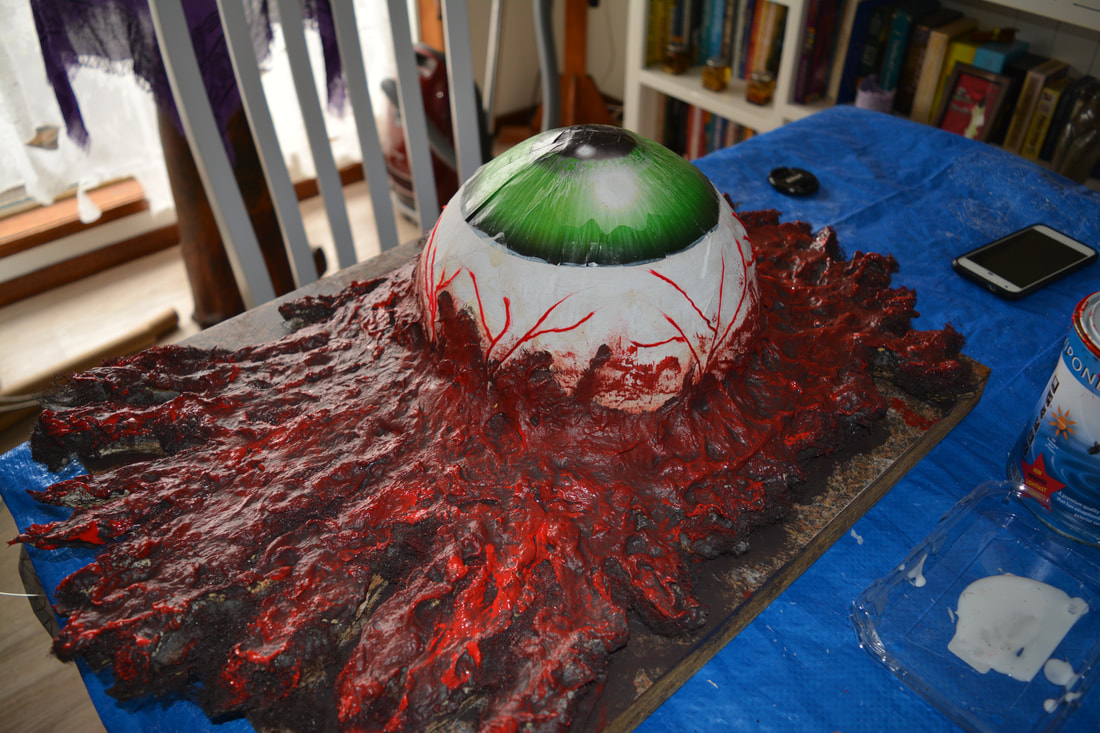
- Once try we pulled apart red wool into small pieces and then using pva/white glue stuck them to the sides to form the vein look.
- The next stage was to undercoat the base colour on the gooey surround, we used brown.
- When this is dry, use red to dry brush the top colour coat.
- On the back we used black gloss exterior paint to seal the back of the cardboard but as we didn't papermache strip the base the corrugations where open to the weather.
- To seal them we used hot glue, which is really annoying and time consuming so next time we will papermache the base first.
- Once this was all done we glued a thin strip of dowel wood to the back to make it easier to put eyelets in to hang it using liquid nails.